We’re slowly preparing for Baby #2 here at the Shove household. I’m working on getting the nursery pulled together, making a short list of newborn things we’ll need, and brushing up on my Baby Wise. This pregnancy is flying by, and with only 10 weeks left to prepare to become a family of four (!), I’m ready to kick it into high gear. :)
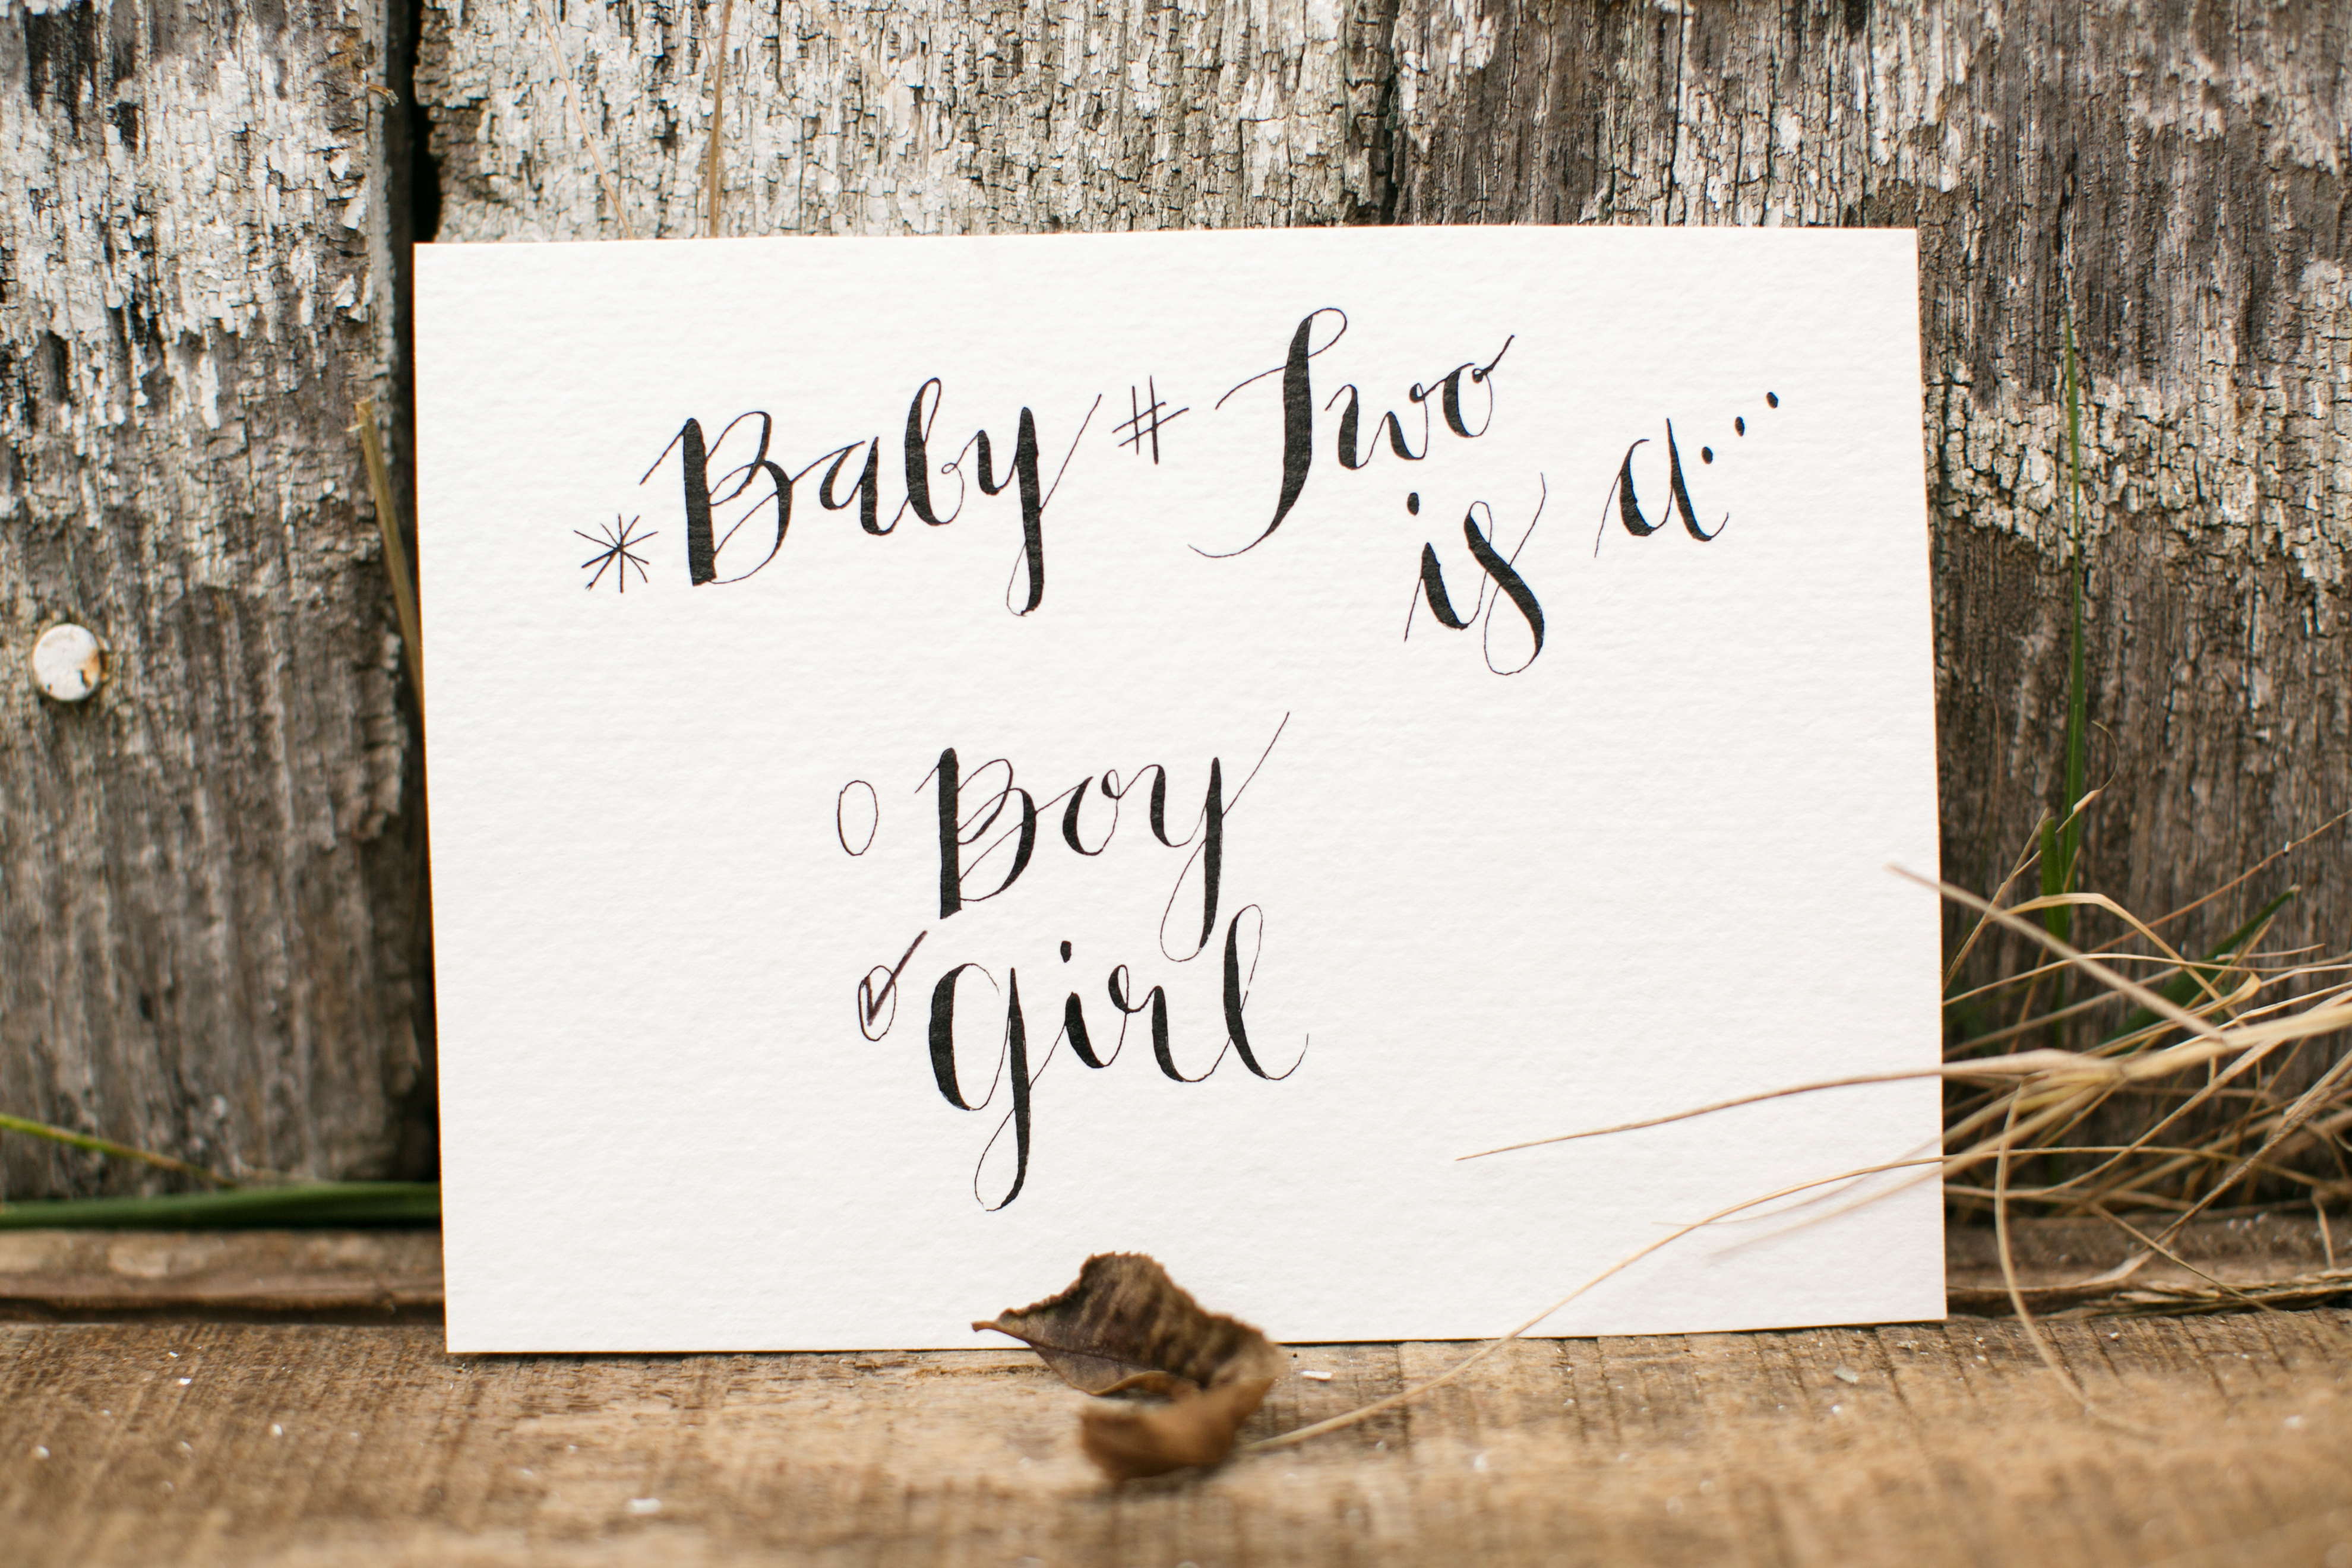
When we found out we were having a second girl in November, we were all in the throws of a terrible stomach bug, traveling to NYC and getting ready for the holidays. Now that life is beginning to get back to normal, I feel like I’m finally beginning to process that we’re having another girl!
Before that pink confetti dropped and told us a little lady was on the way, I struggled a lot with whether I wanted a boy or a girl. (Because clearly I had a say in the matter. :) ) After wrestling with my emotions for a while, I came to this conclusion: I wanted Baby #2 to be a boy for Ryan’s sake and a girl for my sake. To be honest, I’ve always said that as long as I didn’t have all boys, I’d be happy. (Nothing against boys; I just could never seem to imagine myself without a daughter. Every time I envisioned what an all-boy life looked like, I’d see myself inserted into scenes from “Overboard.”) When we found out that E.V. was a girl, I was ecstatic and relieved; it put took off all of the pressure on future pregnancies because I had my desire for a little girl fulfilled. I also always said that I’d love to be a mom to all girls, perhaps even more than I wanted be a mom to boys and girls. I’m not obsessed with sports; I enjoy shopping; my creative activities always seem to revolve around art or other girly things. Thus, when we got pregnant with Baby #2, I secretly hoped for a girl…and then felt guilty because I wanted Ryan to have the experience of having a son.
I know that Ryan is fully equipped to wrangle a gaggle of girls, perhaps more than any other guy I know. Emma Vance loves him like a little girl should love her daddy, and I can already envision how full his heart is going to be once he has two tiny ladies vying for his affection and approval. I’m still a little sad for the part of him that might miss out on coaching, on passing down guy knowledge and on handing his son his first beer, but that sadness is greatly overshadowed by the excitement I have when I picture him in tears walking each of our daughters down the aisle one day. :)
Okay, enough on the whole double-girl thing. Back to the Gender Reveal…
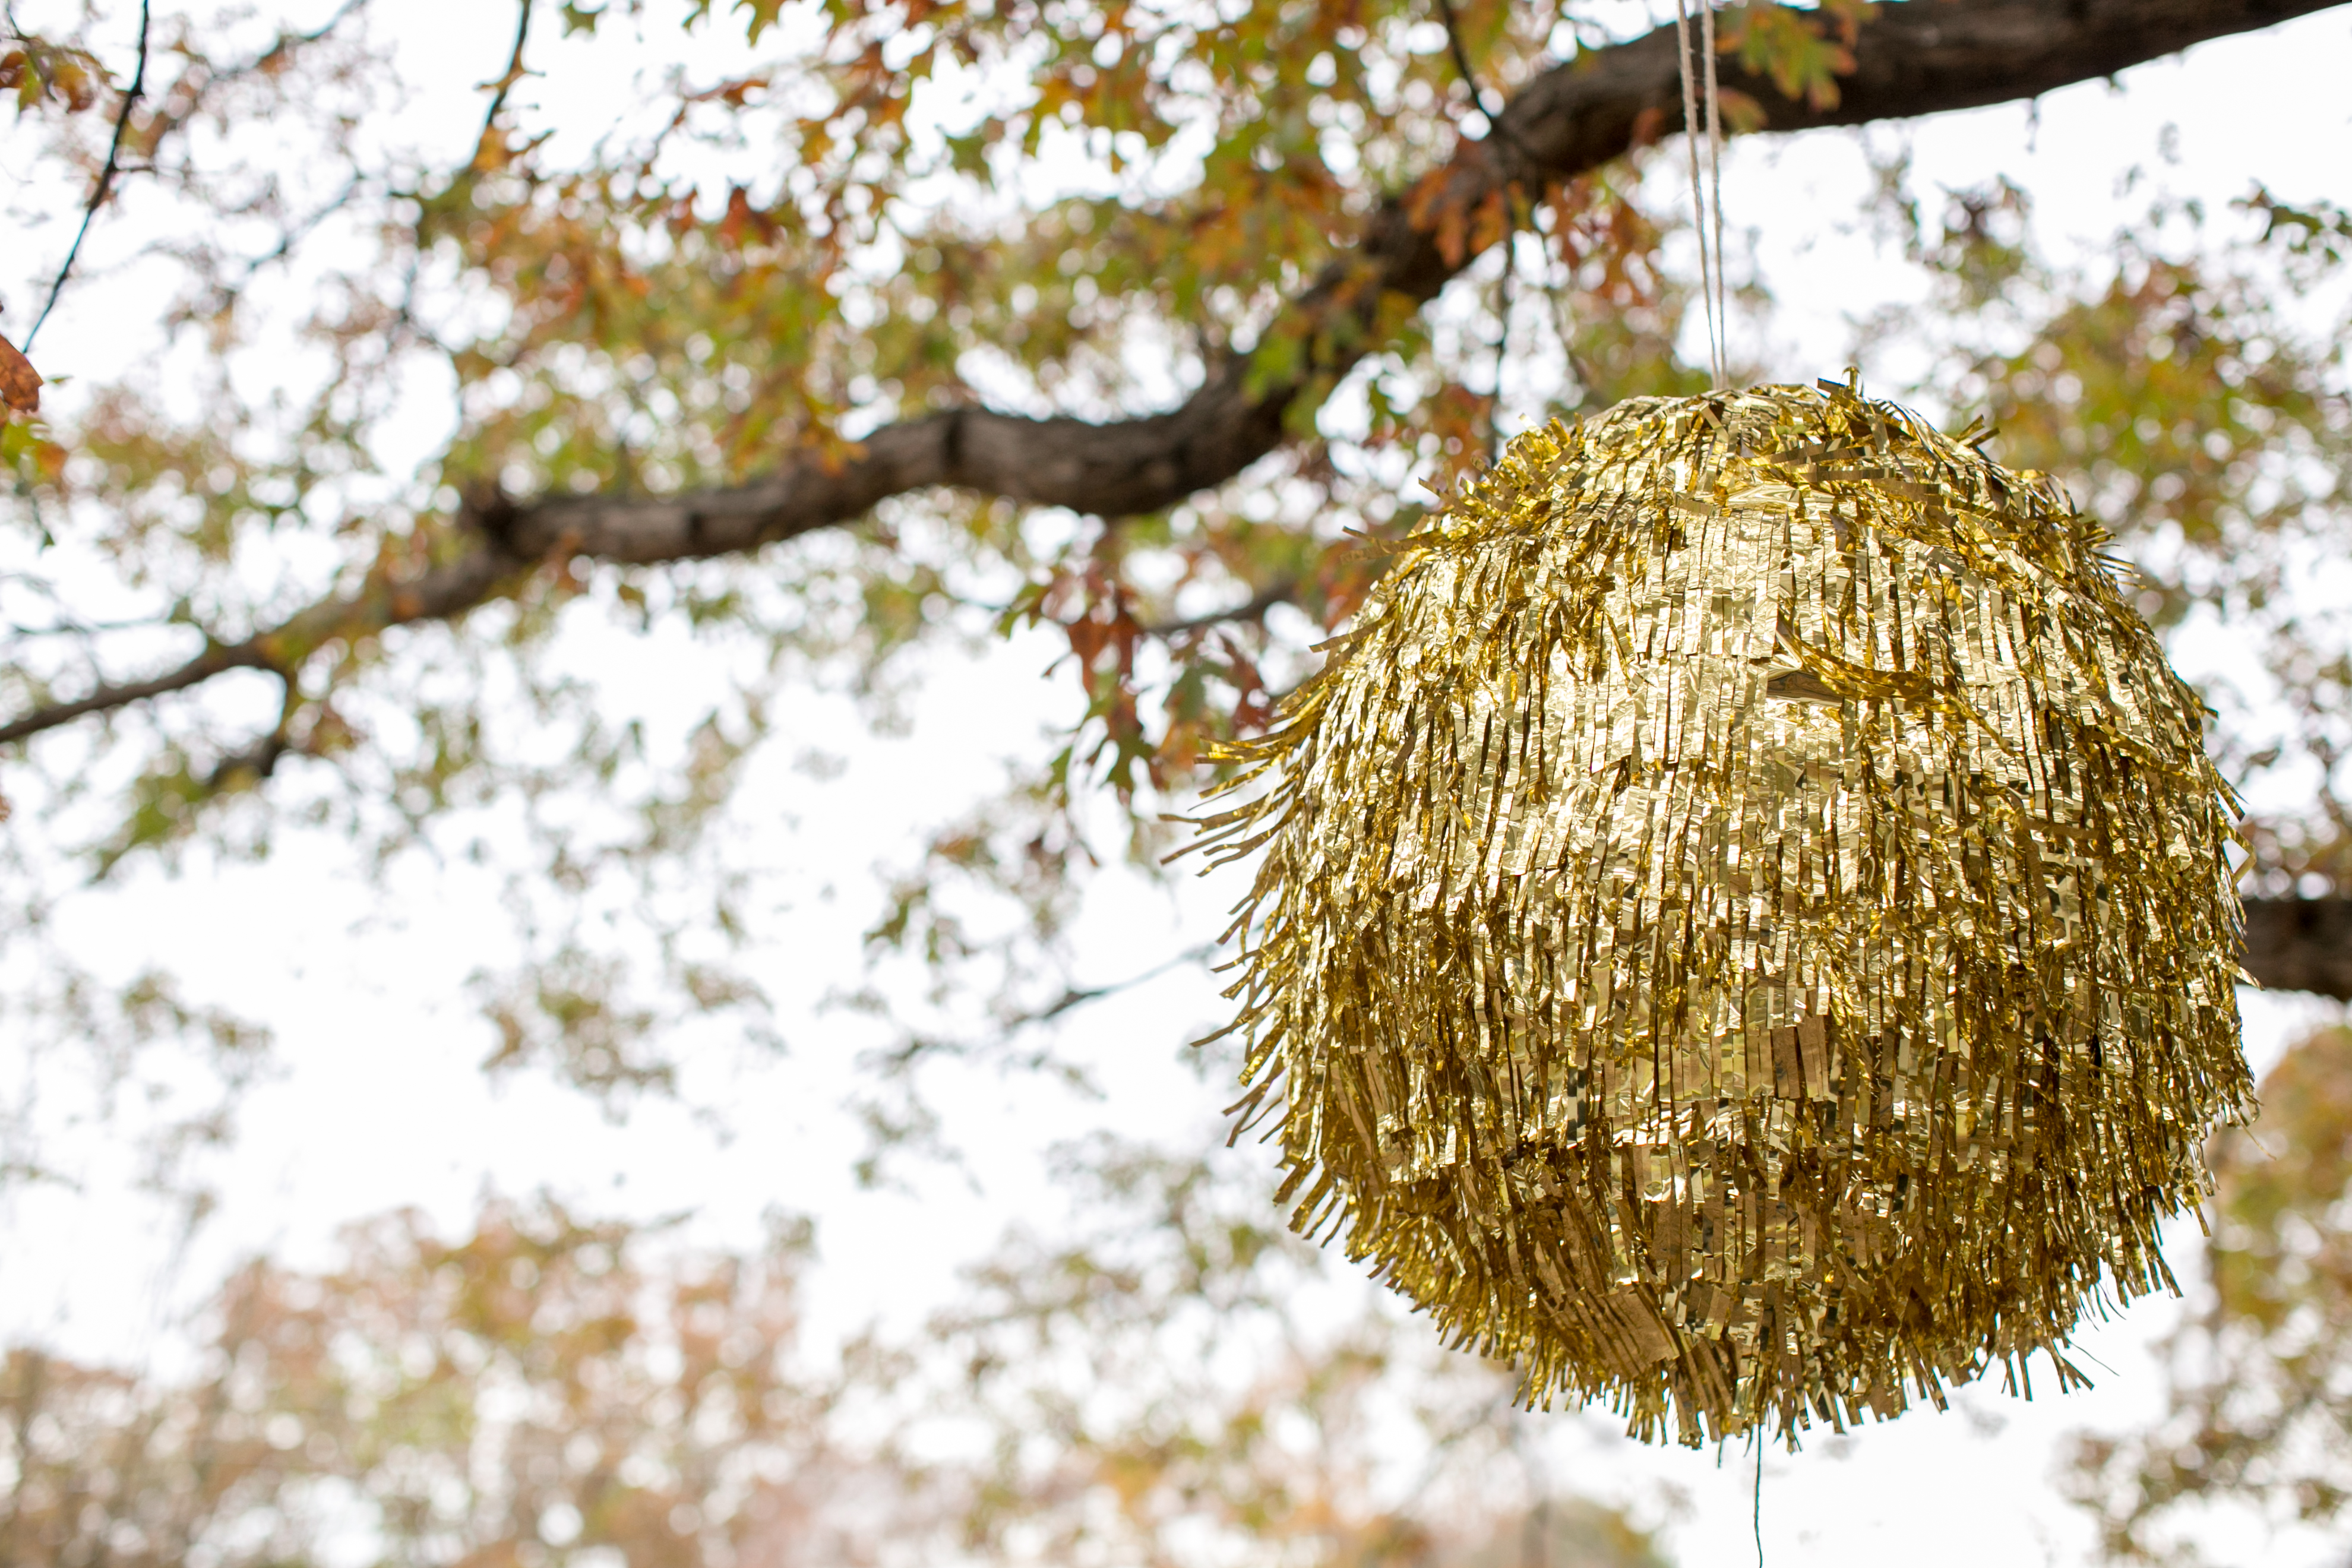
Since we announced E.V.’s little sister in November, I’ve gotten a lot of questions about the pull-string pinata that I made for our Gender Reveal. It was super easy to make, so I thought I’d share in hopes to inspire a few of you out there. A ton of artists and crafters have done these pull-string pinatas before, but for me, I really wanted a BIG, SHINY one, which I hadn’t seen anywhere. When I get a vision in my mind, I can never seem to shake it until it’s realized, and in this case I think my oversized pinata made a lasting impression in the pictures…


When I say that this project was “super easy,” I mean it. Seriously, even the least crafty of you out there can do it!
As you read along to see how I made mine, please know that I didn’t really intend on doing a “How To” blog on this craft until Ryan suggested it as I was about to cut my first mylar fringe, so I don’t claim these to be the best pictures in the world. But you’ll get the idea. ;)
HOW TO: GIANT PULL-STRING PINATA
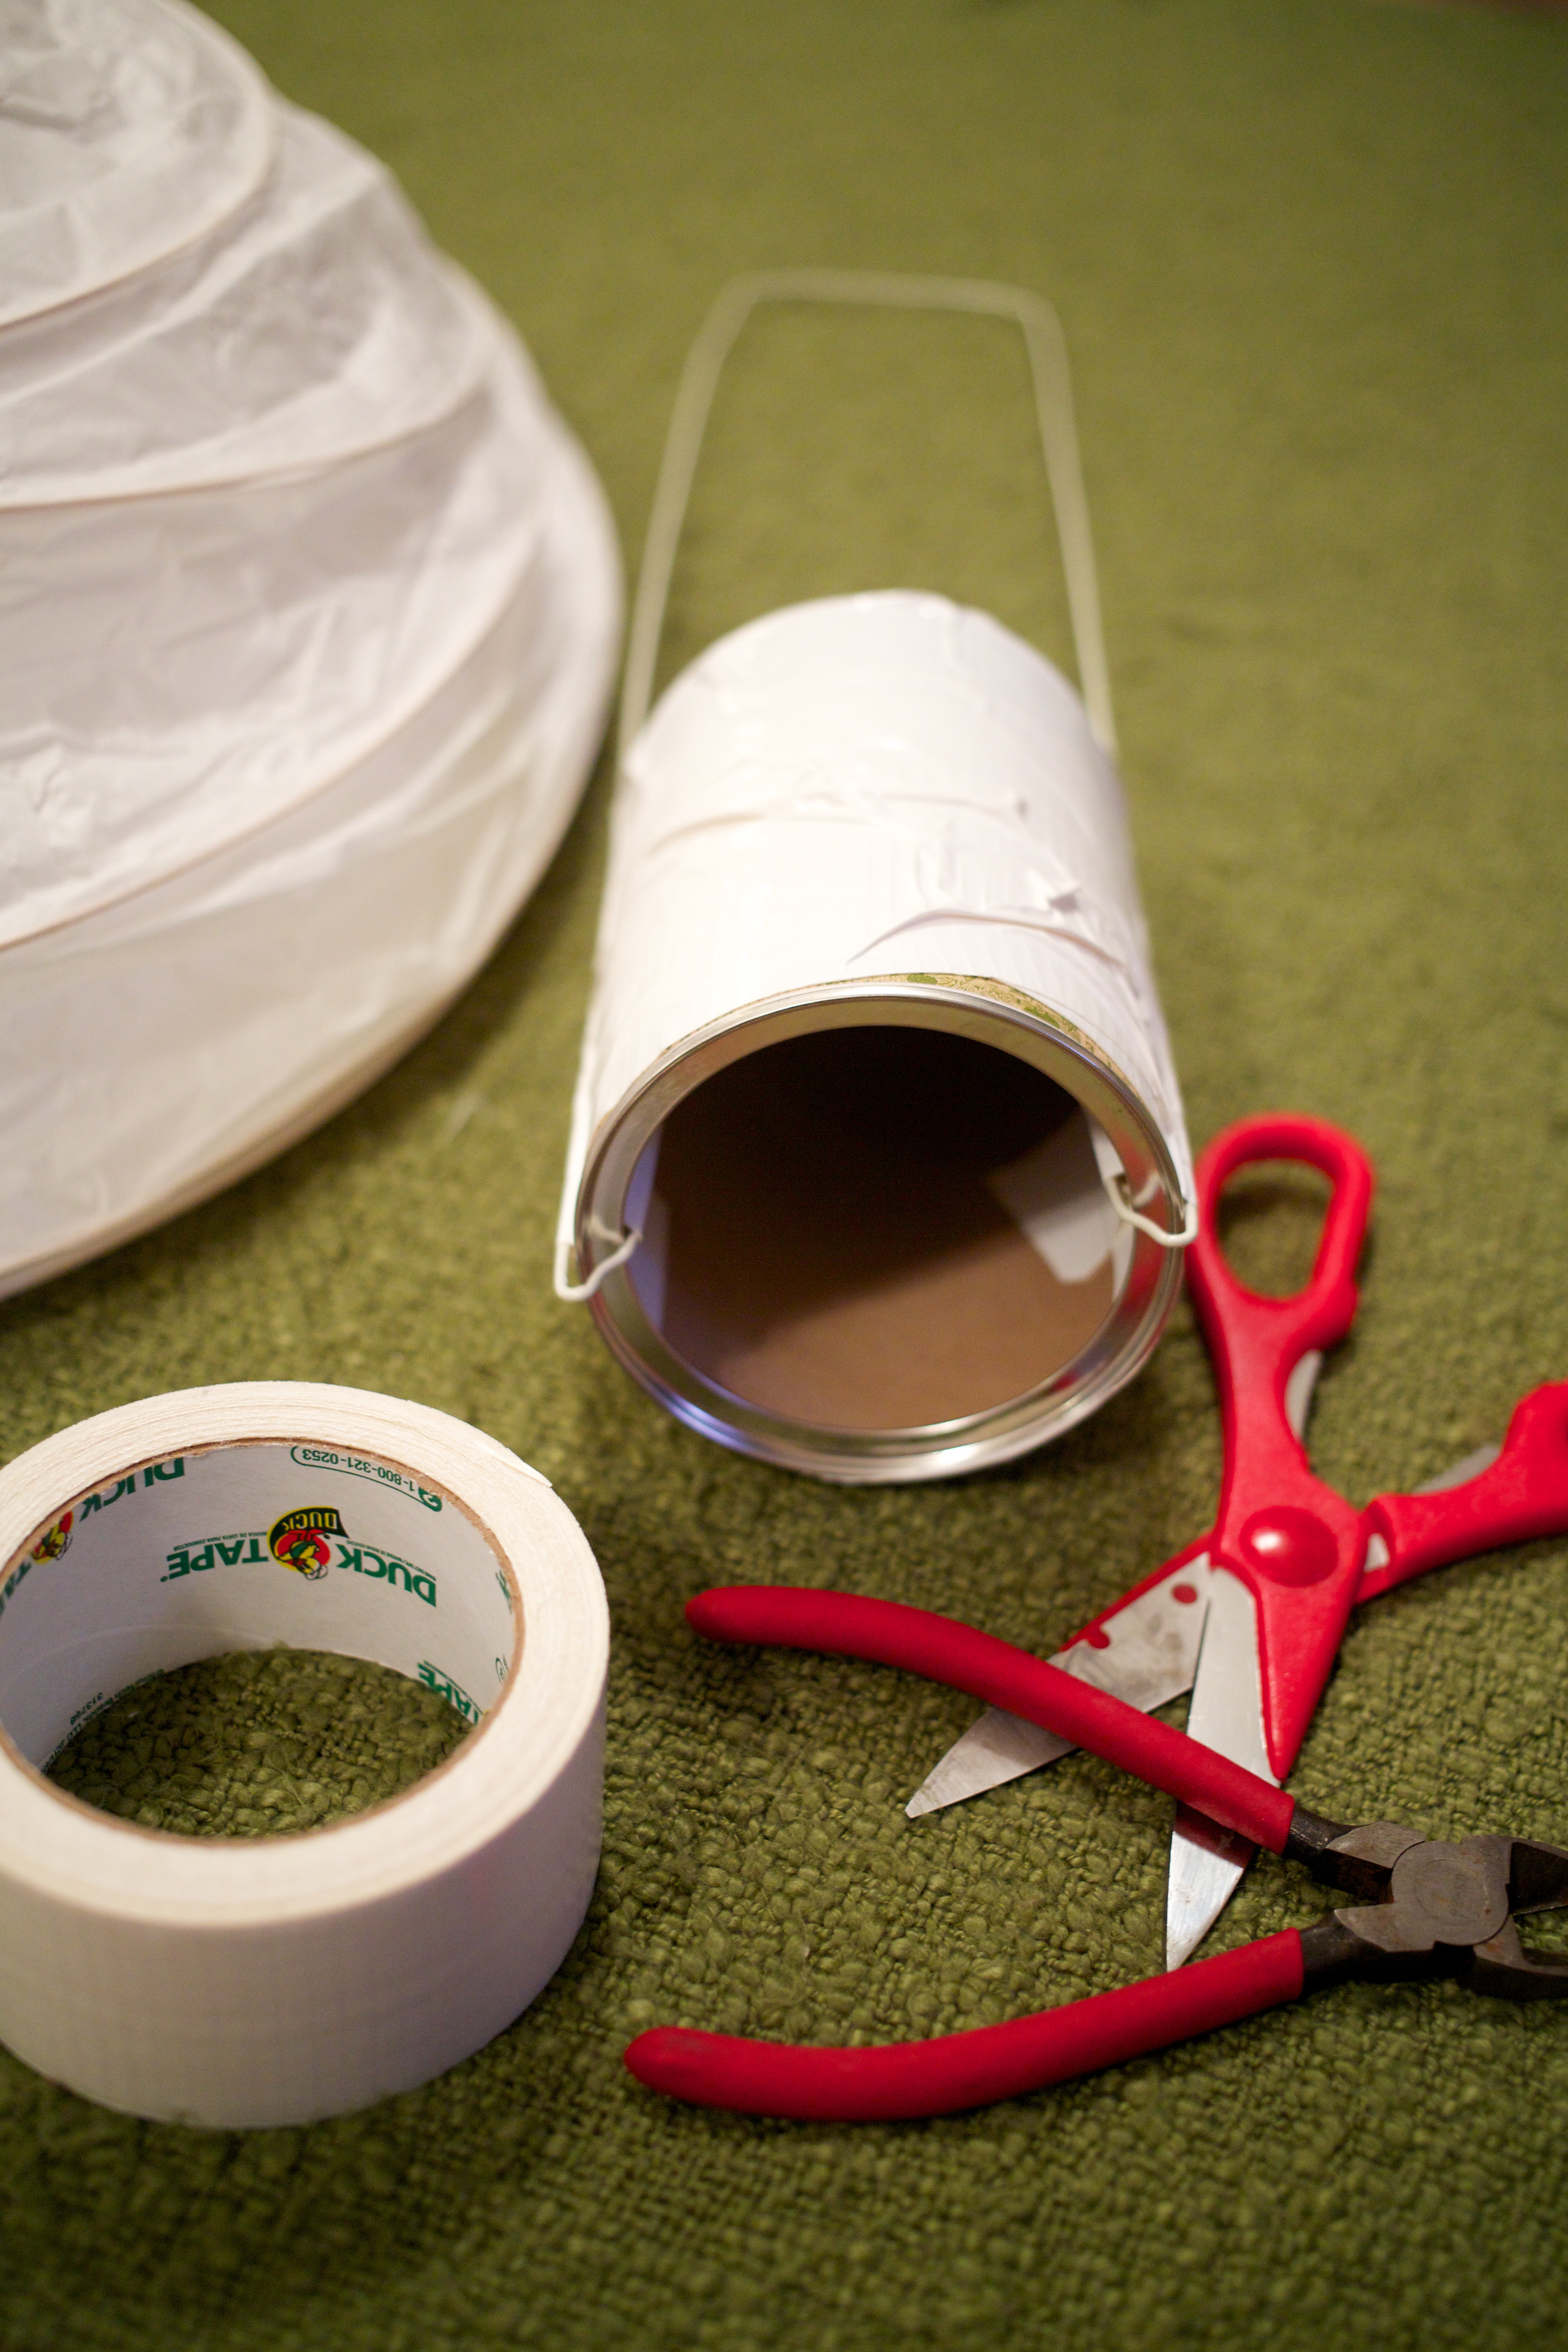
What you’ll need…
- Large IKEA Paper Lantern (Buy the lantern as big as you want the pinata to be; I chose the biggest I could find.)
- Mylar Fringe (I got mine from Party City. It was actually loooong door fringe that I then cut down because they didn’t have short fringe in gold.)
- Empy Oatmeal Can
- Nail, Screw or Washer
- Wire Hanger
- Wire Cutters
- Hot Glue Gun and Sticks
- Scissors
- Tape
- Confetti (I cut up tissue paper into 3/4″ squares because I wanted it to be big enough to be seen on camera from a distance.)
STEP ONE: Make It Fucntional
I was really worried that if I simply had someone stuff the lantern with either blue or pink confetti, one or two things would happen: 1.) The confetti would bottleneck and not actually fall out of the pinata, or 2.) I’d see the color of confetti reflecting or sticking out of the top or bottom of the paper lantern. Solutions? Yes, I have a few of those!
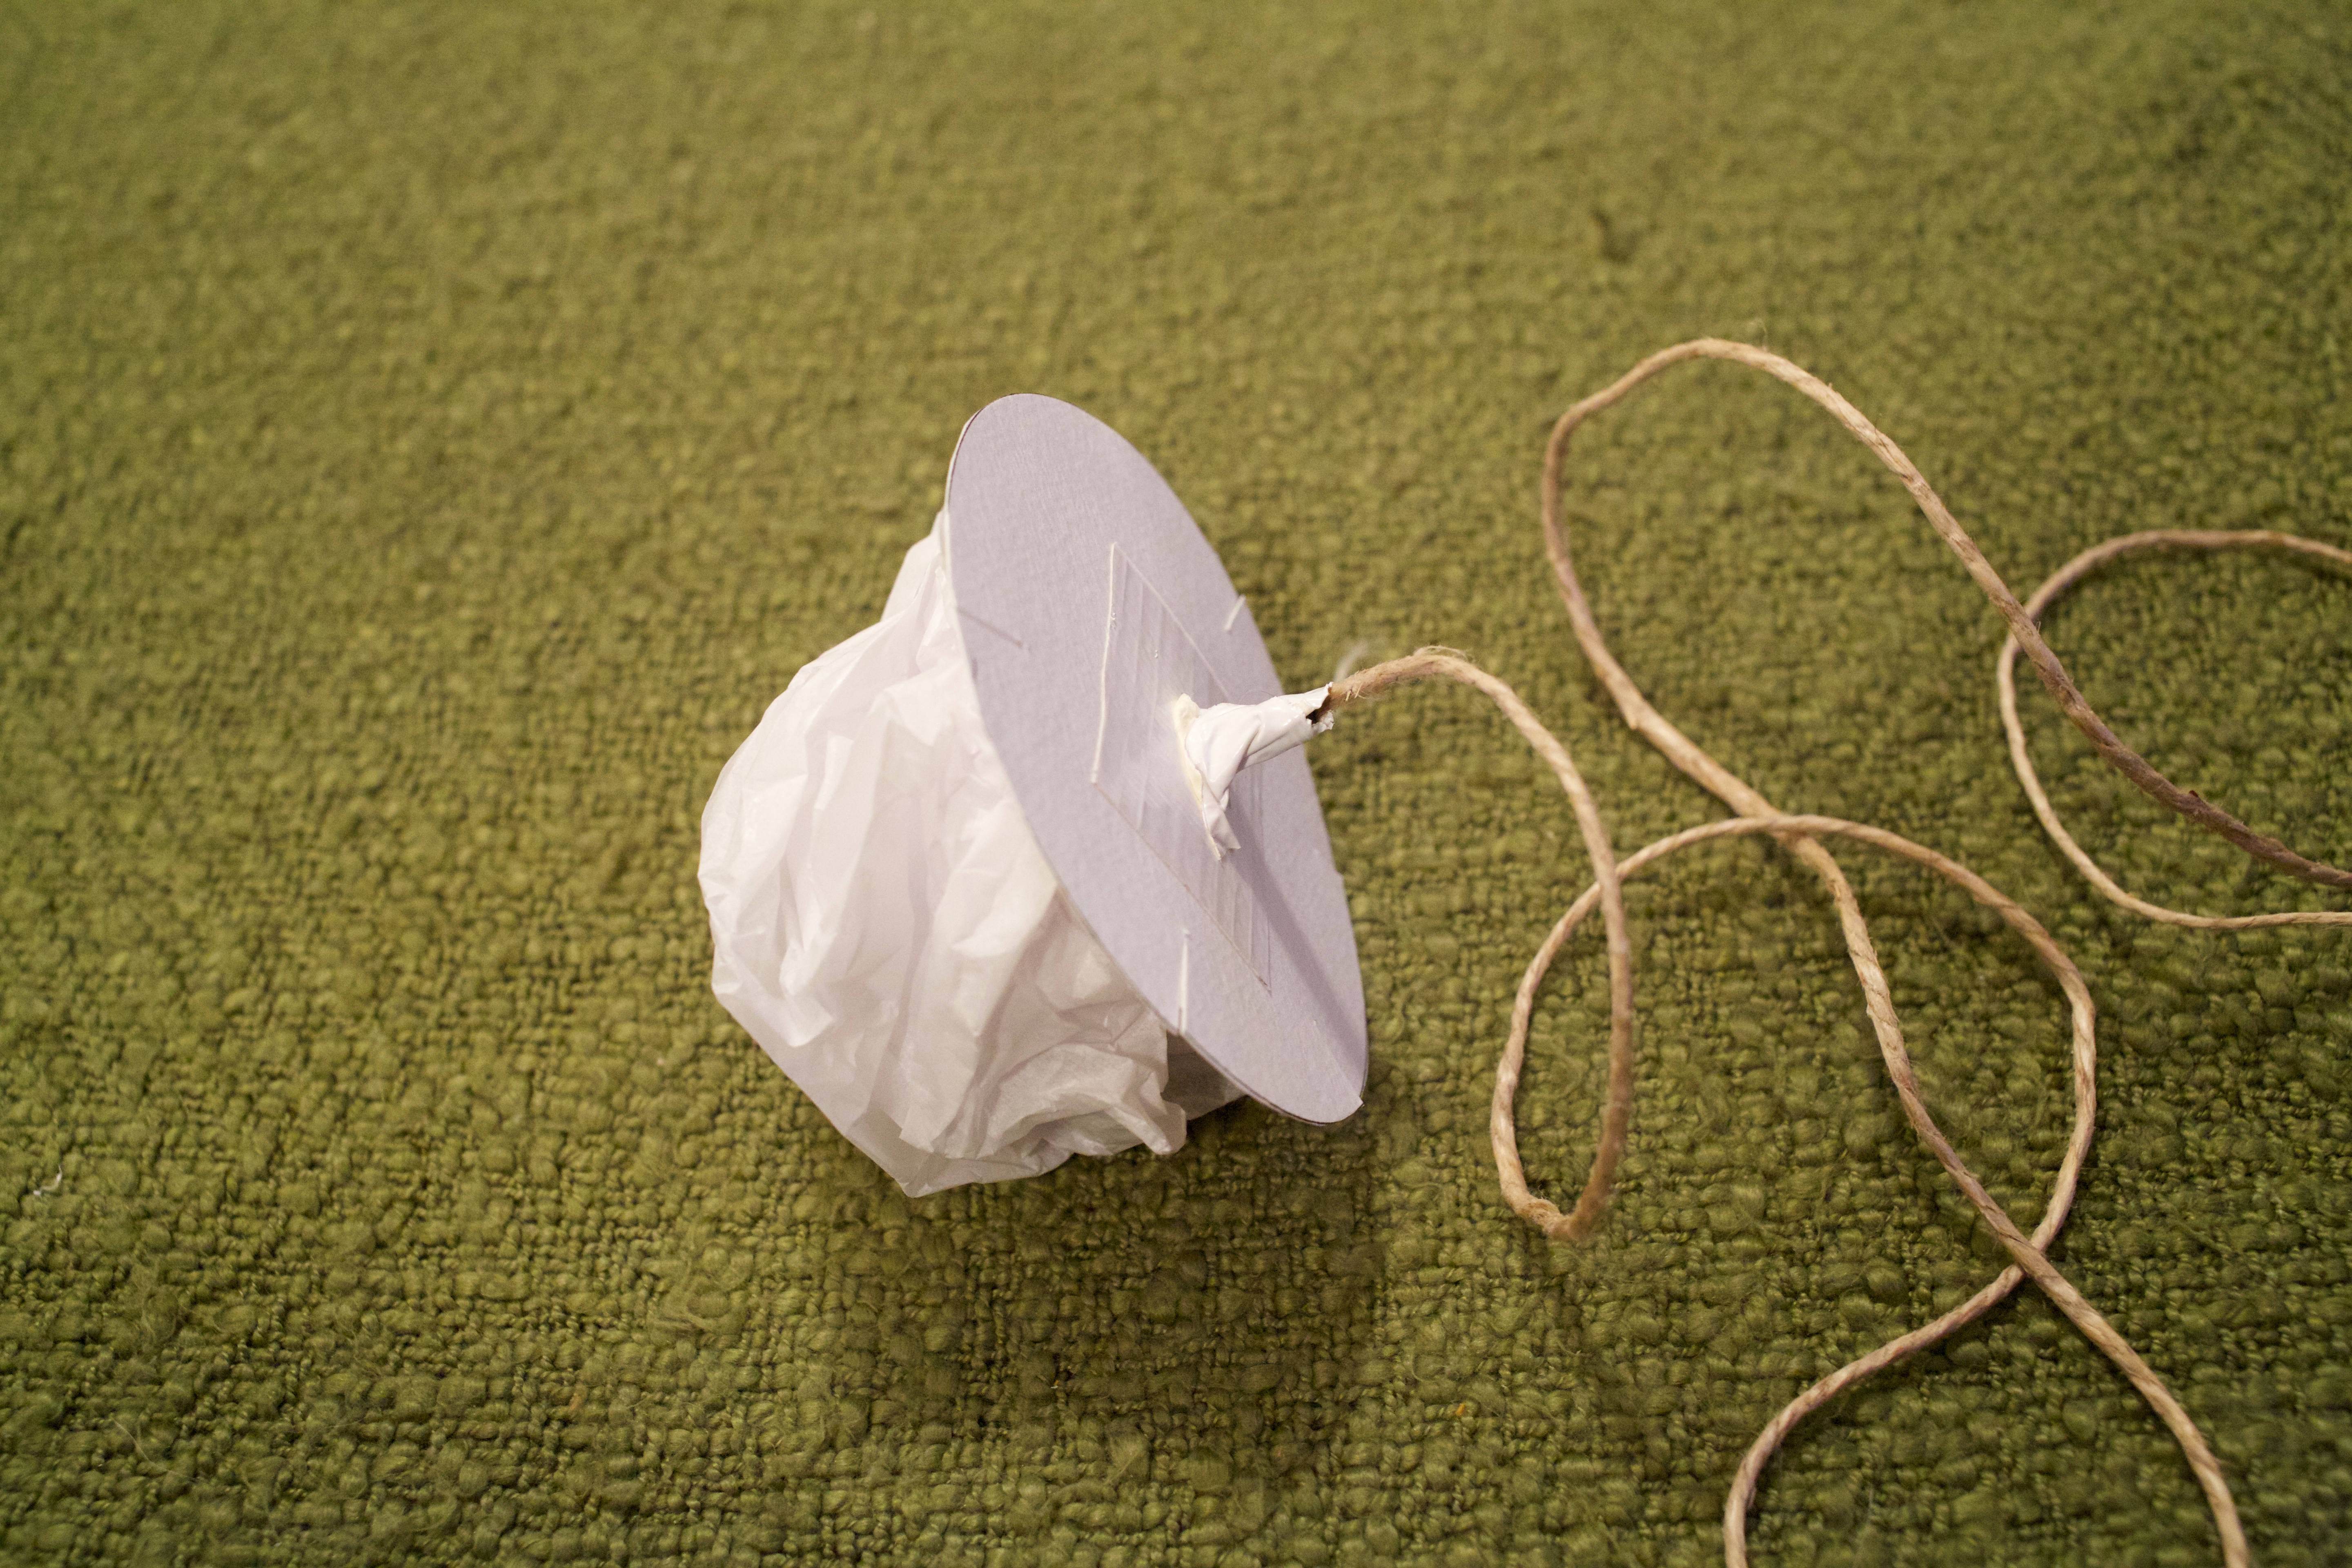
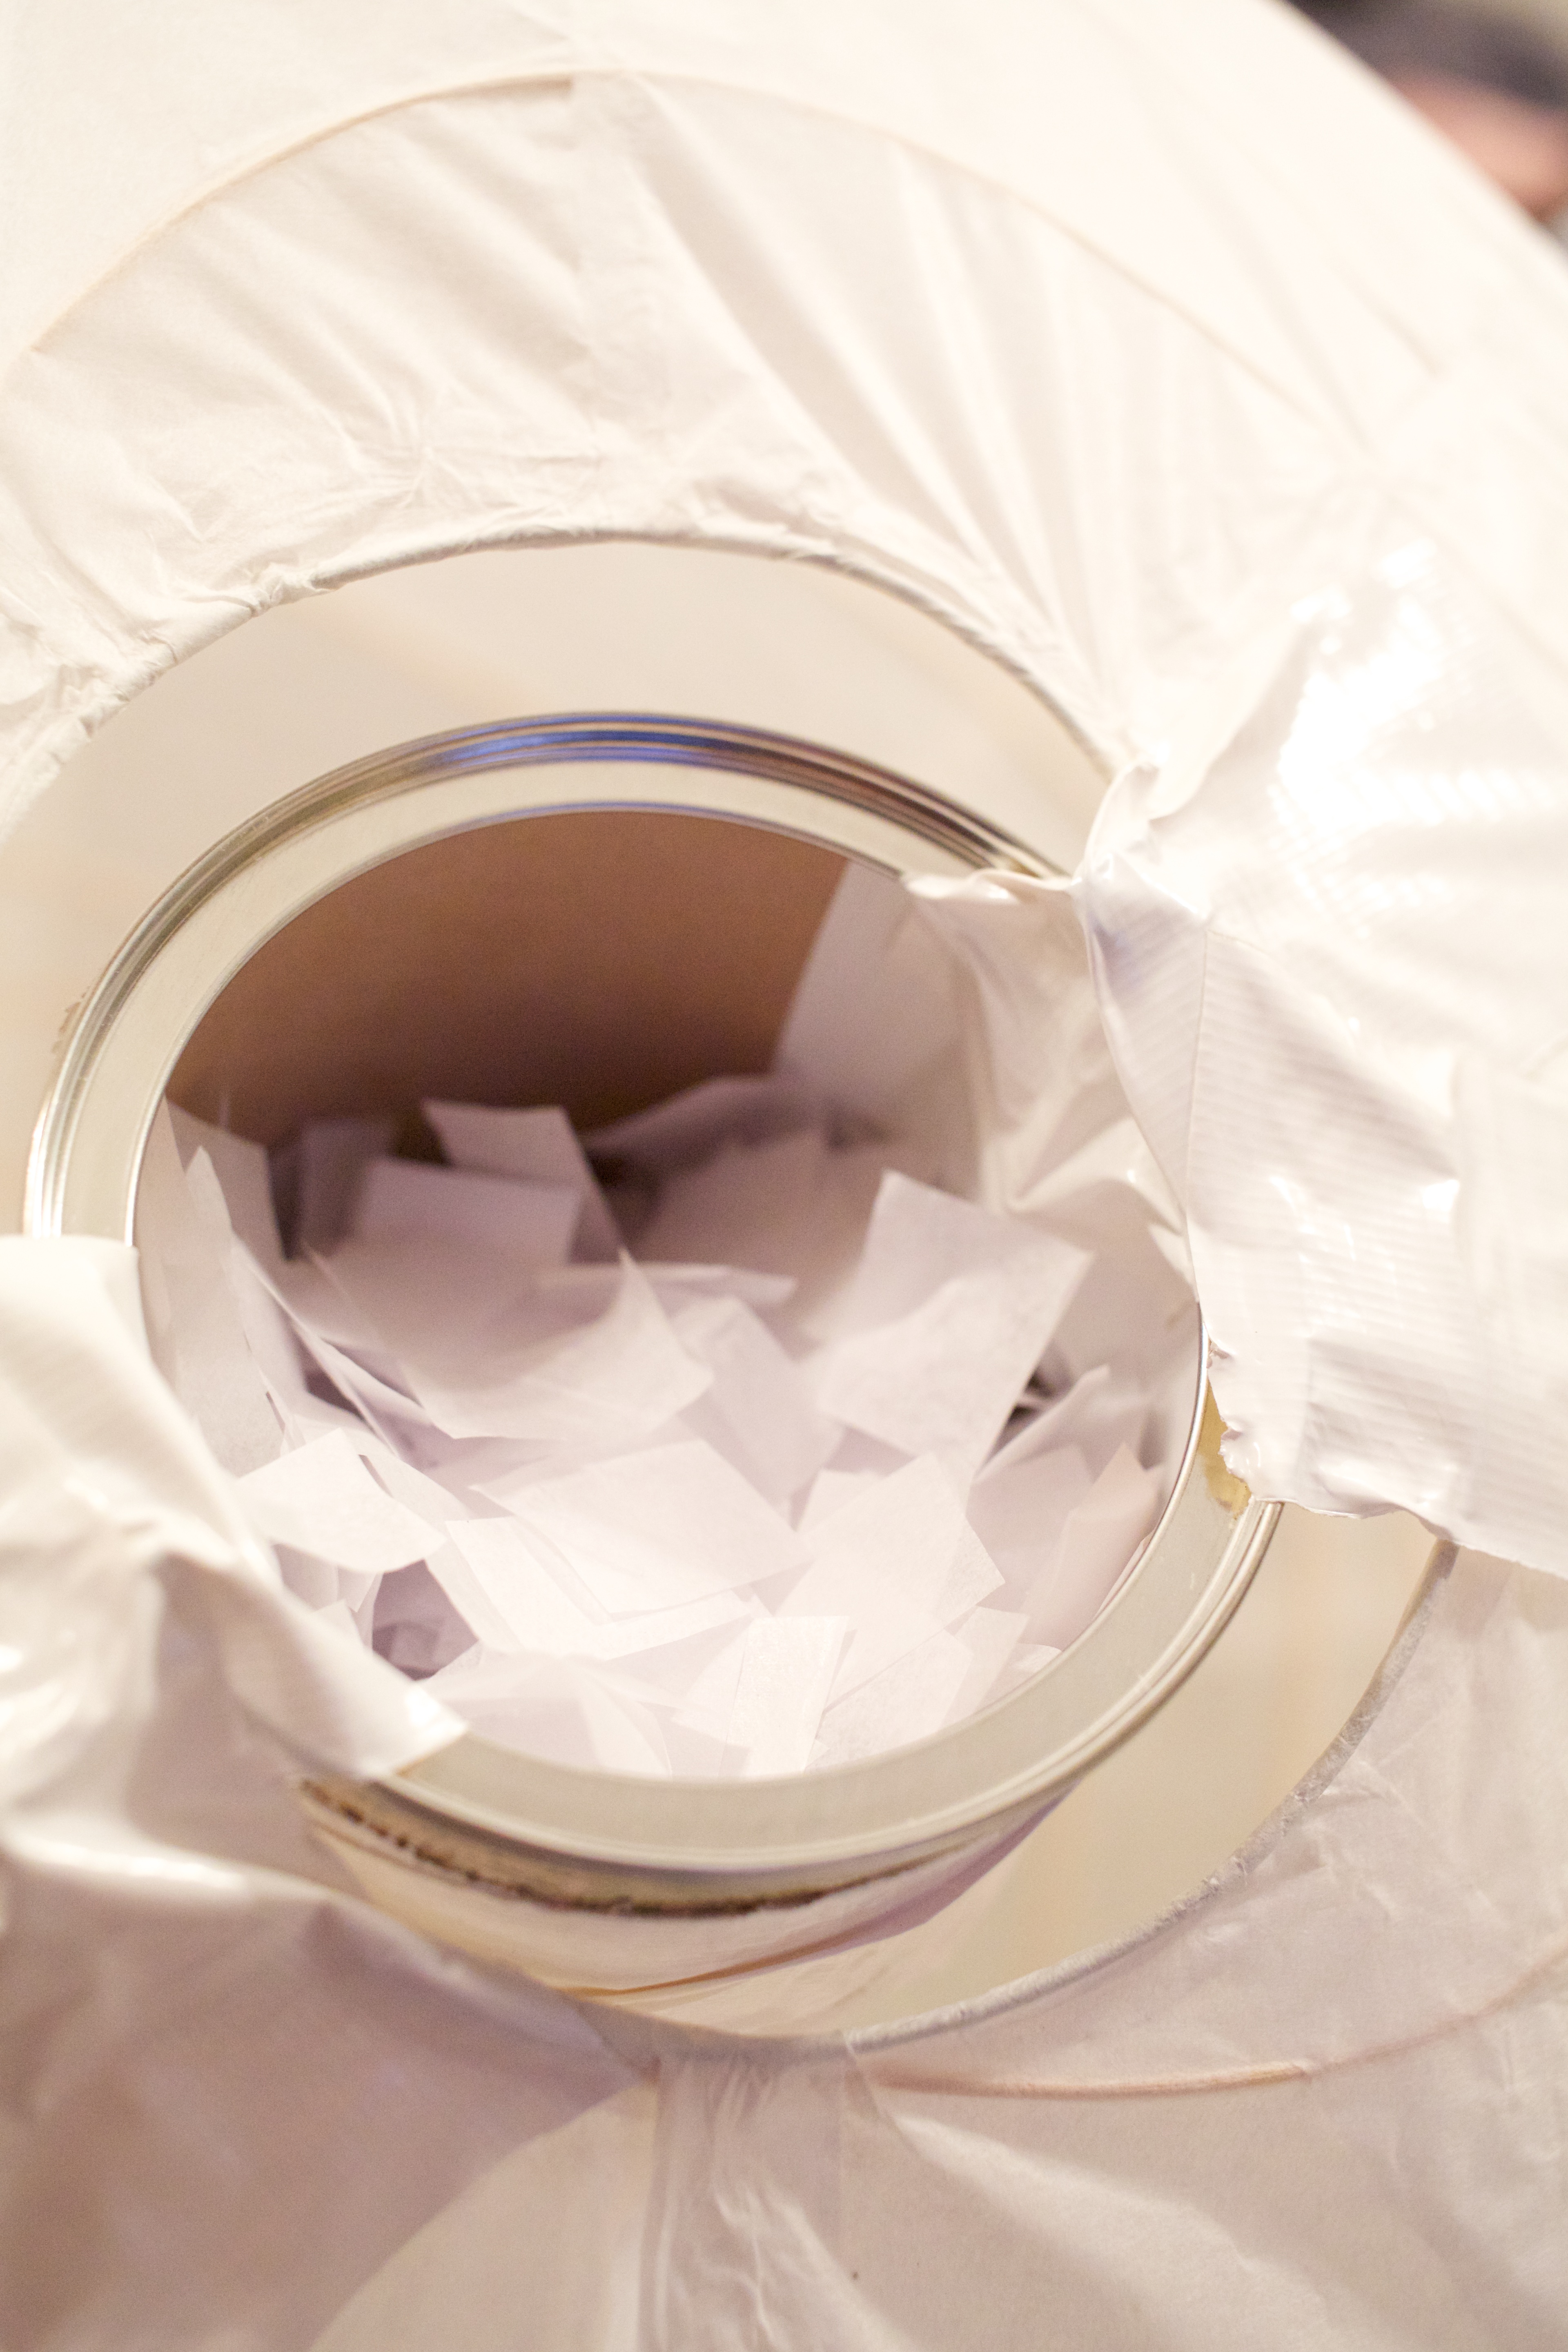
To make sure the confetti wouldn’t bottleneck, I created a completely vertical tunnel for the confetti from an oatmeal can. Using the existing wire insert for the paper lantern, I cut the bottom section out and wrapped the ends into the oatmeal can. A little tape to secure it, and viola! Confetti tube!
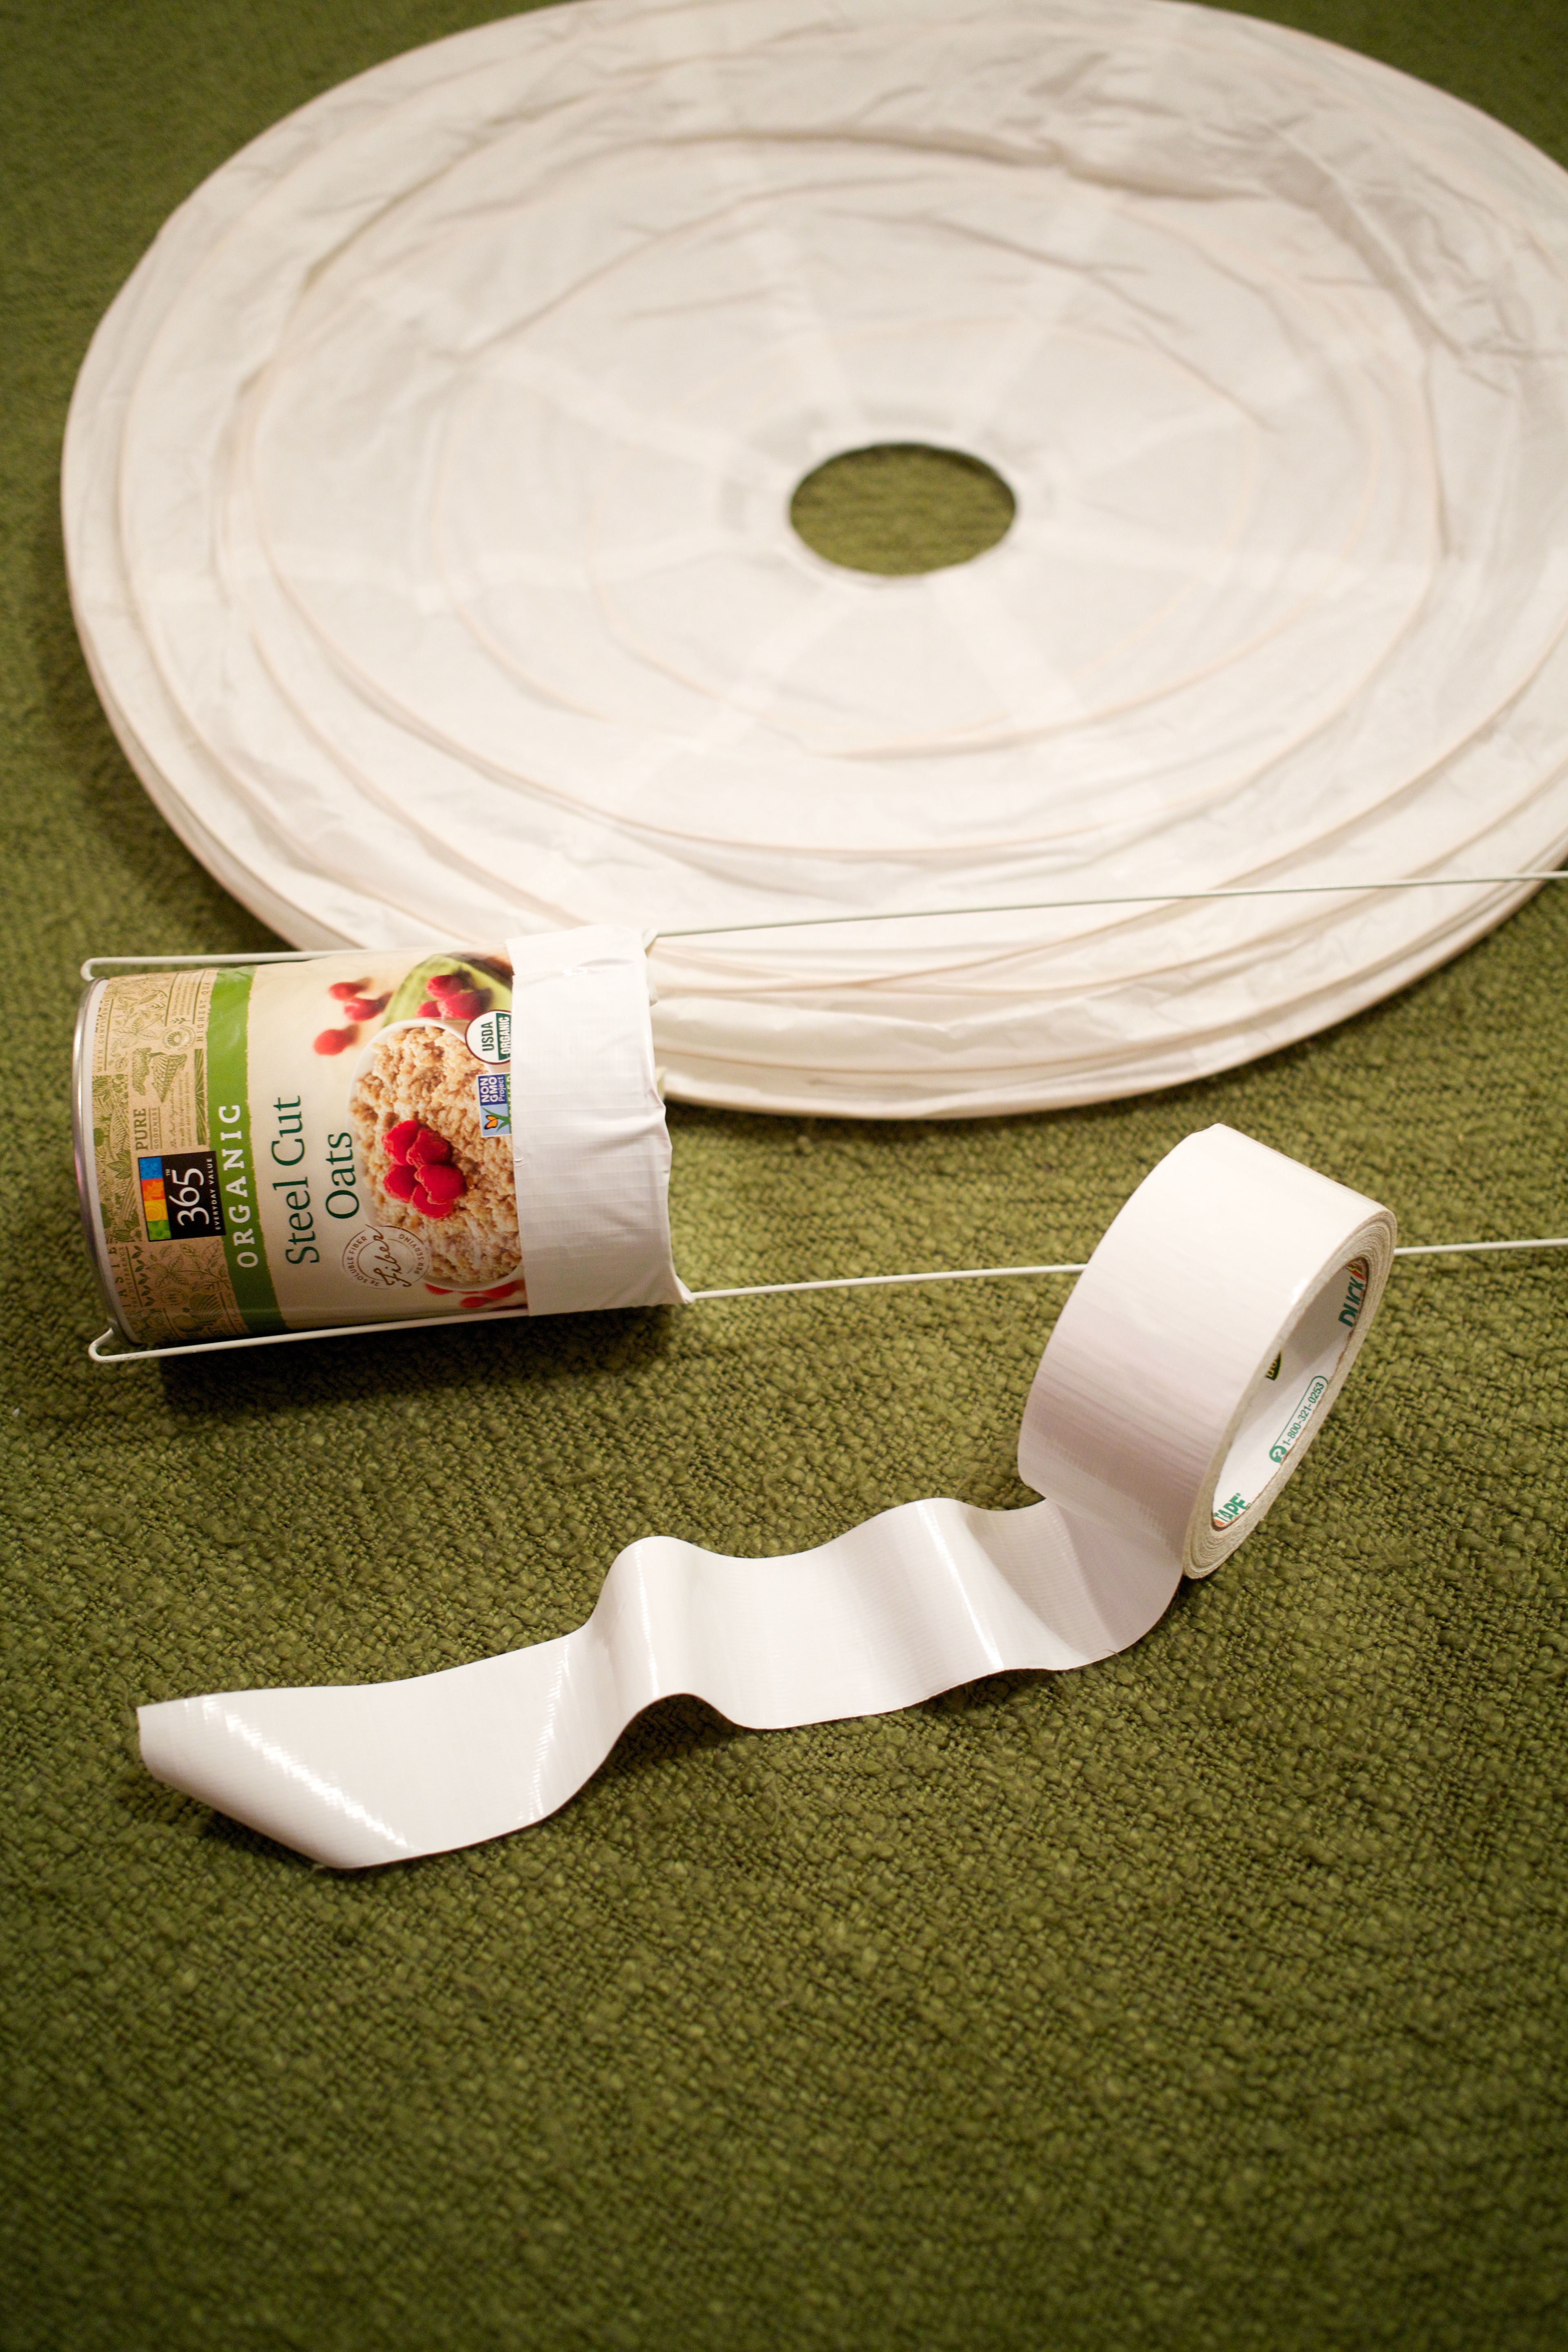
I then inserted the oatmeal can and wire frame into the paper lantern to “inflate” it into a ball, but the oatmeal can made it difficult to securely attach the frame to the lantern. To solve this little problem, I just just a couple of little pieces of wire from a hanger and used them to loop the two pieces together. A little tape to mask my wires, and we were back in business!

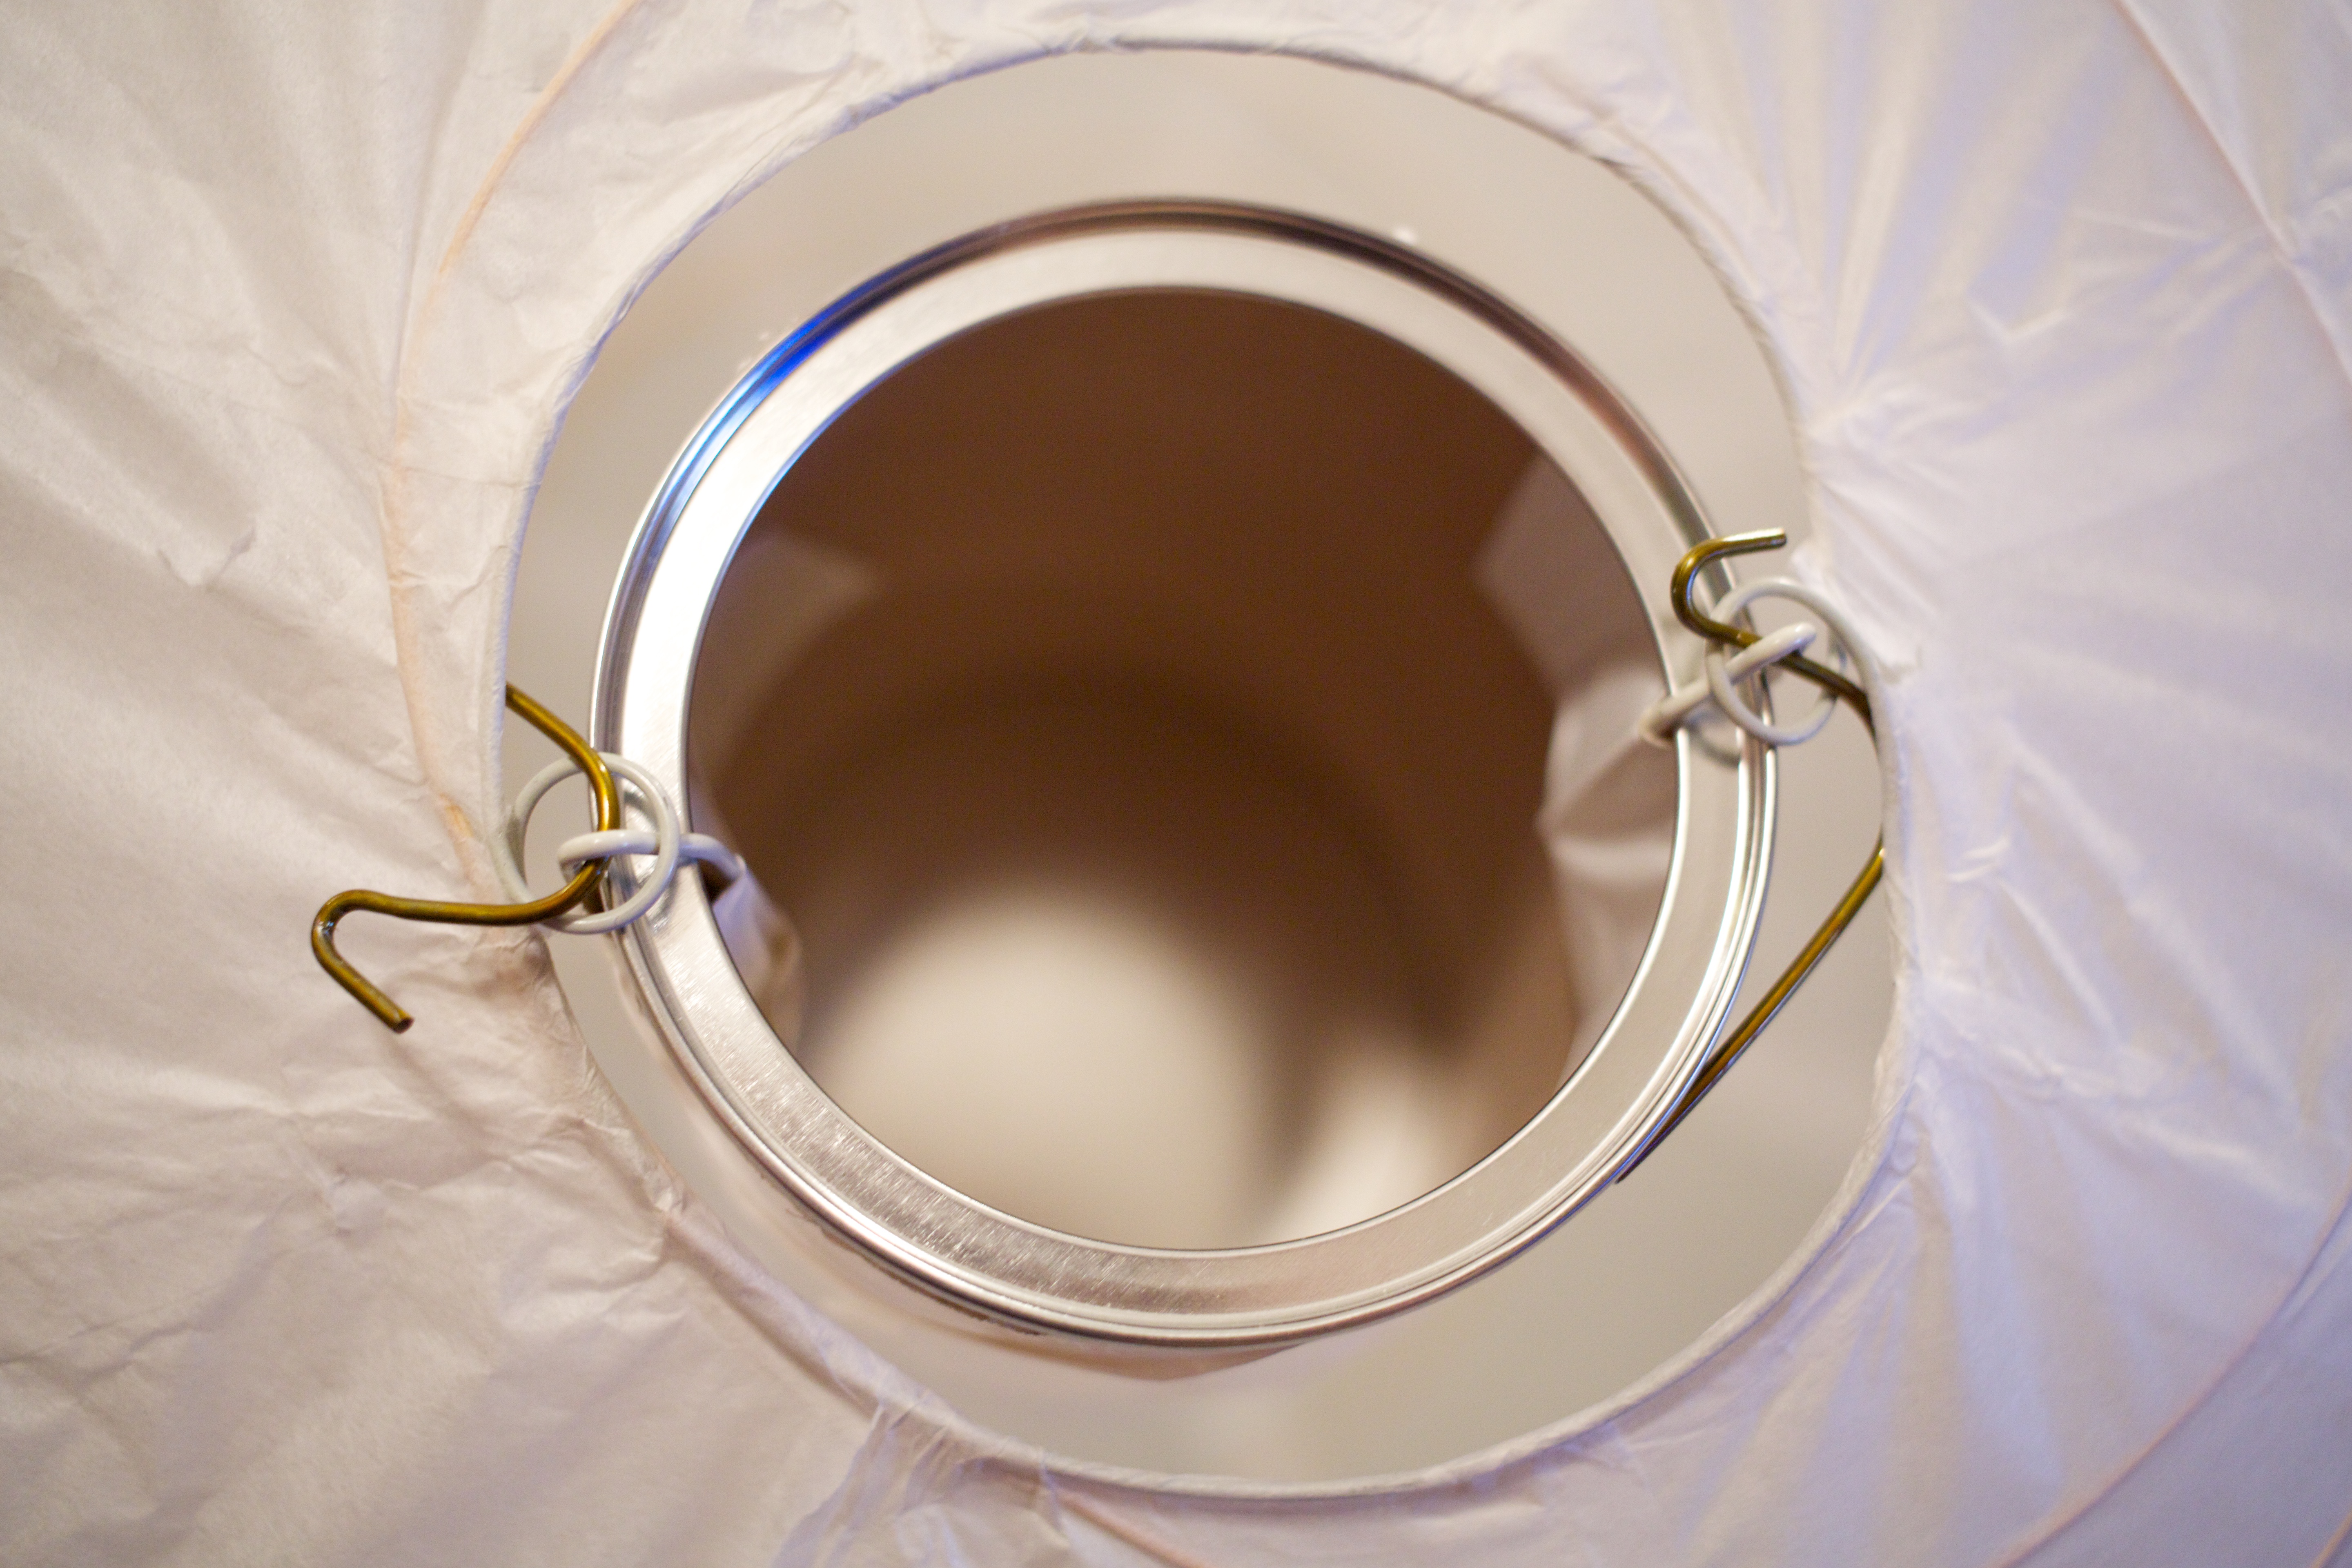
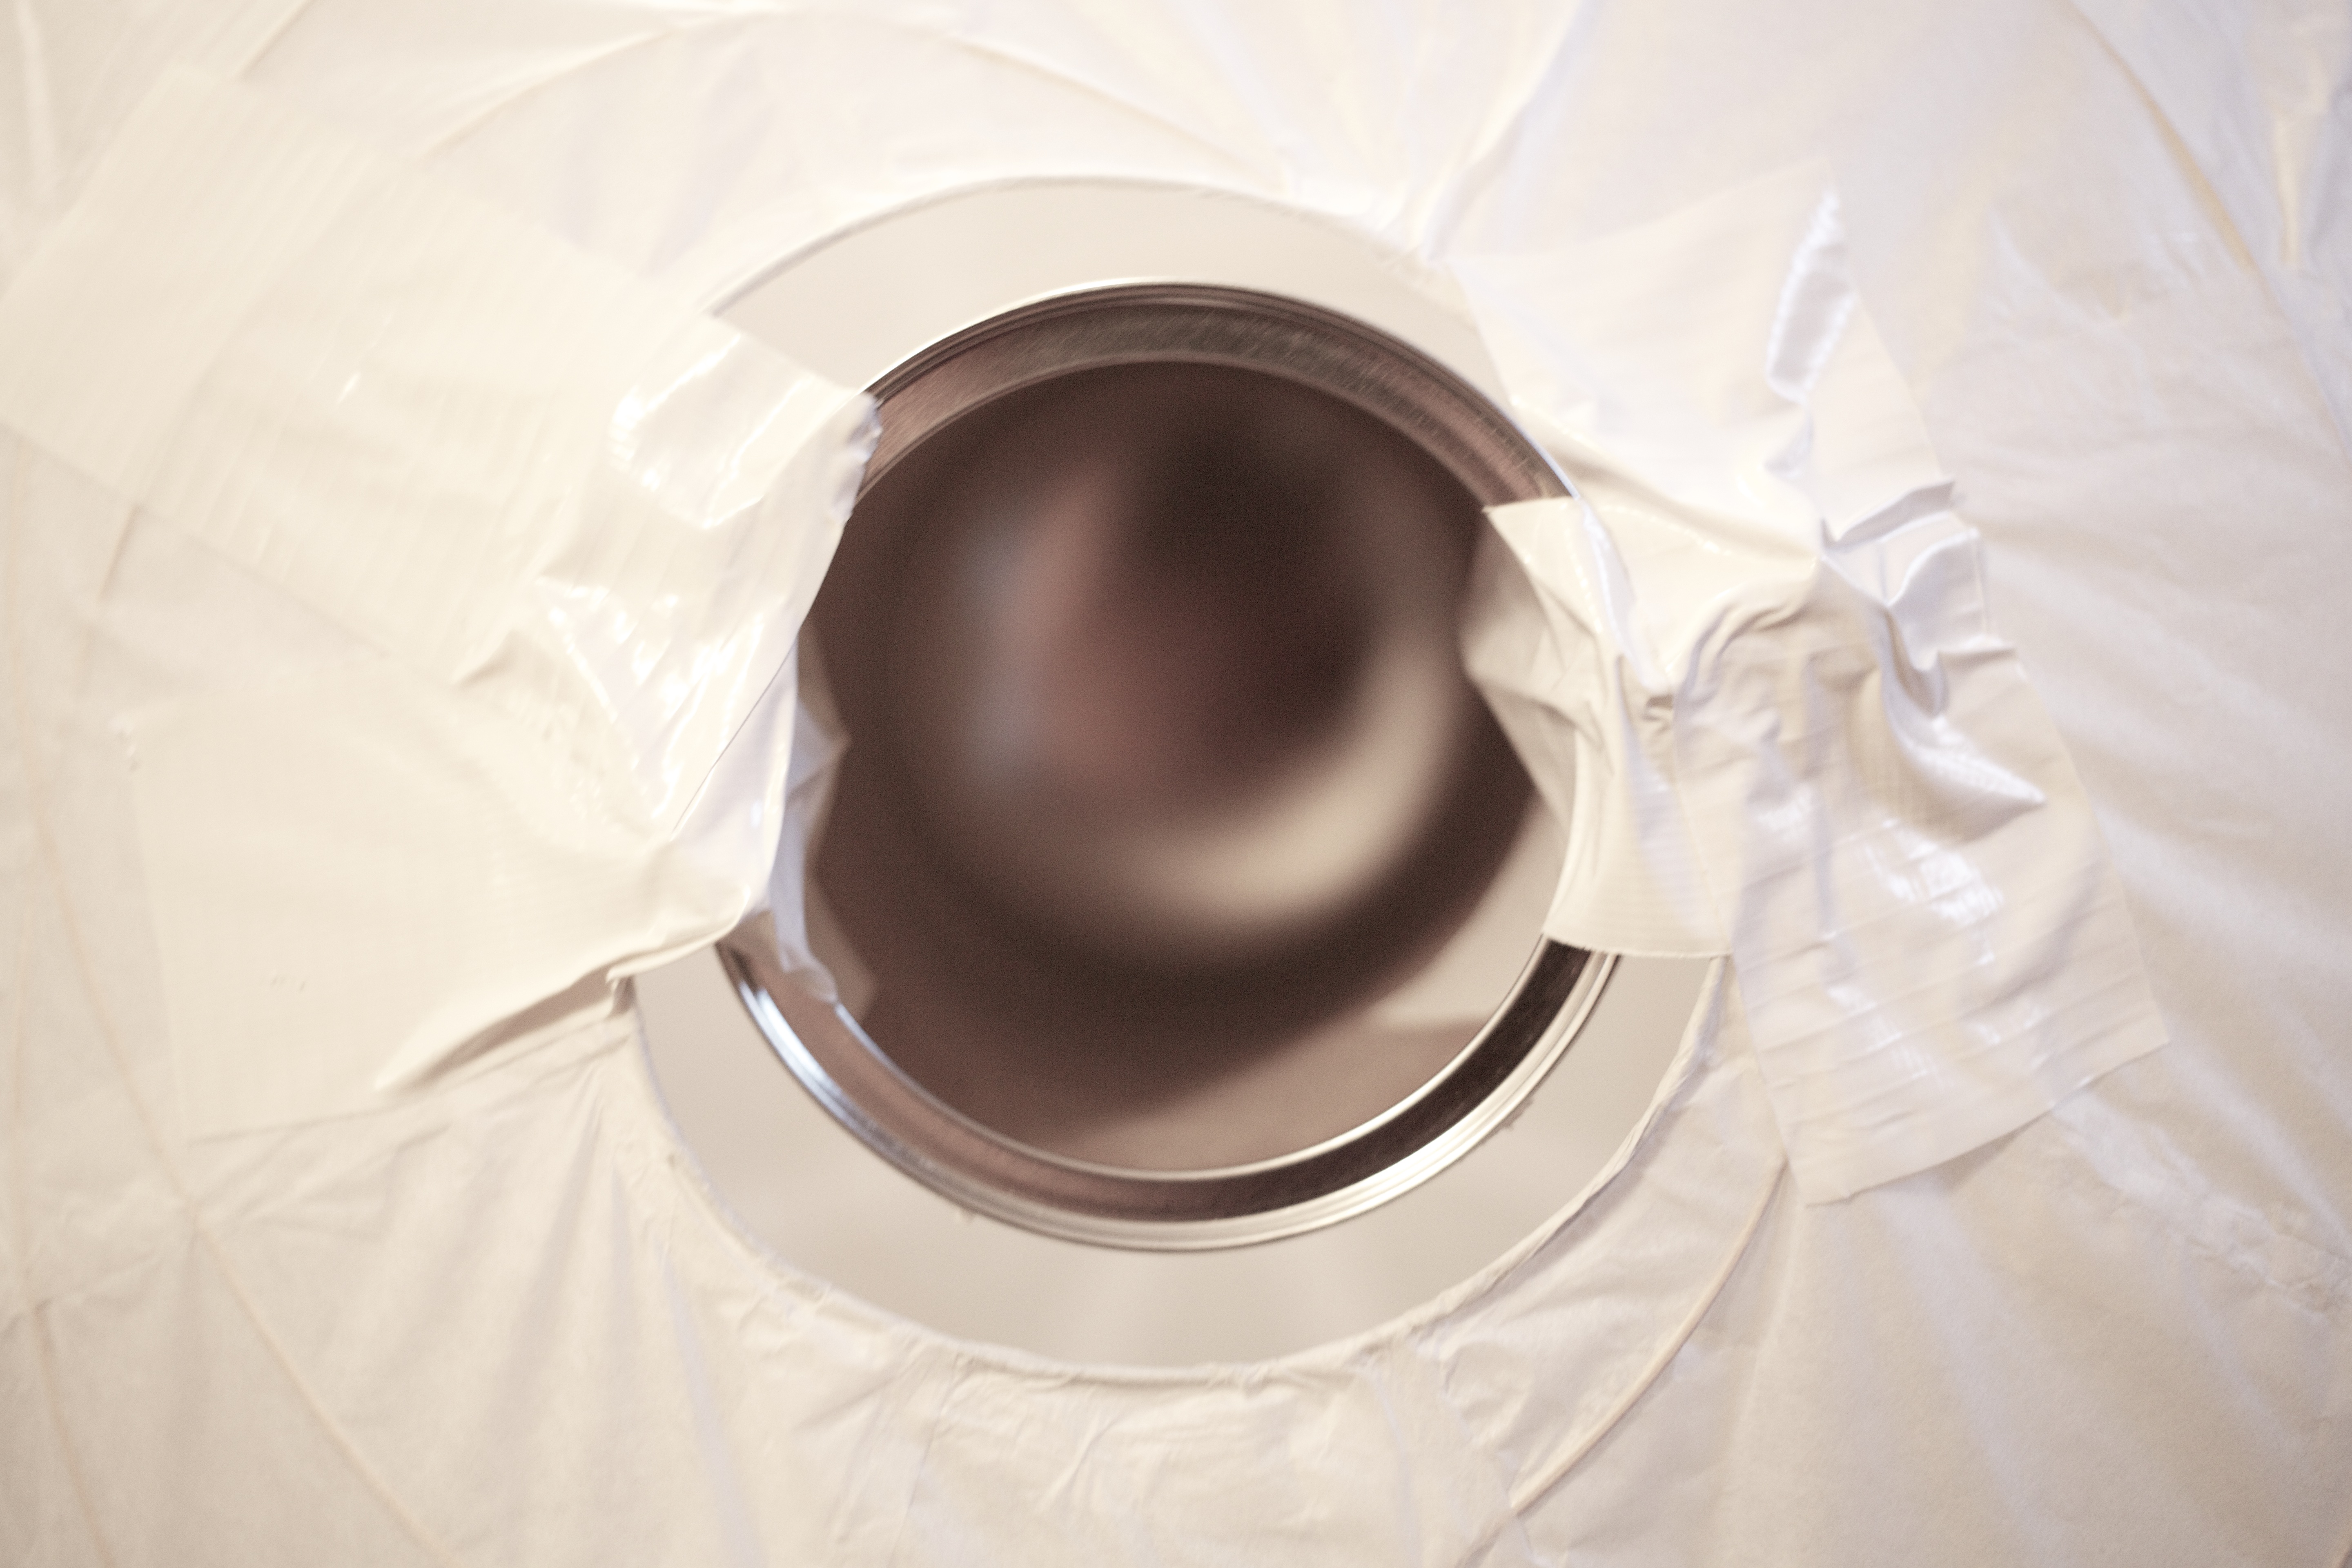
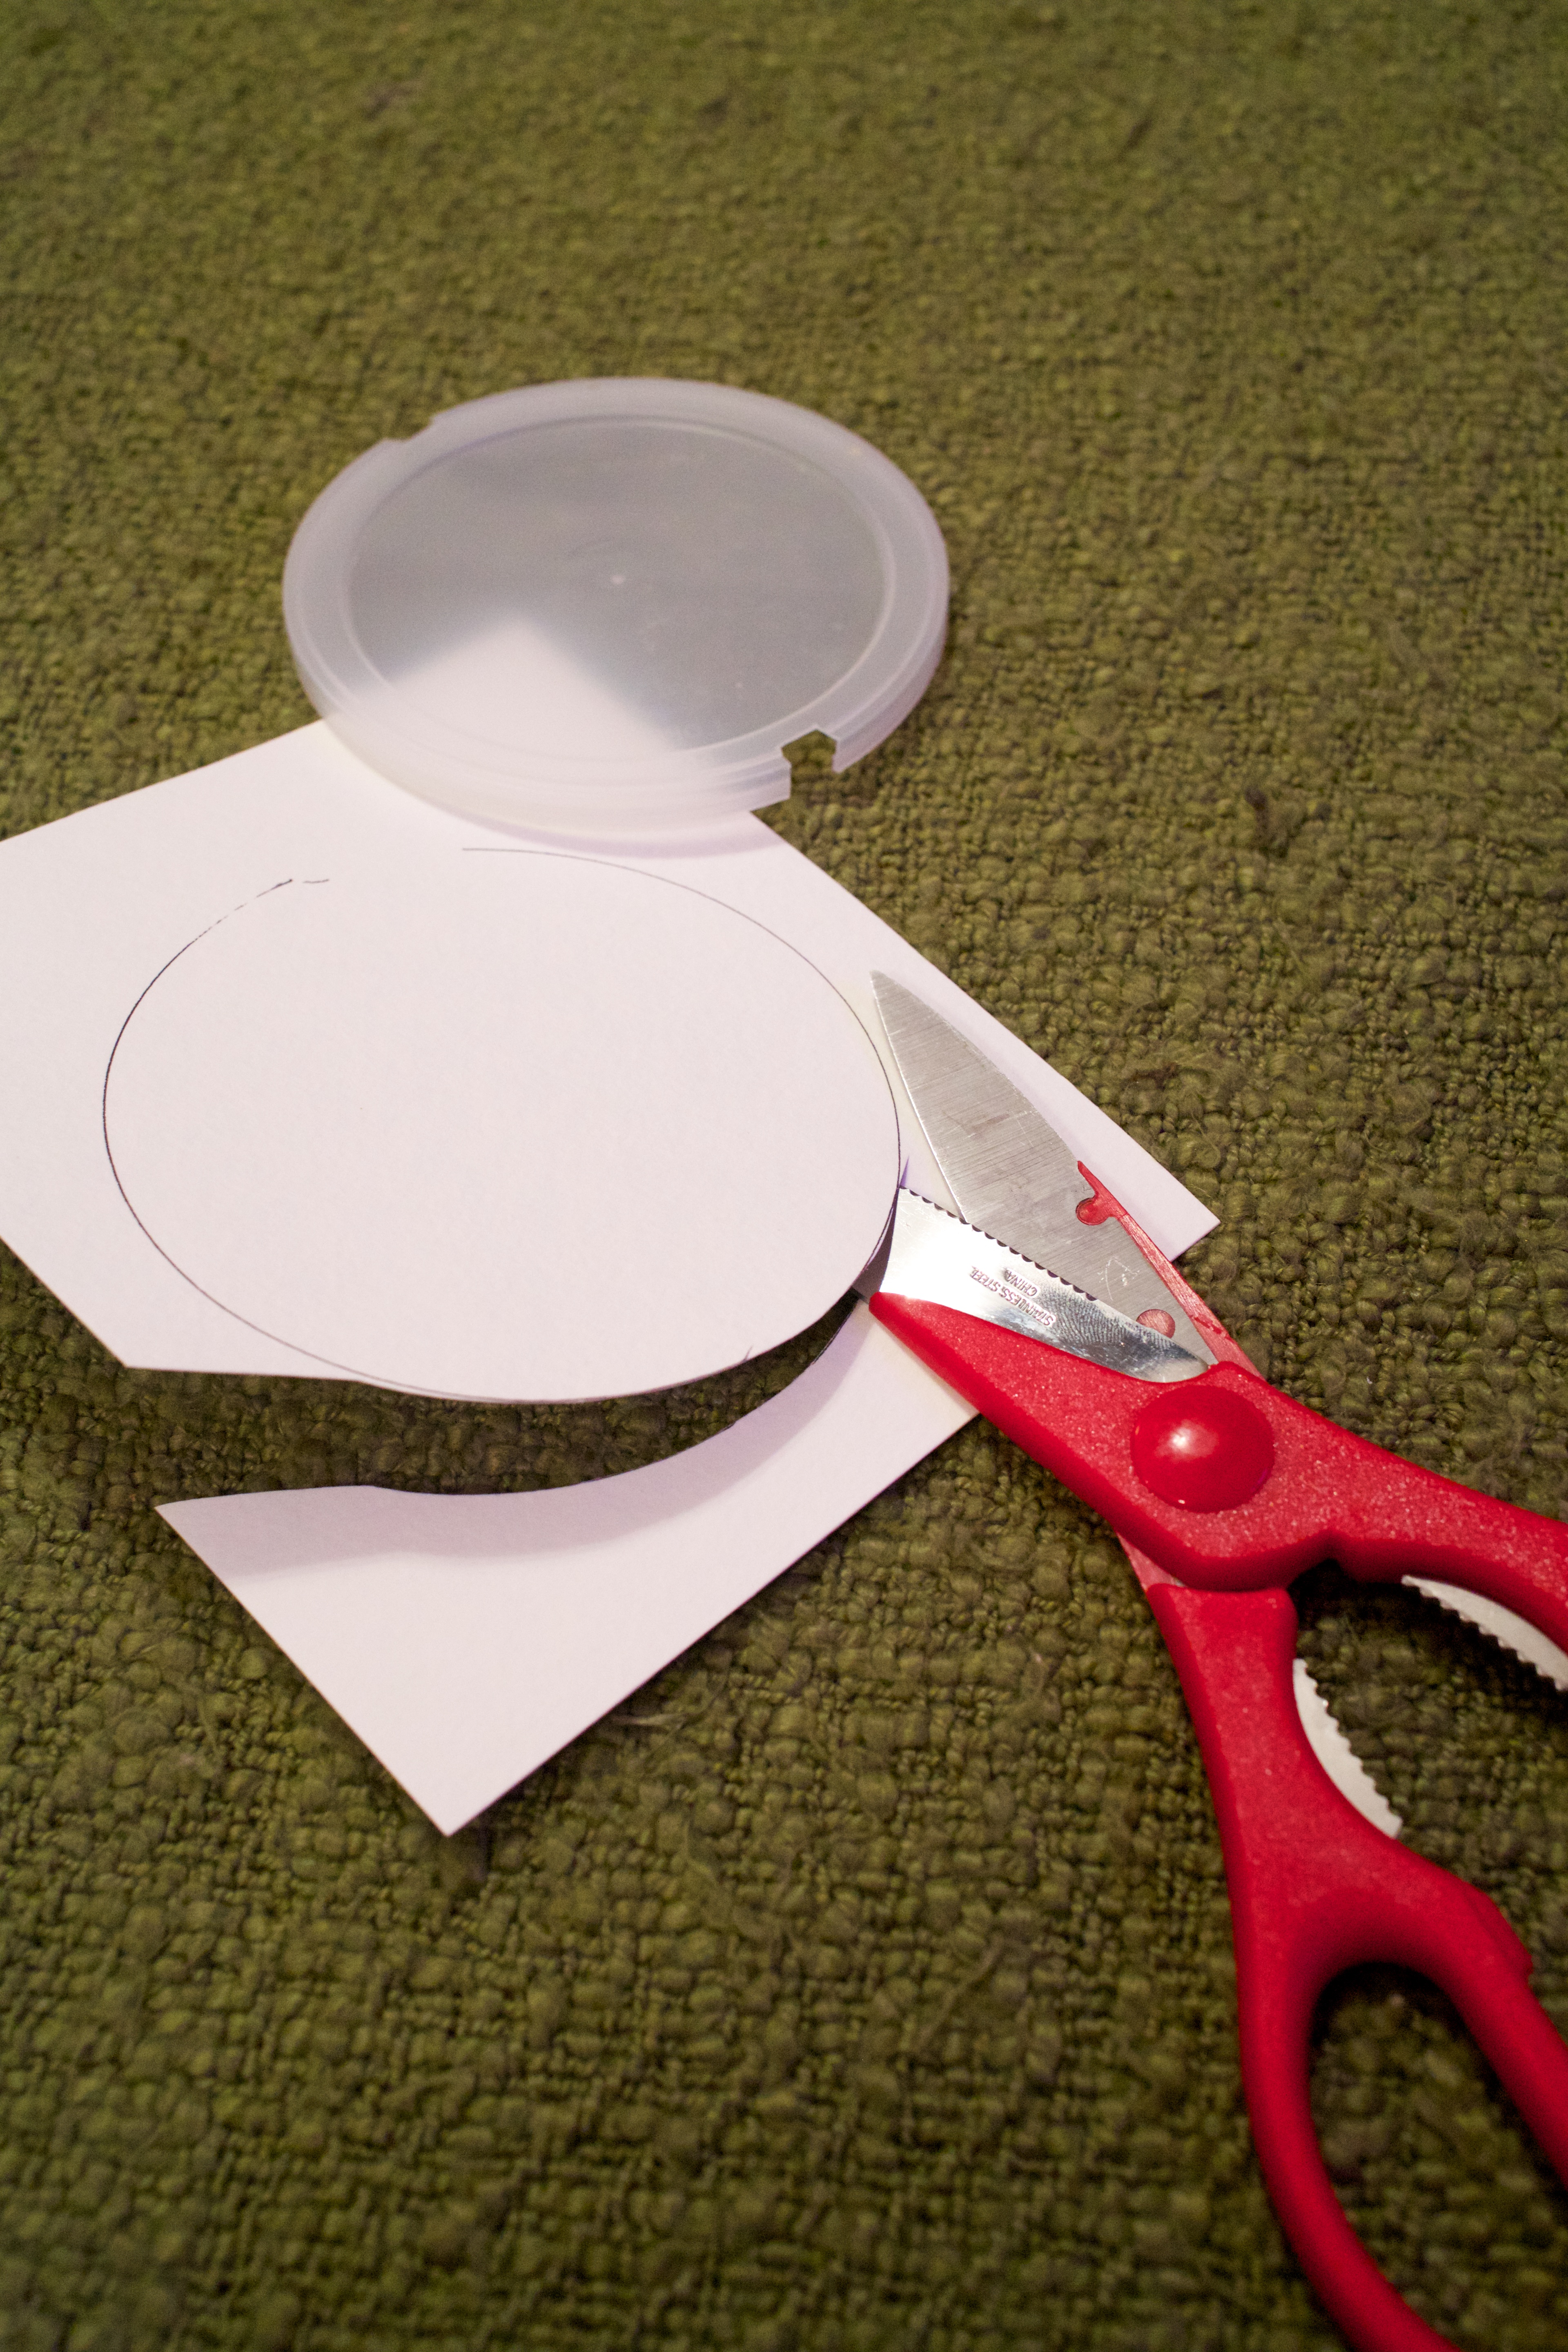
Then it was time to make sure no confetti popped out of the canister prematurely. Using the oatmeal can lid as a general guide, I cut a slightly larger circle and then put a few 1/2″ slits around the edges to make sure it would slide into the oatmeal can easily. I attached the string by poking it through the center of the paper circle. Initially I just knotted the end, but the knot wasn’t large or strong enough to ensure that the string would actually pull the plug all the way out. Using a nail as an anchor solved that problem easily. I also added a little white tissue padding to the inside of the plug because I was terrified that confetti would find it’s way around the plug somehow. (And, with this being for the purposes of a gender reveal, a single piece of confetti could’ve ruined the whole thing!) The white tissue paper made sure that the confetti couldn’t escape.
I, of course, am OCD, so I went so far as to test my oatmeal-cansiter-concotion with white confetti before the actual reveal to make sure my ideas would work–and they did! Once I knew that the pinata was functional, it was time for Step Two.
STEP TWO: Making It Pretty
At this point, I realized that hanging the paper lantern to decorate it was the easiest route, so I went ahead and used a string to attach it to my kitchen cabinets. Make sure you hang it somewhere close to an outlet, because it’s glue gun time!
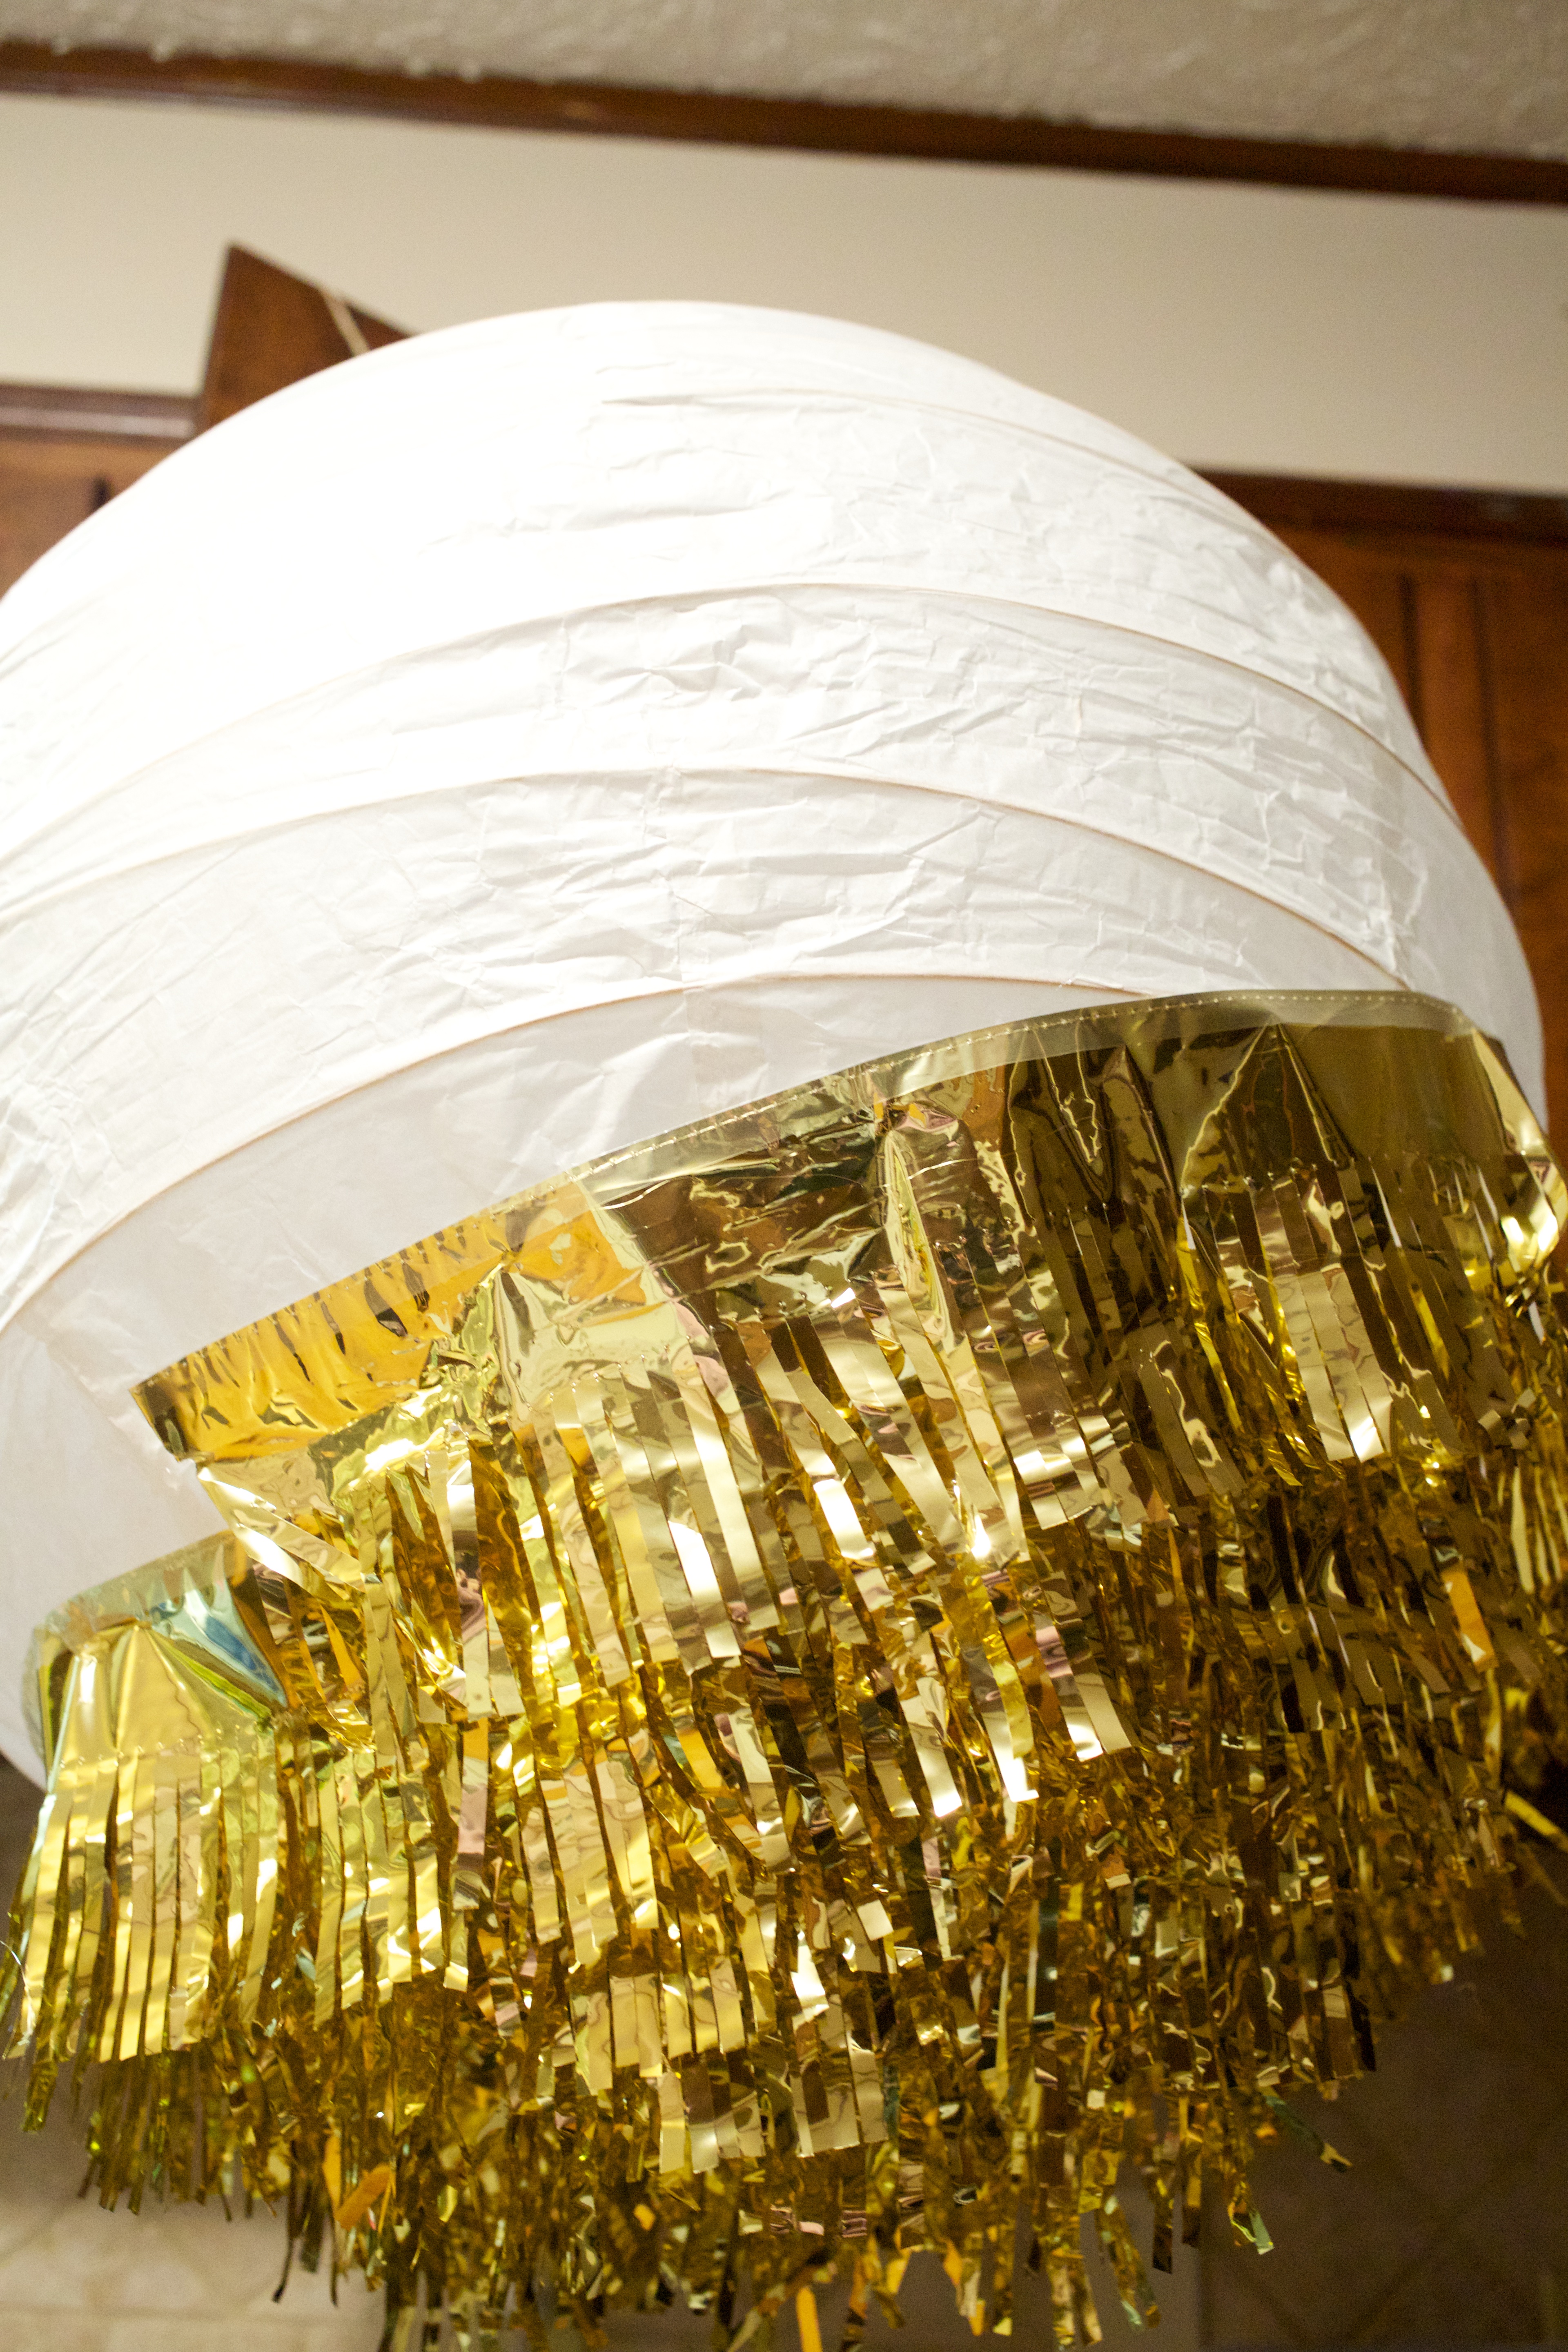
I used door fringe from Party City and cut it down to about 4-6″ long. I wanted the pinata to look shaggy, which is unlike a traditional pinata. I don’t have any real justification for going with the shaggy look other than preference and that it’s a little different than the others I had seen online. Although cutting my own fringe was more time-consuming than purchasing shorter fringe (like the stuff they sell to go around the edges of tables), it turned out for the best because the construction of the door fringe was much sturdier (since mylar rips so easily) and thus easier to work with. Also, even if I had wanted a short, tailored look for the pinata, they didn’t have short fringe in gold, and I had it in my brain that the pinata had to be gold. ;)
After cutting down the long fringe, I began hot gluing at the bottom. I put glue every couple of inches, let it set, then went back and added more glue spots to get rid of the inevitable bumps you’ll get when going ’round and ’round the paper lantern.


Truthfully, gluing the fringe took way longer than I had predicted, so allot a big chunk of time for Step Two. (Plus, if you’re like me, you’ll inevitably need a break every once in a while to ice your burned fingers. ;) )
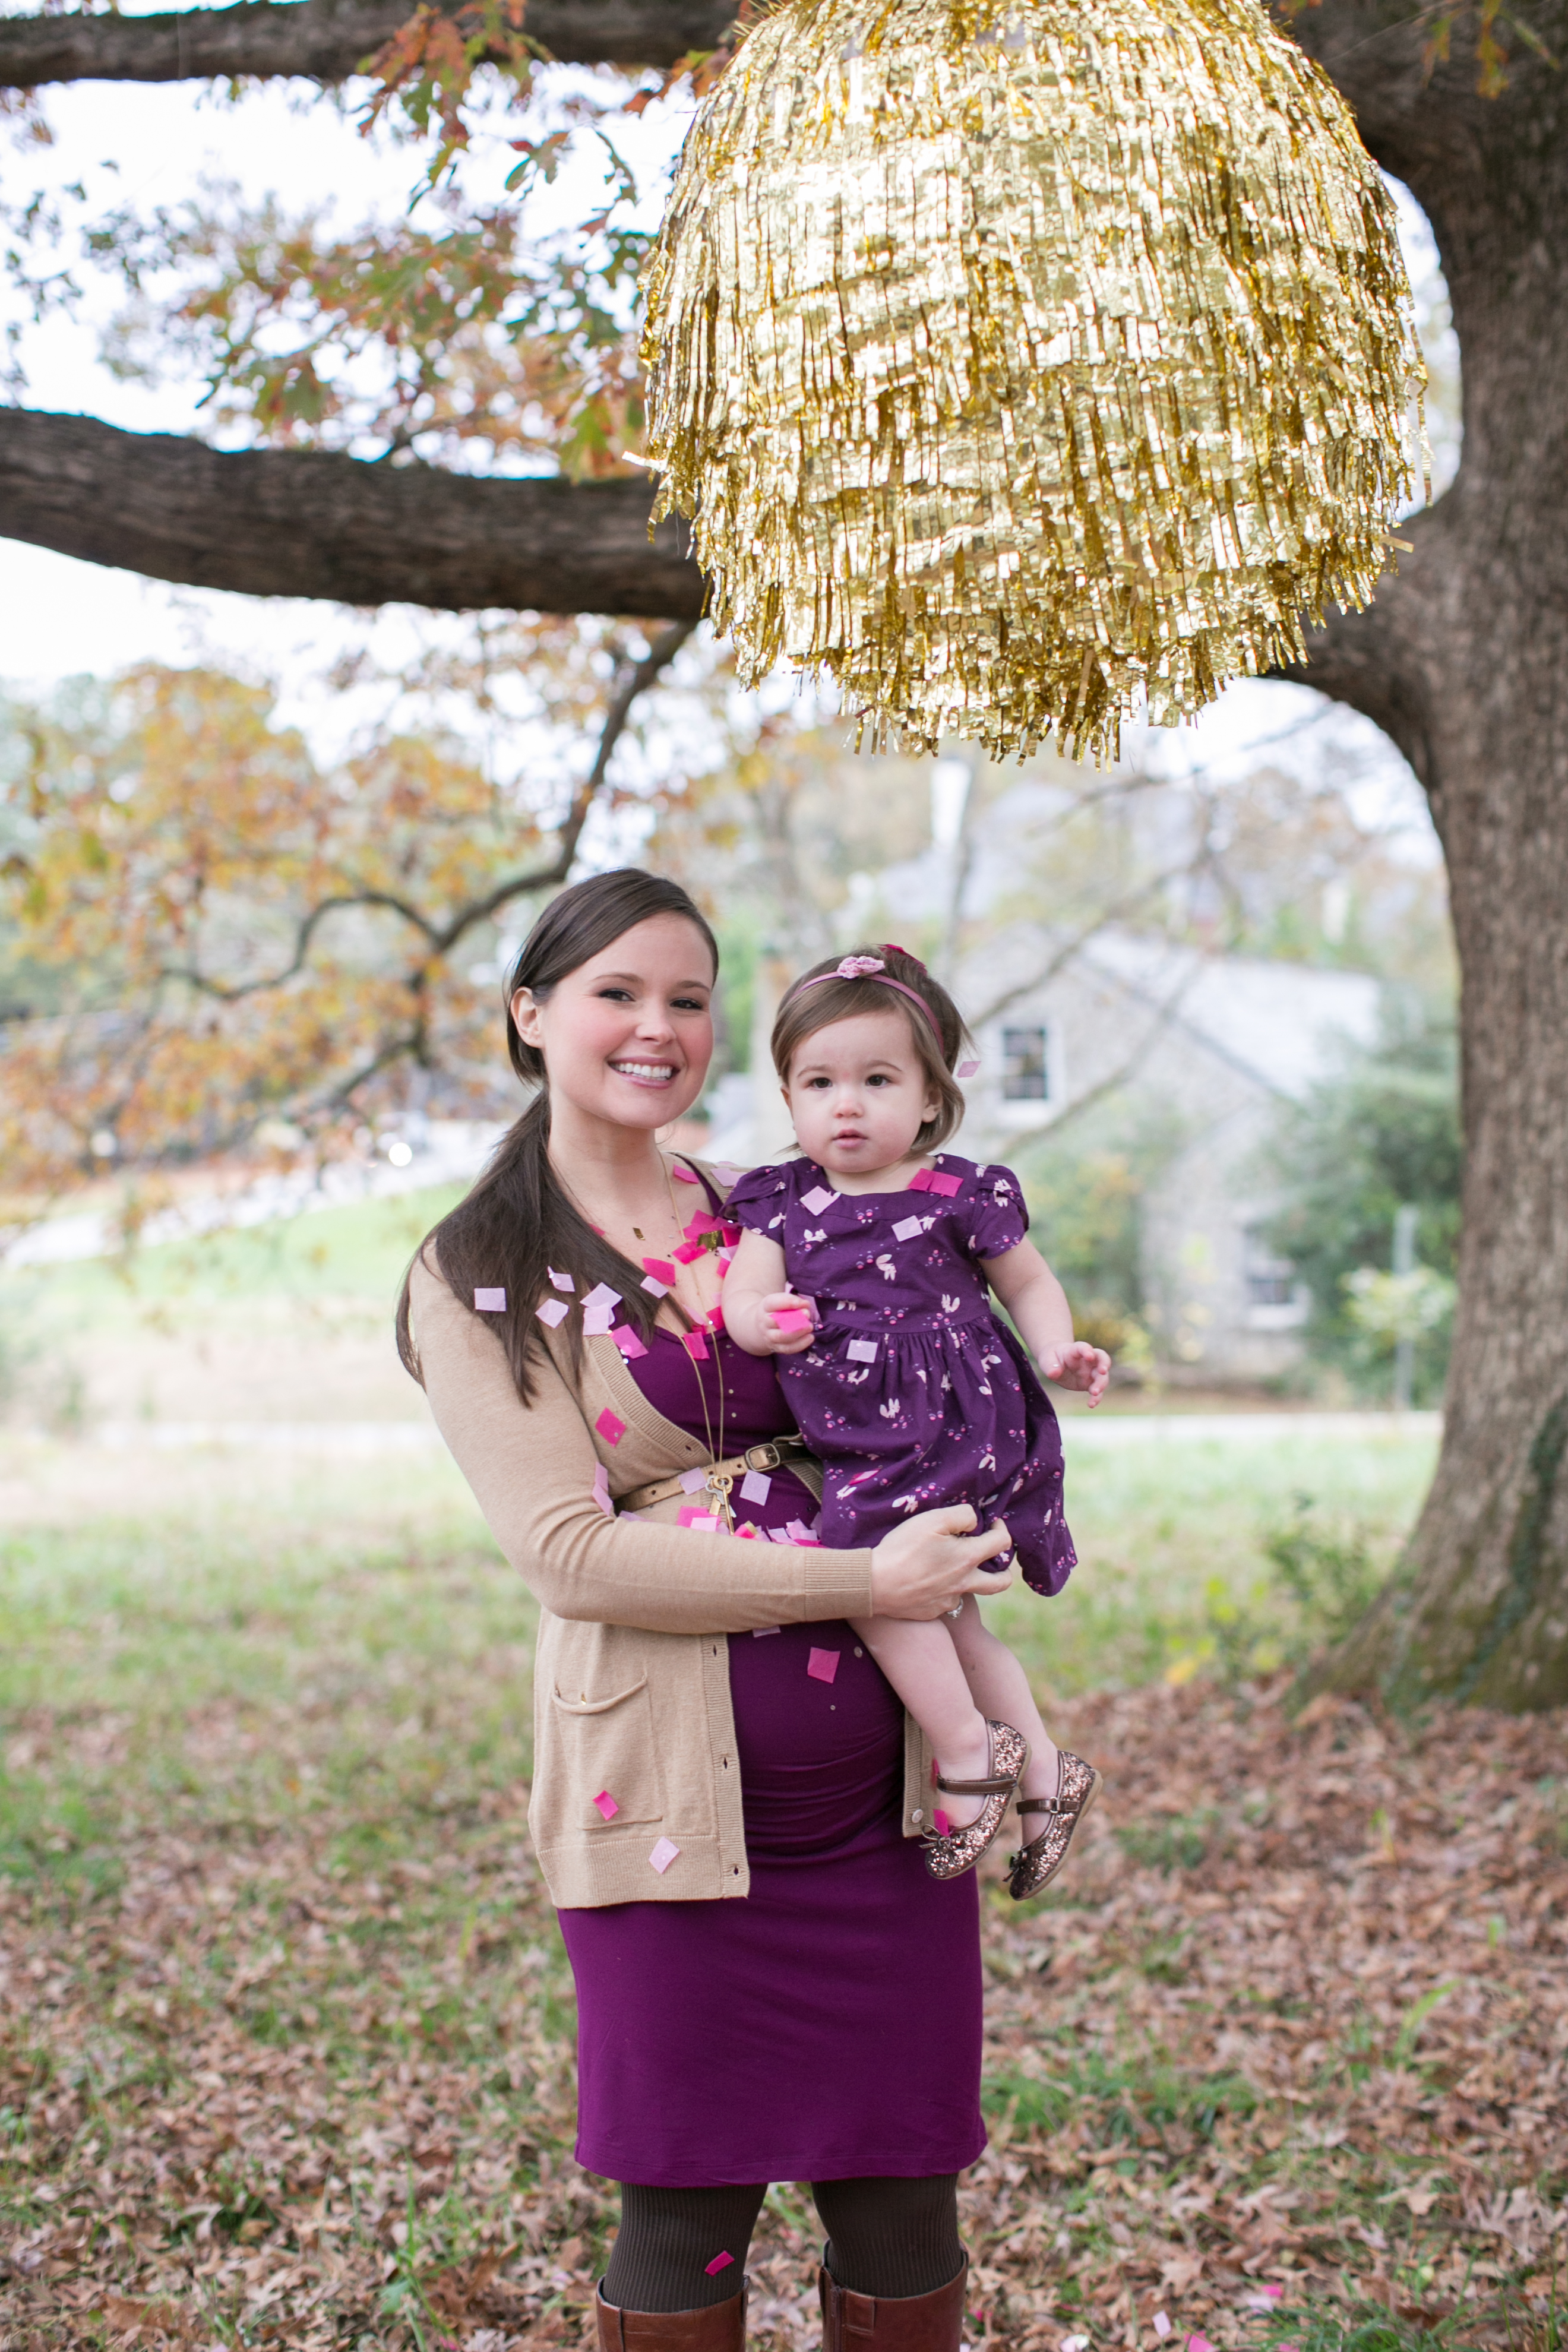
Once the lantern’s fully covered, it’s officially a pinata! I cut my own pink and blue confetti from tissue paper (because I wanted big pieces), had our photographer stuff the pinata at the photo shoot, and then got to enjoy the fruits of my crafting labor! I hope you do, too! ;)

Love this Idea. I am creating a pinata for my daughters birthday and I will use your OCD idea for sure!!! hahaha.
Thanks for posting.
How many packs of fringe did you buy?
Author
Hi Ashley! It’s been awhile ;), but I believe I used 2-3 packs. Good luck!