Let me begin by saying that I’m not a DIY blogger by any means — and on top of that, any mom knows that a DIY while being nanny-less, babysitter-less and hands-on with your children is a way different beast than any regular ol’ run of the mill project. Sometimes I’m hunched over in my unfinished basement toiling on some party craft or object revamp, and my mind wanders to all those lovely artists sans toddlers, creating art in their well-lit studios with cleaning crews. And I’m jealous. Truthfully, most of my making looks like this:

Cricket in my lap, tiny hands on my art. And it’s wonderful and frustrating and I wouldn’t want her anywhere else…although I would add a full-time nanny to help manage and distract my girls at inopportune moments. (Wouldn’t we all?)
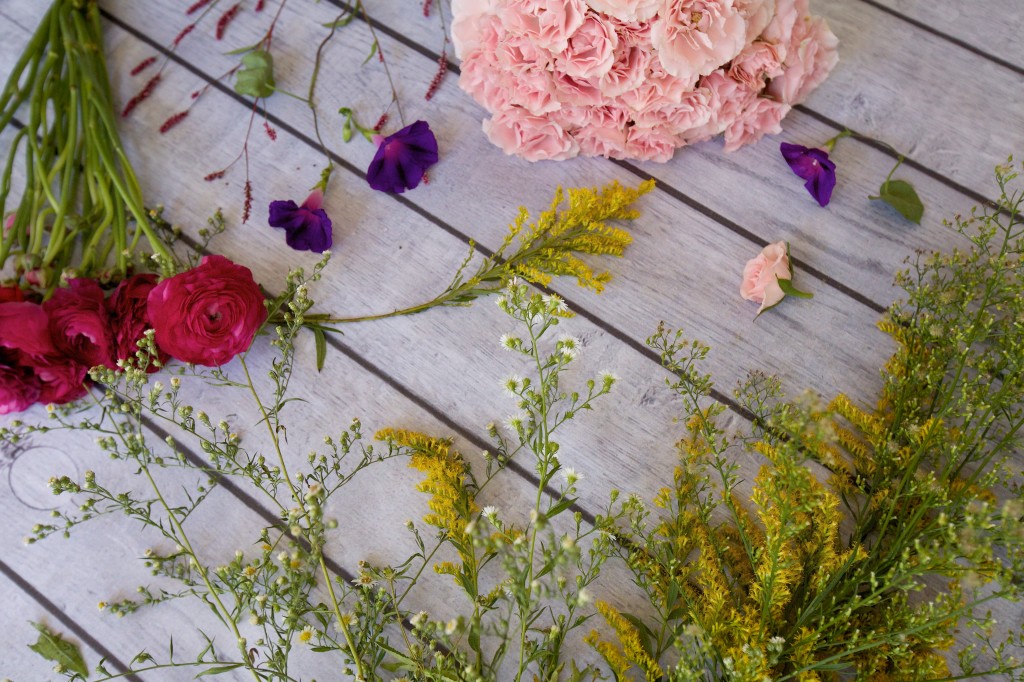
Okay, now onto the fun part! Yesterday I accompanied a girlfriend to my wholesale florist. While checking out, the florist reminded me that in the spring he had sold me a couple of bunches of dying flowers and owed me — so I got to pick some flowers to take home for free (well, essentially)! YAY! I left with a handful of pale pink spray roses and deep magenta ranunculus…and then stopped on the side of the road (twice) to forage for a few more wildflowers to add to the mix. I mean, I know I looked like a total weirdo to the passing cars, but free is FREE, and the only new thing I purchased for this project was floral wire for $.99, so it was waaaaay worth it. ;)
Now…What to do? What to do?
Since I didn’t have any need coming up for floral arrangements, I figured I’d try out a project I’ve been mulling over for a while…LIVE FLOWER NECKLACES!
I really love the idea of wearing live flower necklaces (hey, why not?) — which I thought was a totally original idea. One of my creative friends had to break it to me that my idea wasn’t quite as original as I had thought, but oh well! Note to self: I need to look on Pinterest more often. ;)
So Cricket and I made a few live flower necklaces today while Emma Vance was in preschool. I mention this background detail because my methods weren’t very professional. :/ With a major time crunch, no experience in the area, and an 18-month old (and two dogs) distracting me, I beg your grace when it comes to my super-fancy solutions.
HOW TO: DIY LIVE FLOWER NECKLACES
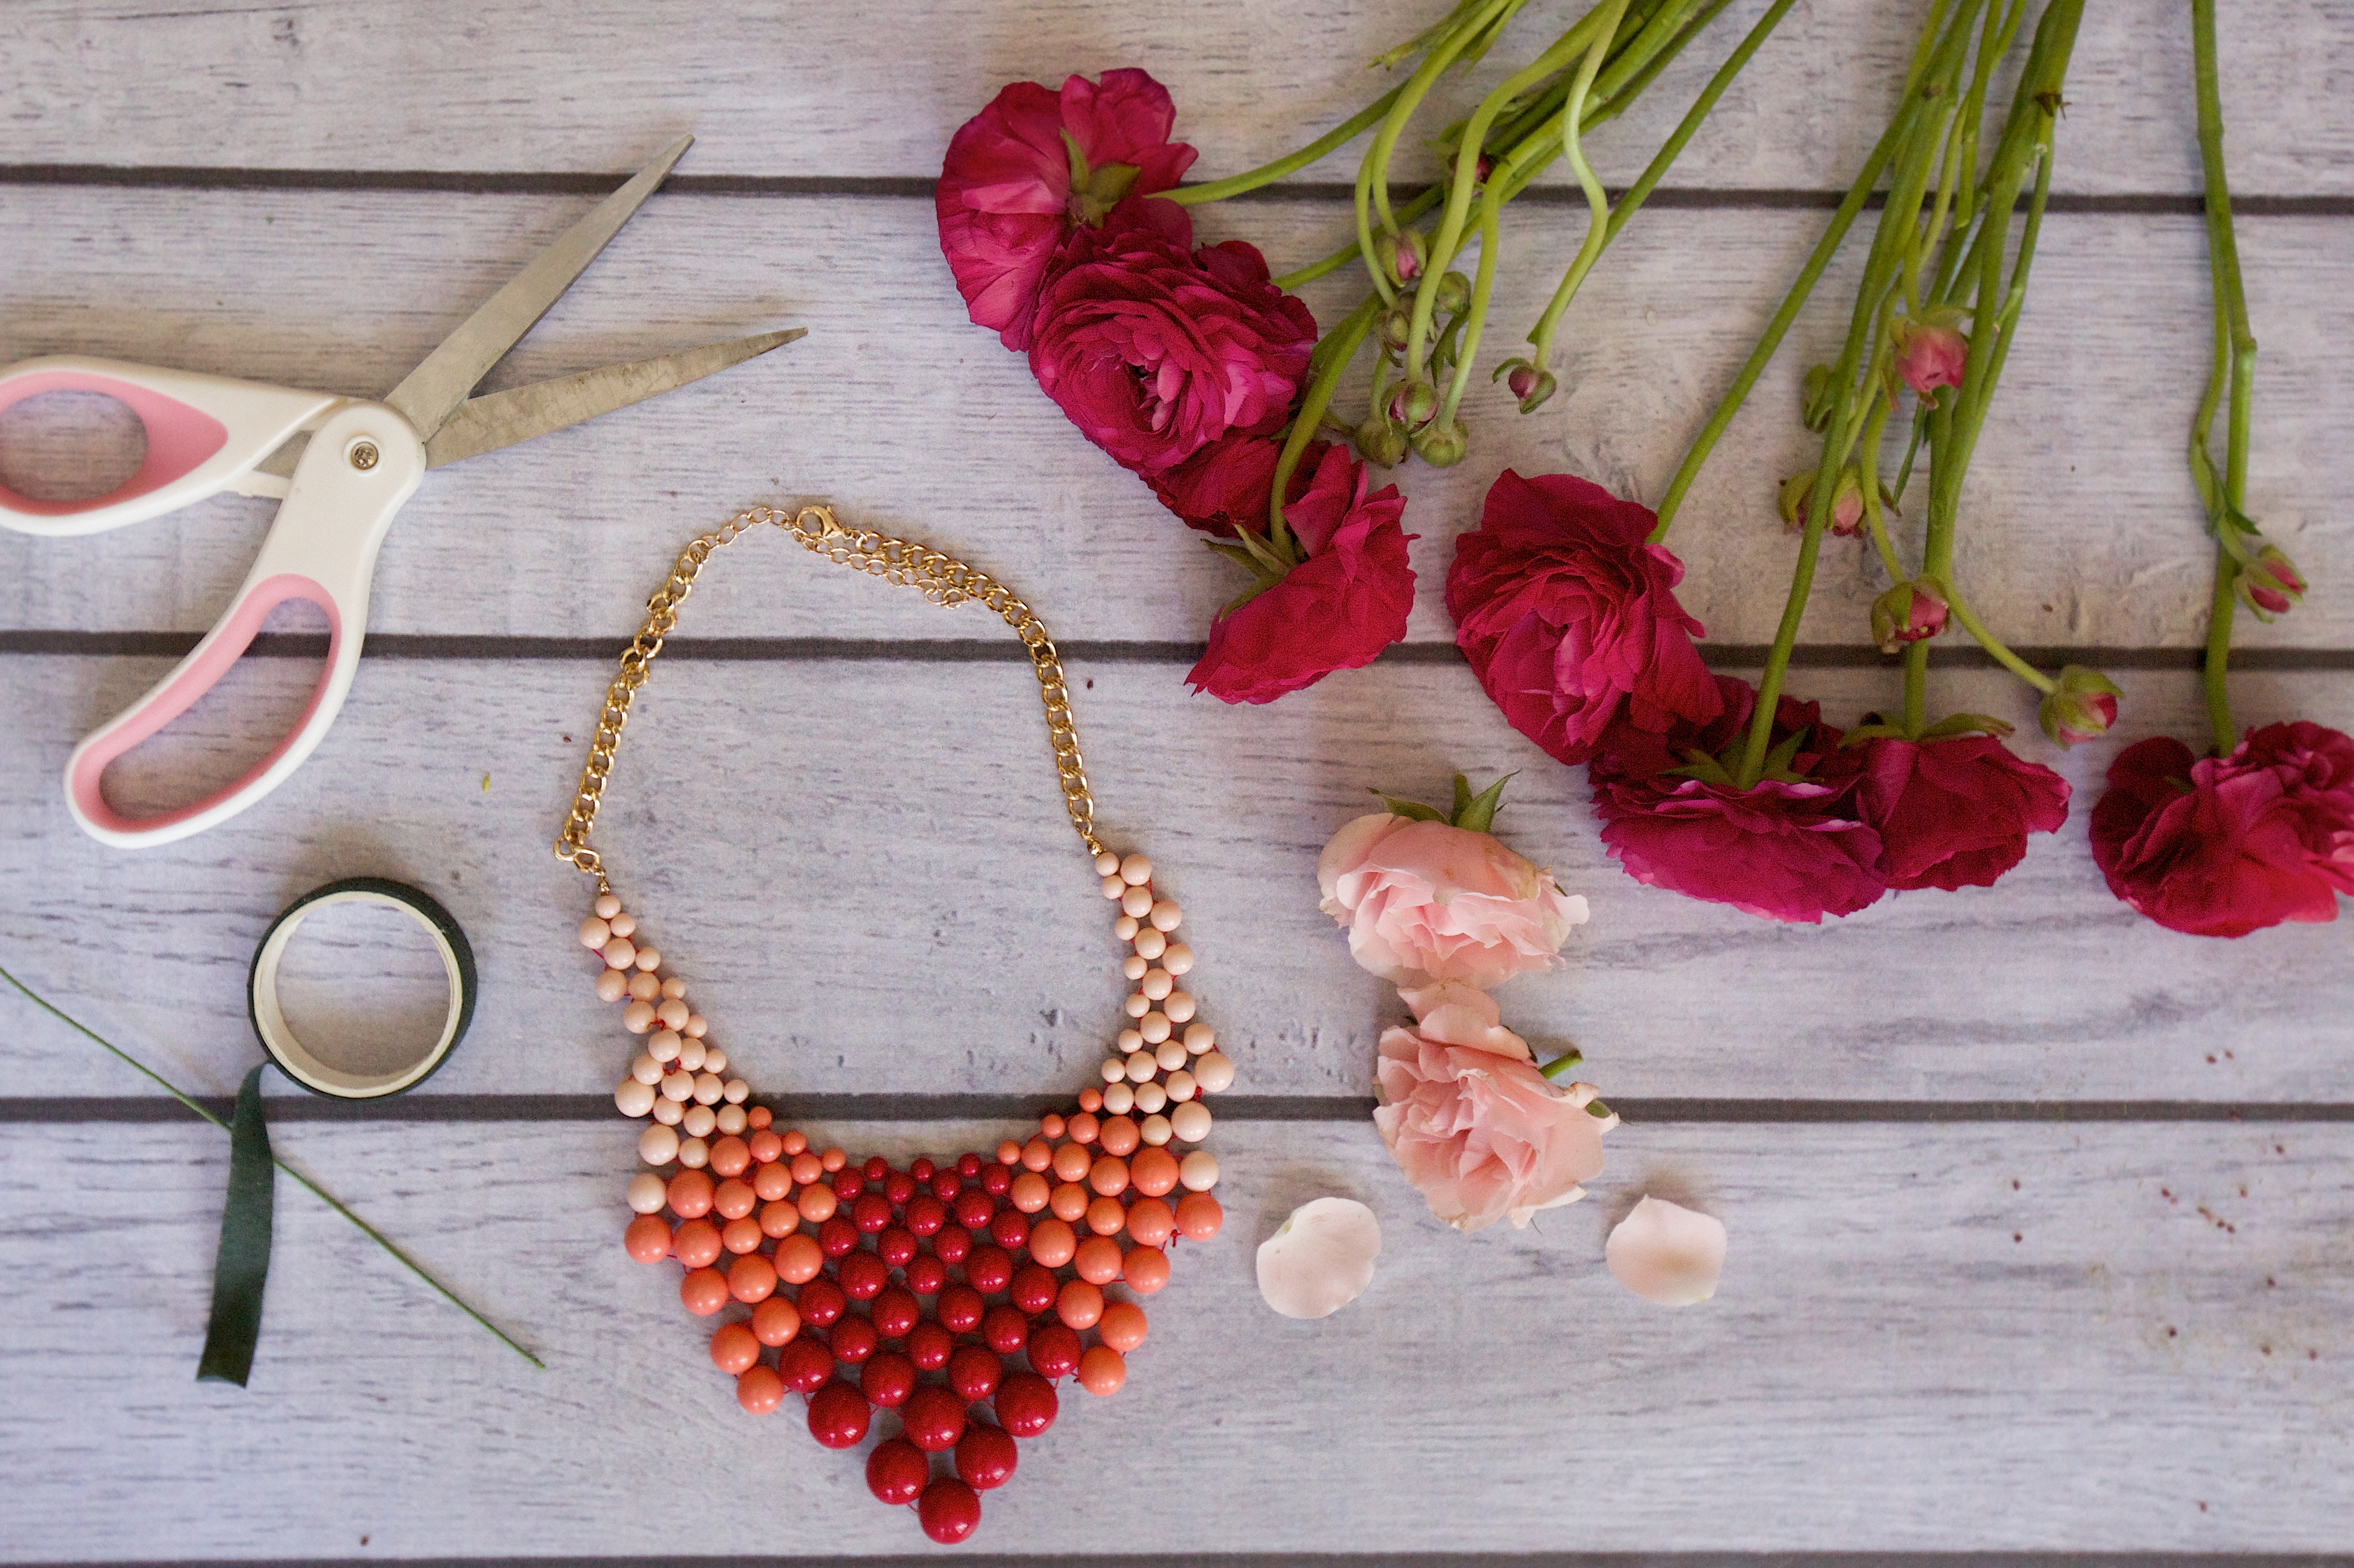
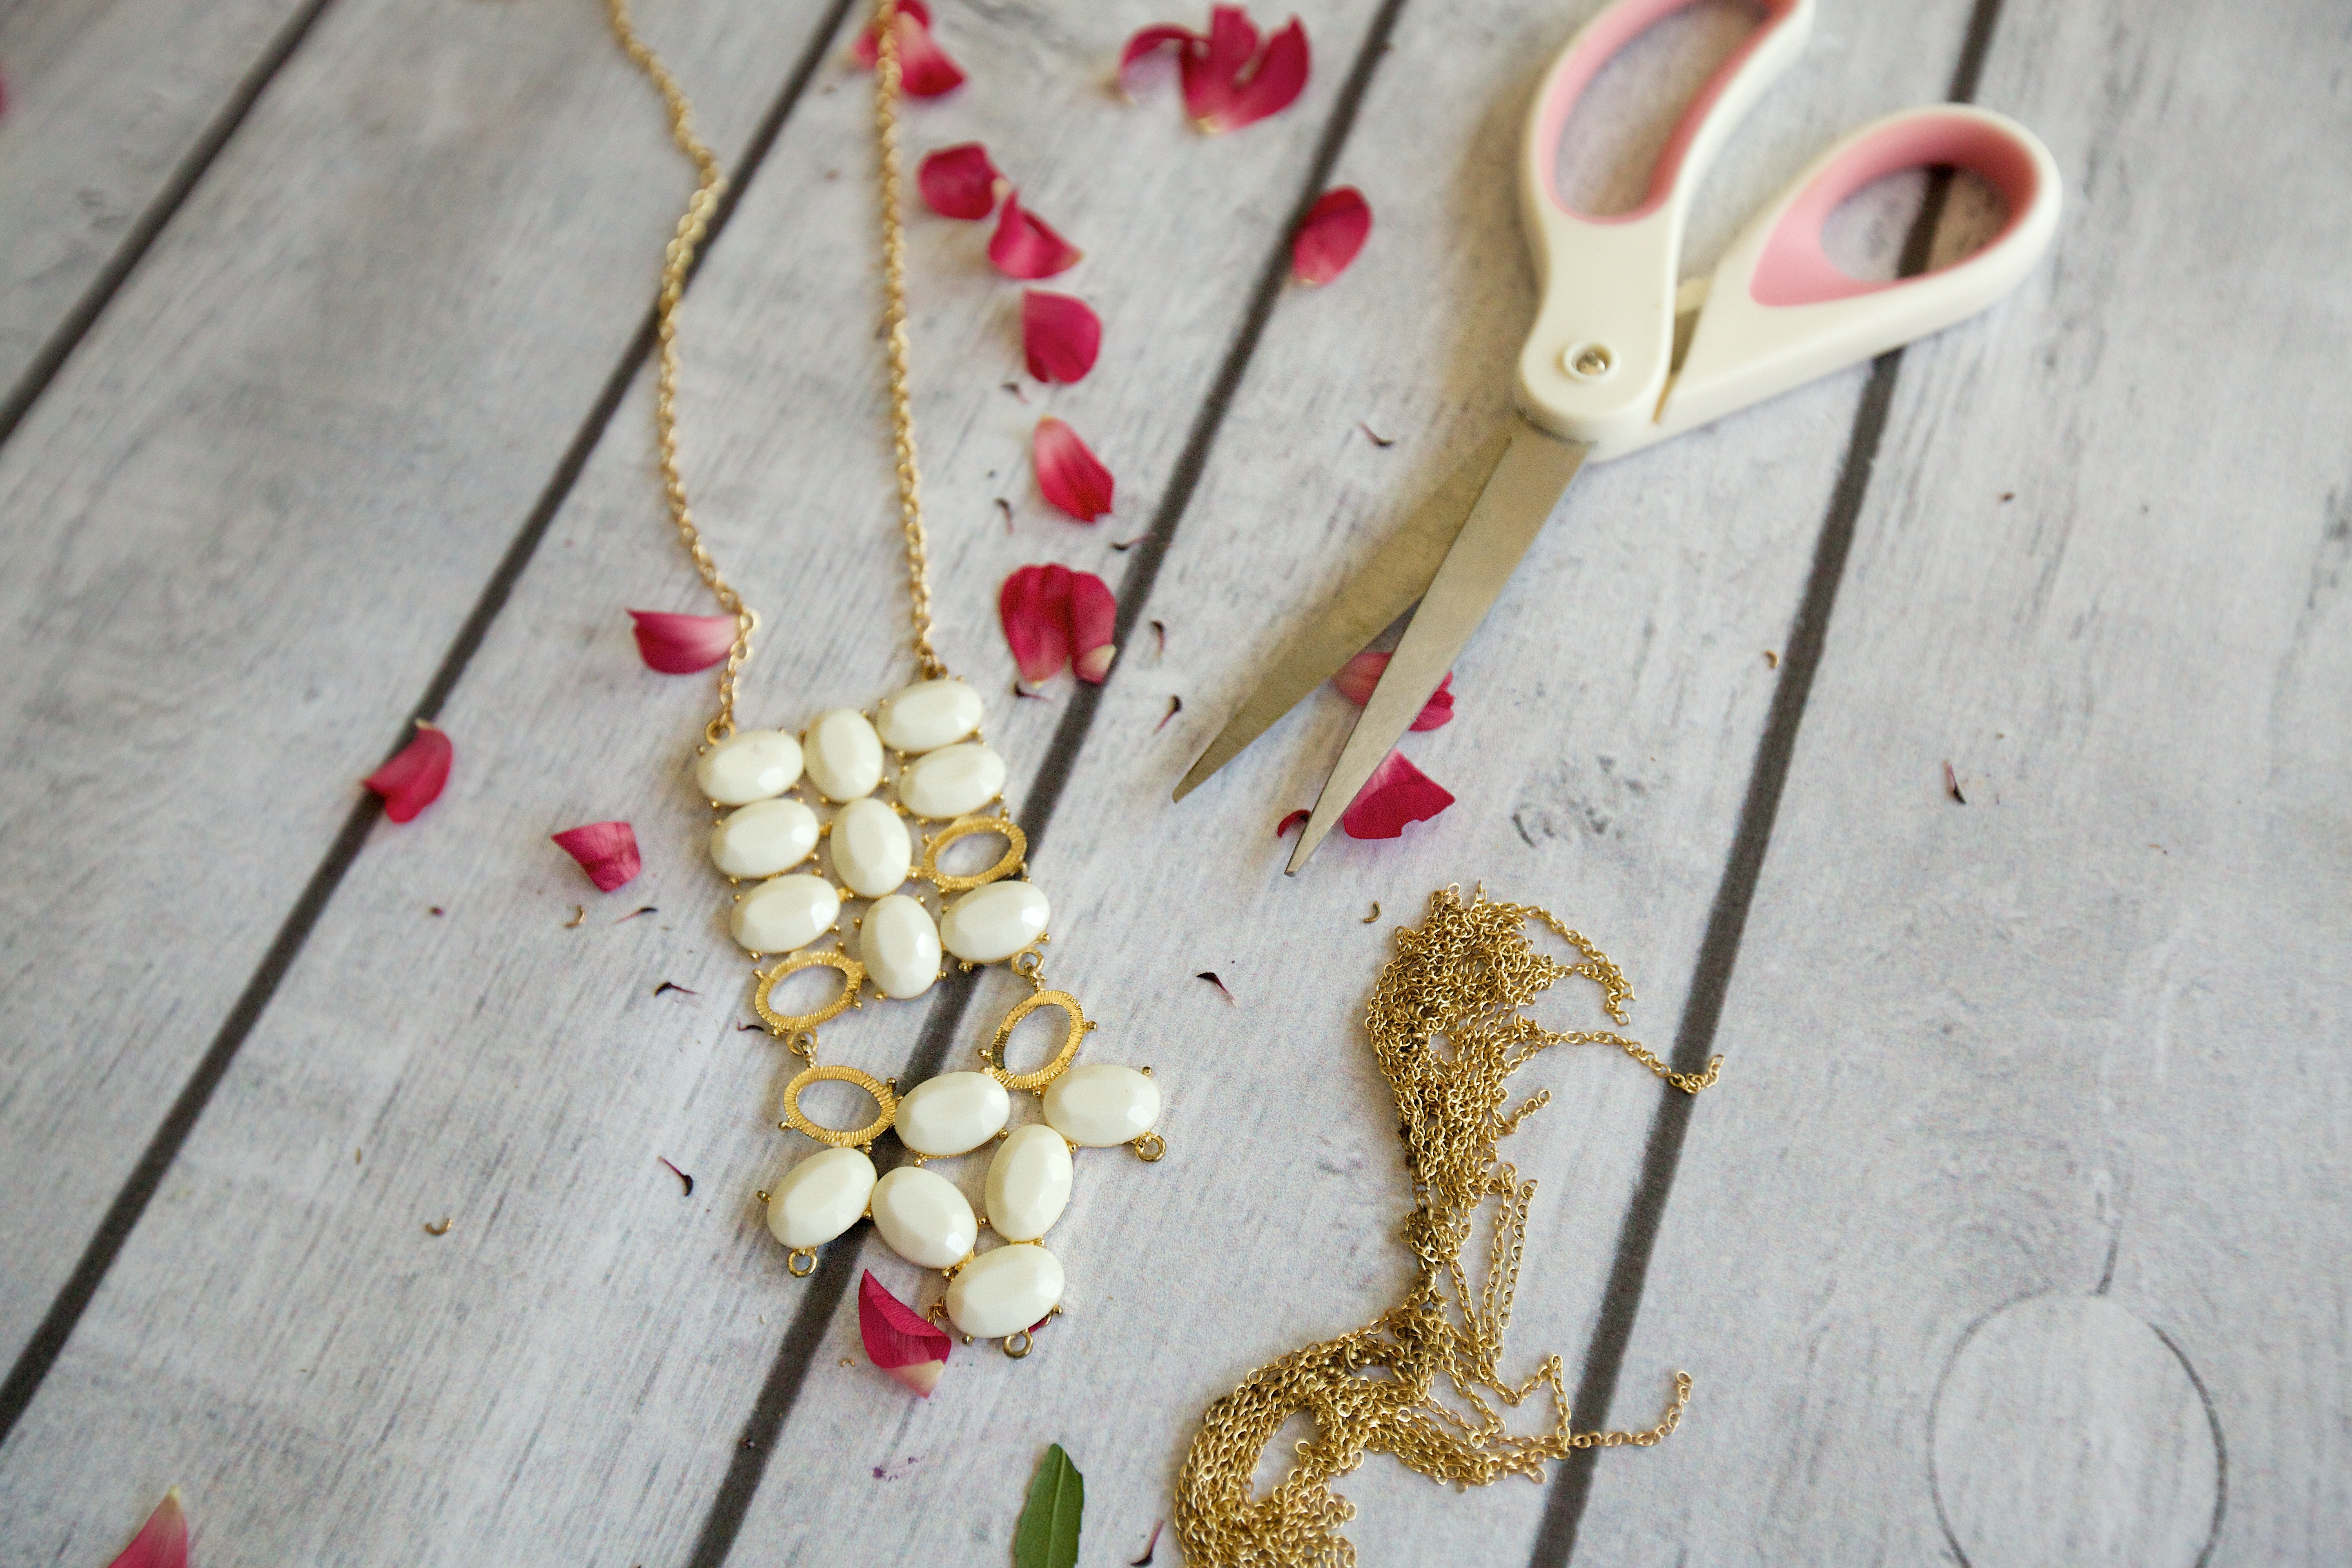
SUPPLIES:
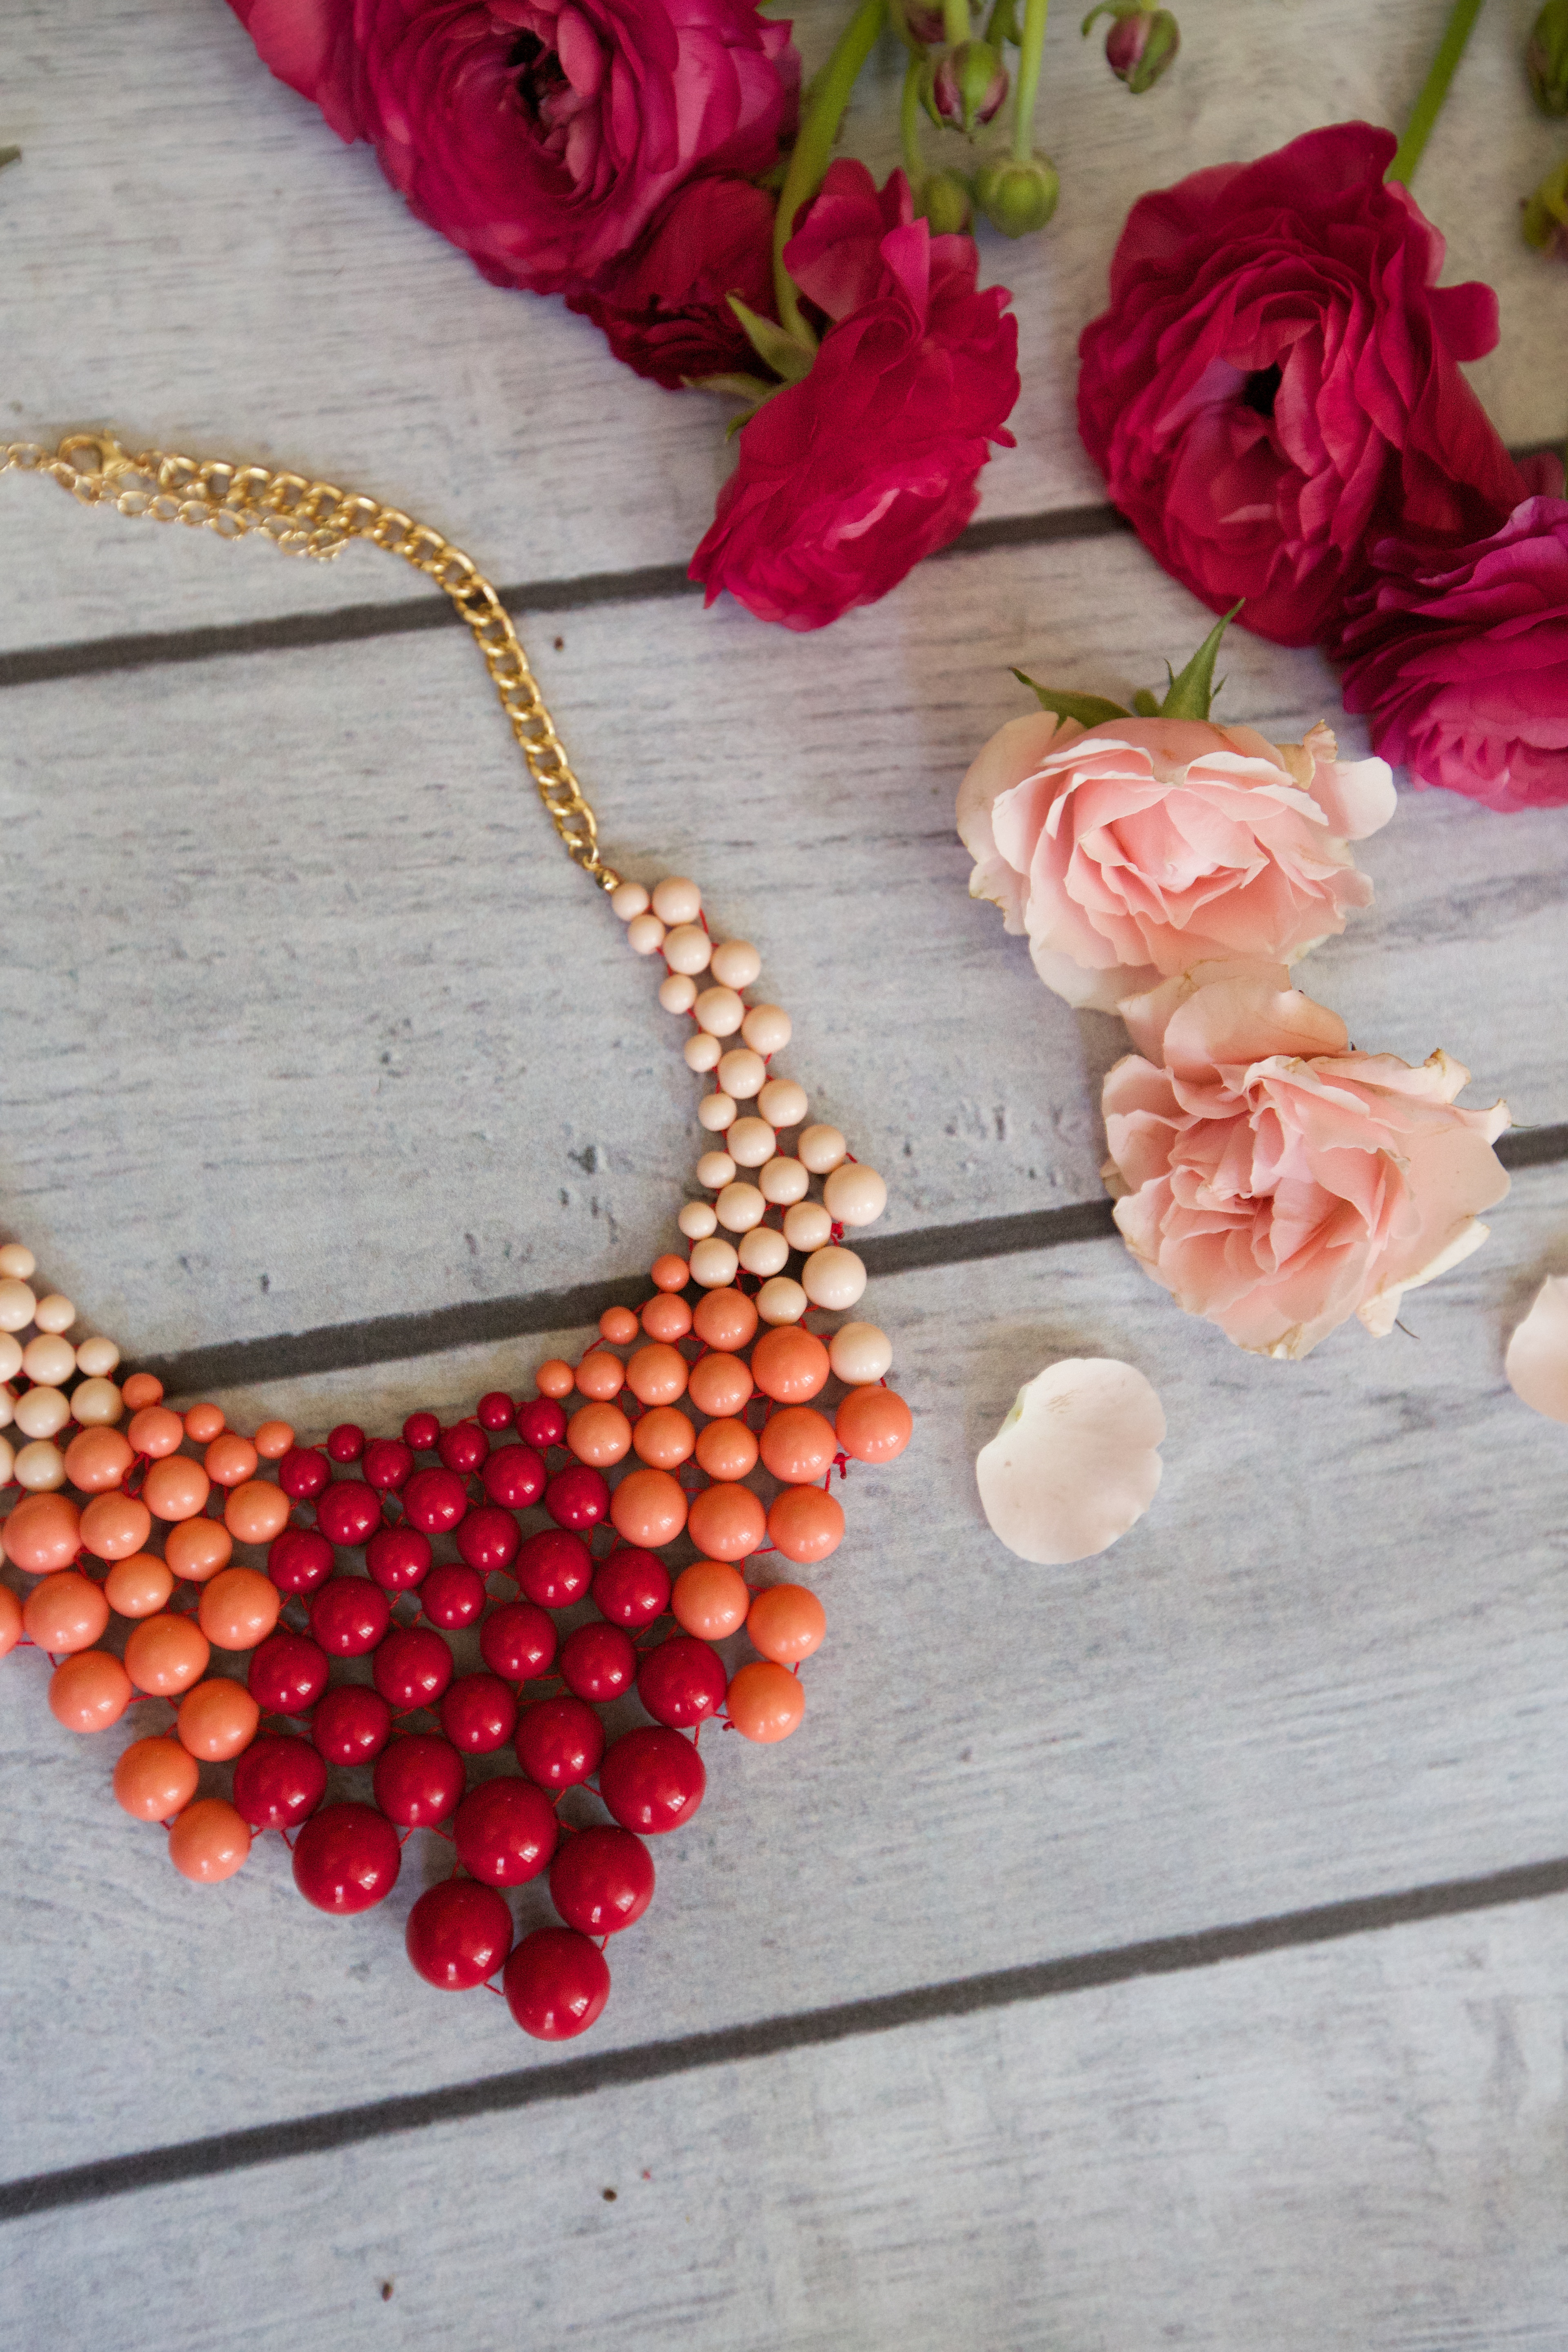
-Variety of flowers (I had two store-bought and foraged the rest)
-Old, junky necklaces
-Scissors
-Floral wire
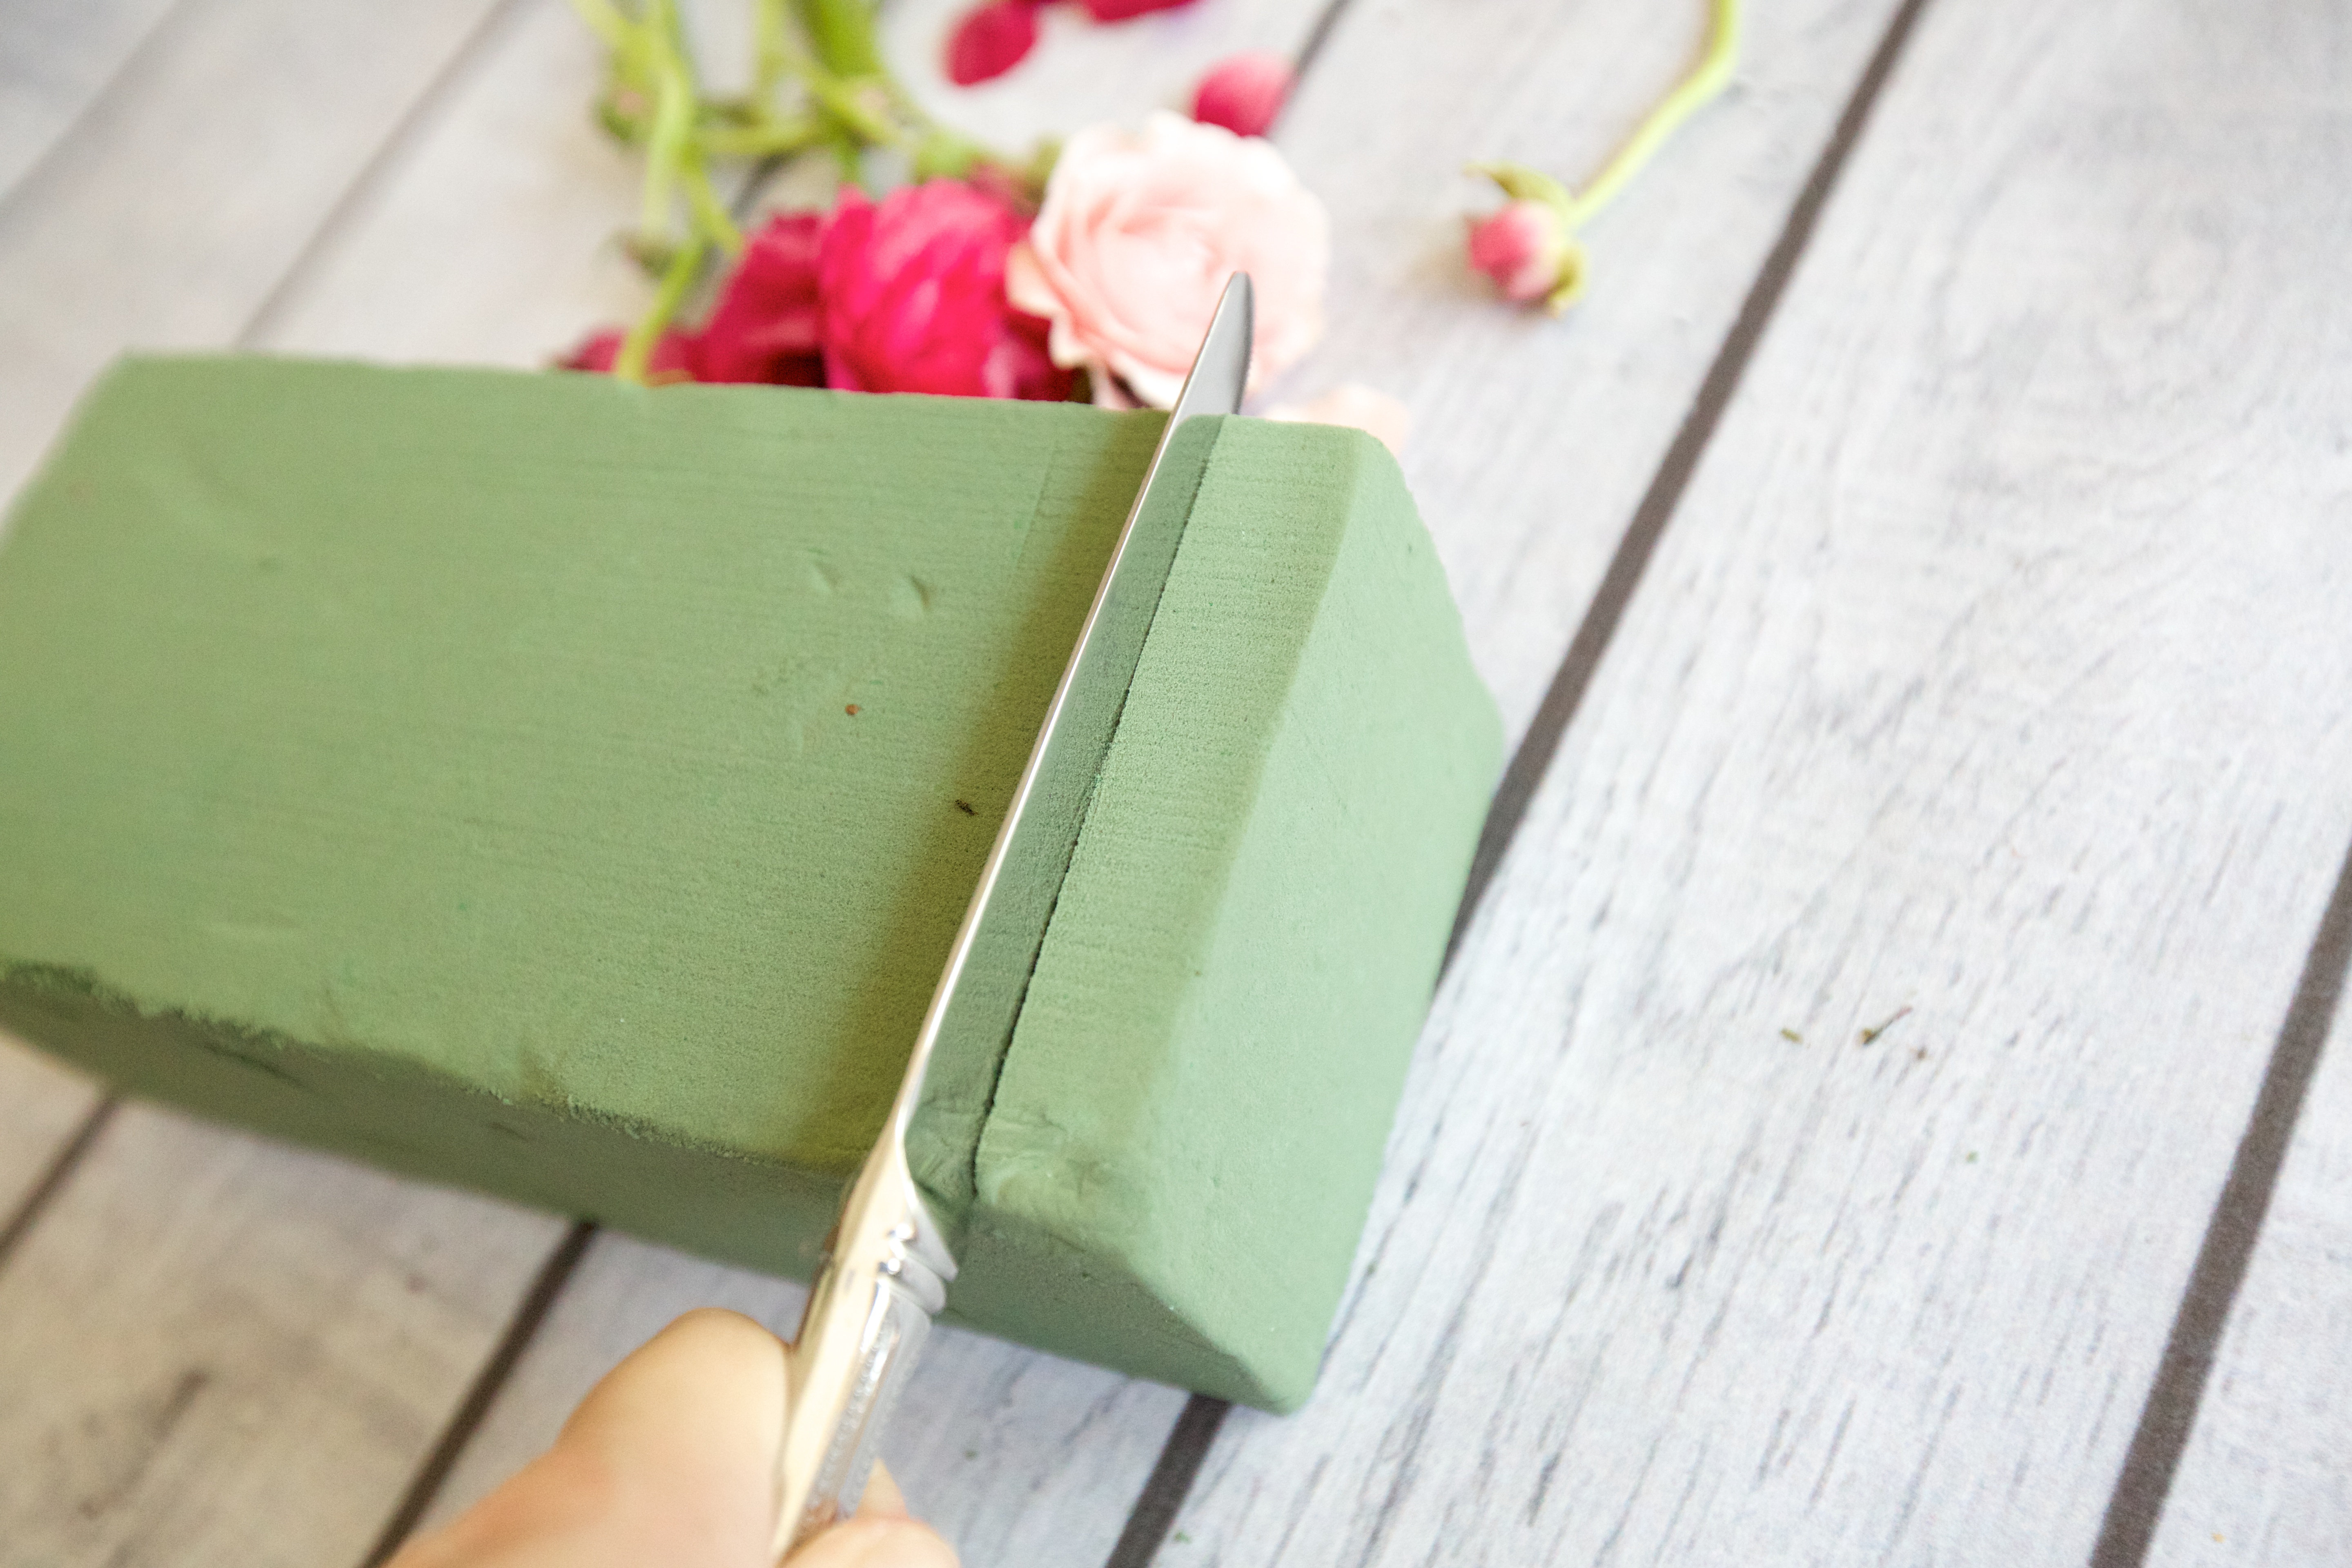
-Floral foam
-Floral tape or duct tape ;)
DIRECTIONS:
I’m not going to treat y’all like crafting newbies, because let’s be honest — Pinterest and blogs have made us all a little wiser these days. So I’ll save the monotonous step-by-step, and just tell you how this all came about:
I have a TON of old, out-dated, broken (thanks, kids!) necklaces and thought I could easily repurpose them for this project. In fact, you could really convert any necklace you want since this is a temporary piece, and then just convert it back once the flowers die. I like that each necklace yields a totally different result. Beware, in my experience the necklaces turned out way BIGGER than I imagined when looking at the original pieces, so if you want to end up with a dainty piece, start with a really small necklace. If you want a truly from-scratch necklace, you could take a small plastic bin (I’m thinking like half of an empty straight-pin box), glue a chain to it, stuff floral foam inside, and get the same type of look without having to sacrifice an existing necklace.
I thought before I started that I’d attach the flowers using floral tape and floral wire, but ended up mostly using duct tape. (Fancy, right?) However, my necklaces weren’t meant to last a long time or be scrutinized while at a party or whatever, so you may have more patience (and time) than I did. If you can do it right, do it. Otherwise, grab your hubby’s duct tape and be okay with being imperfect. ;)
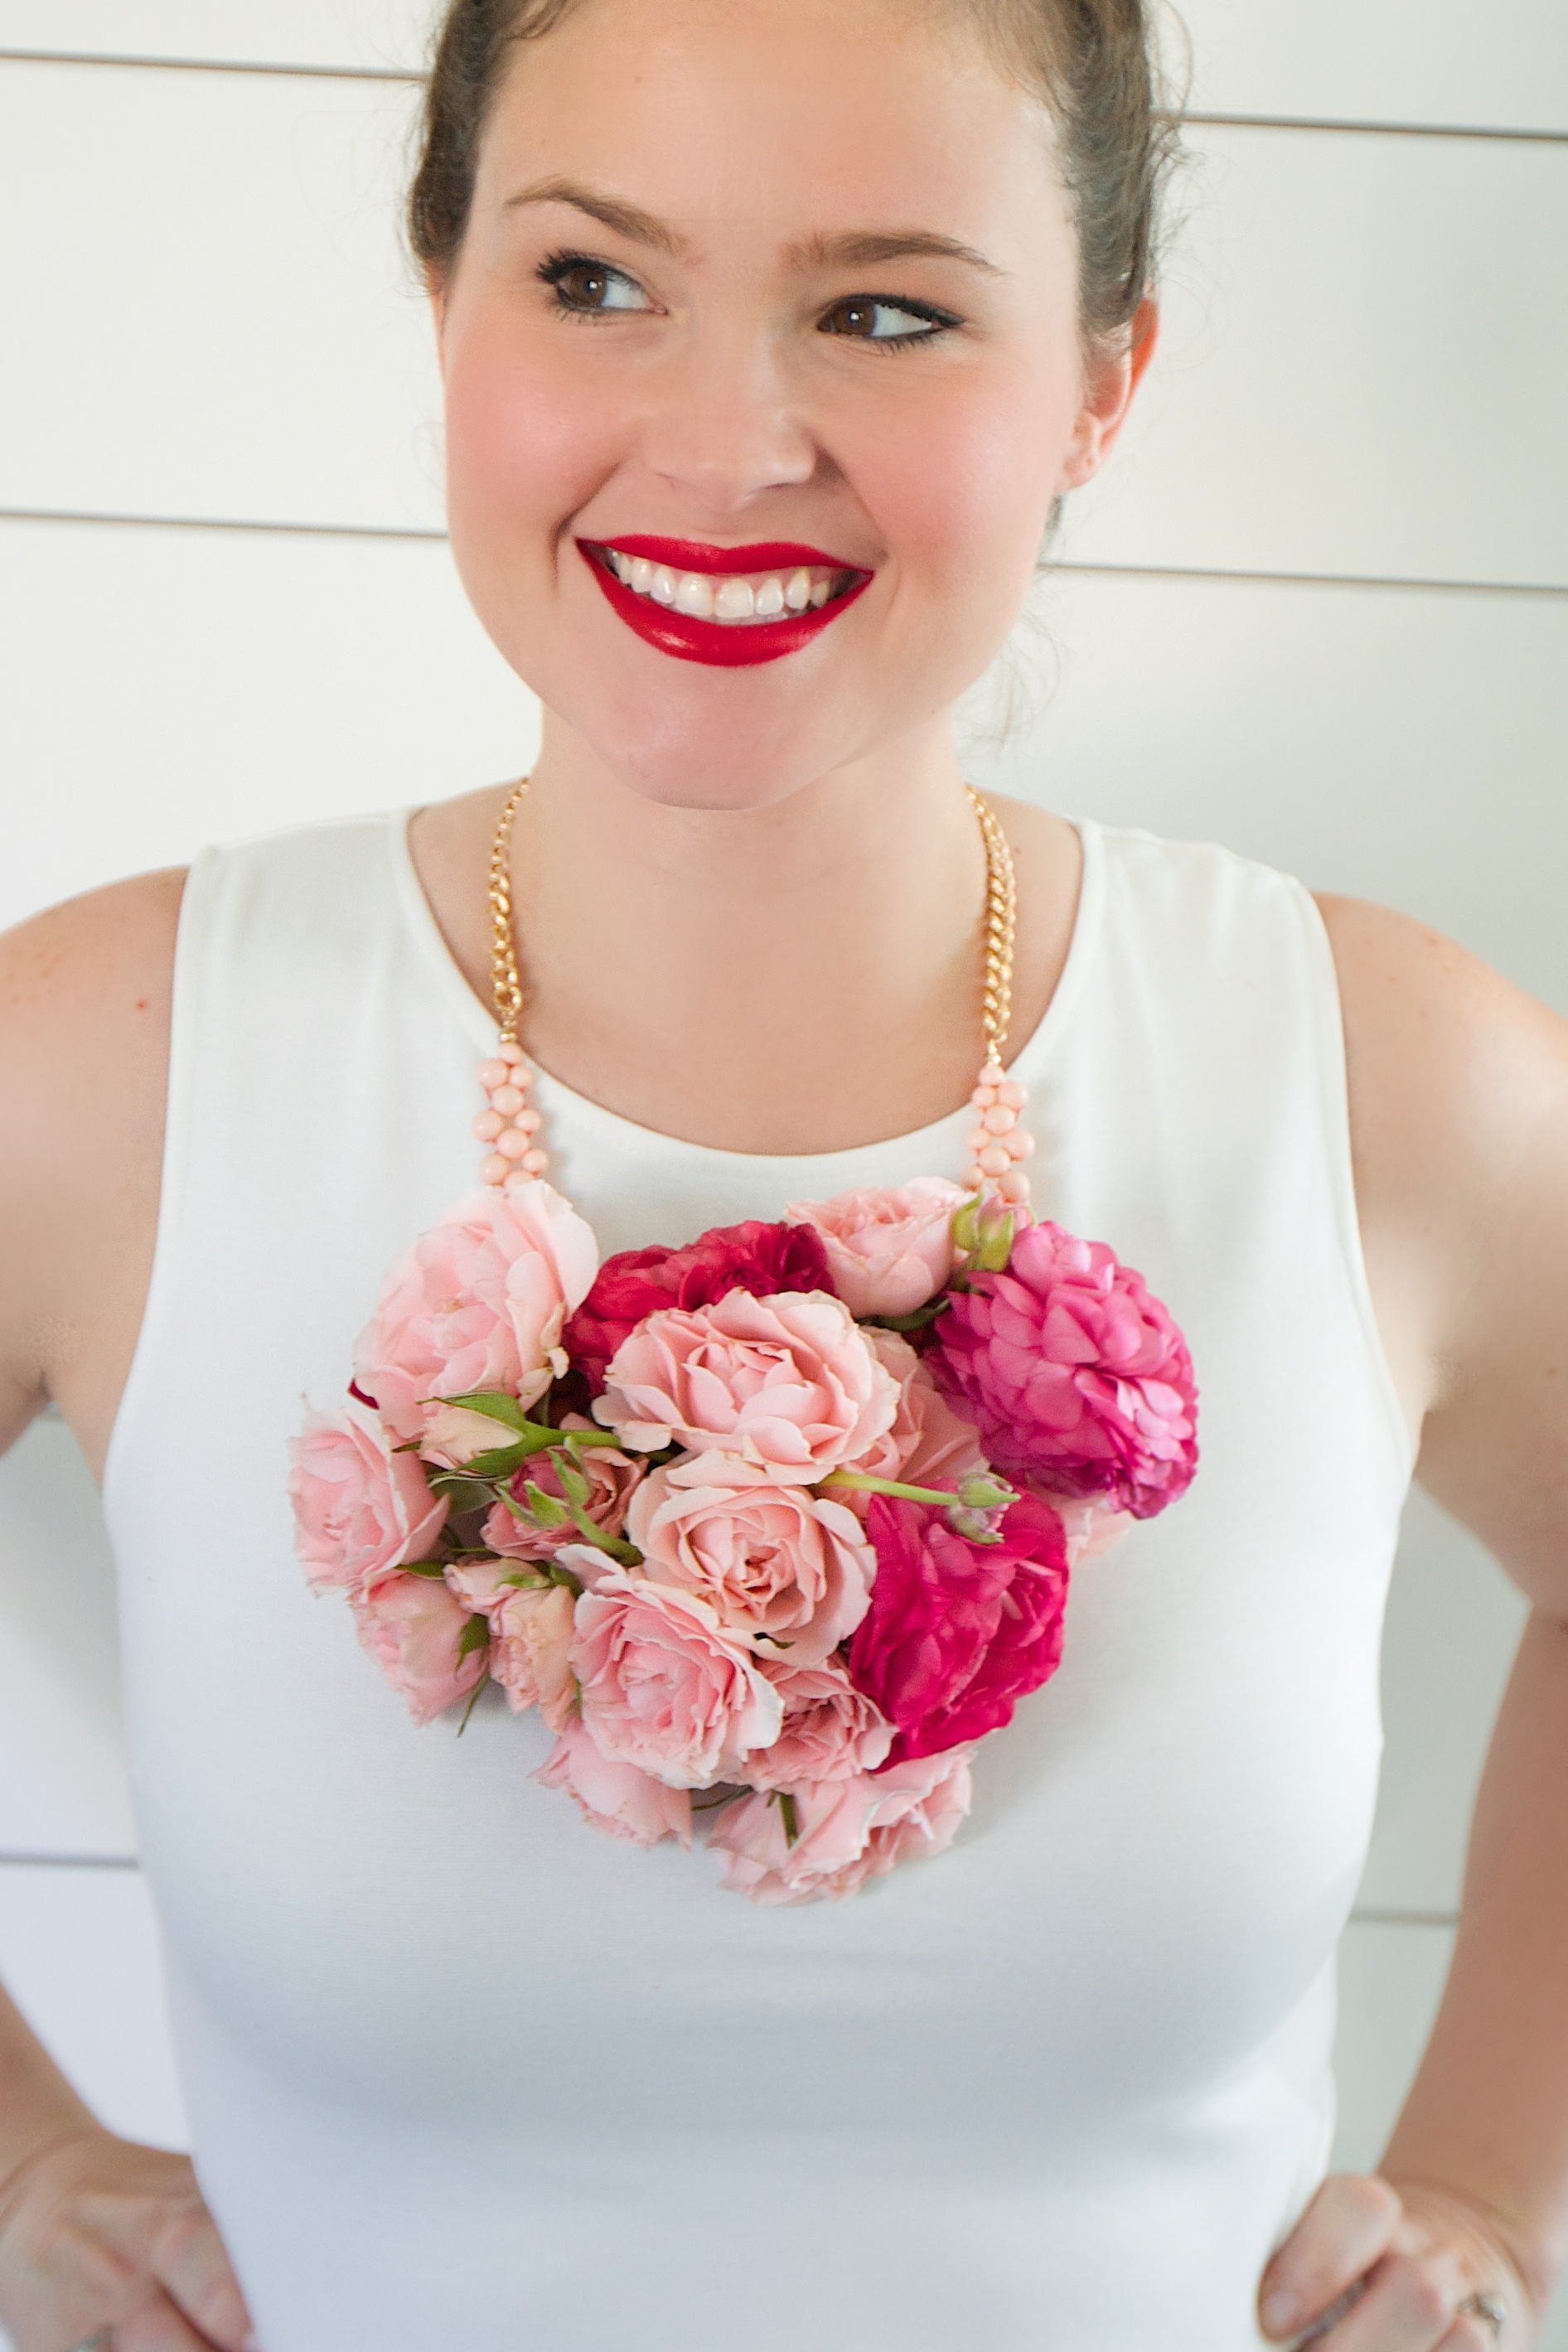
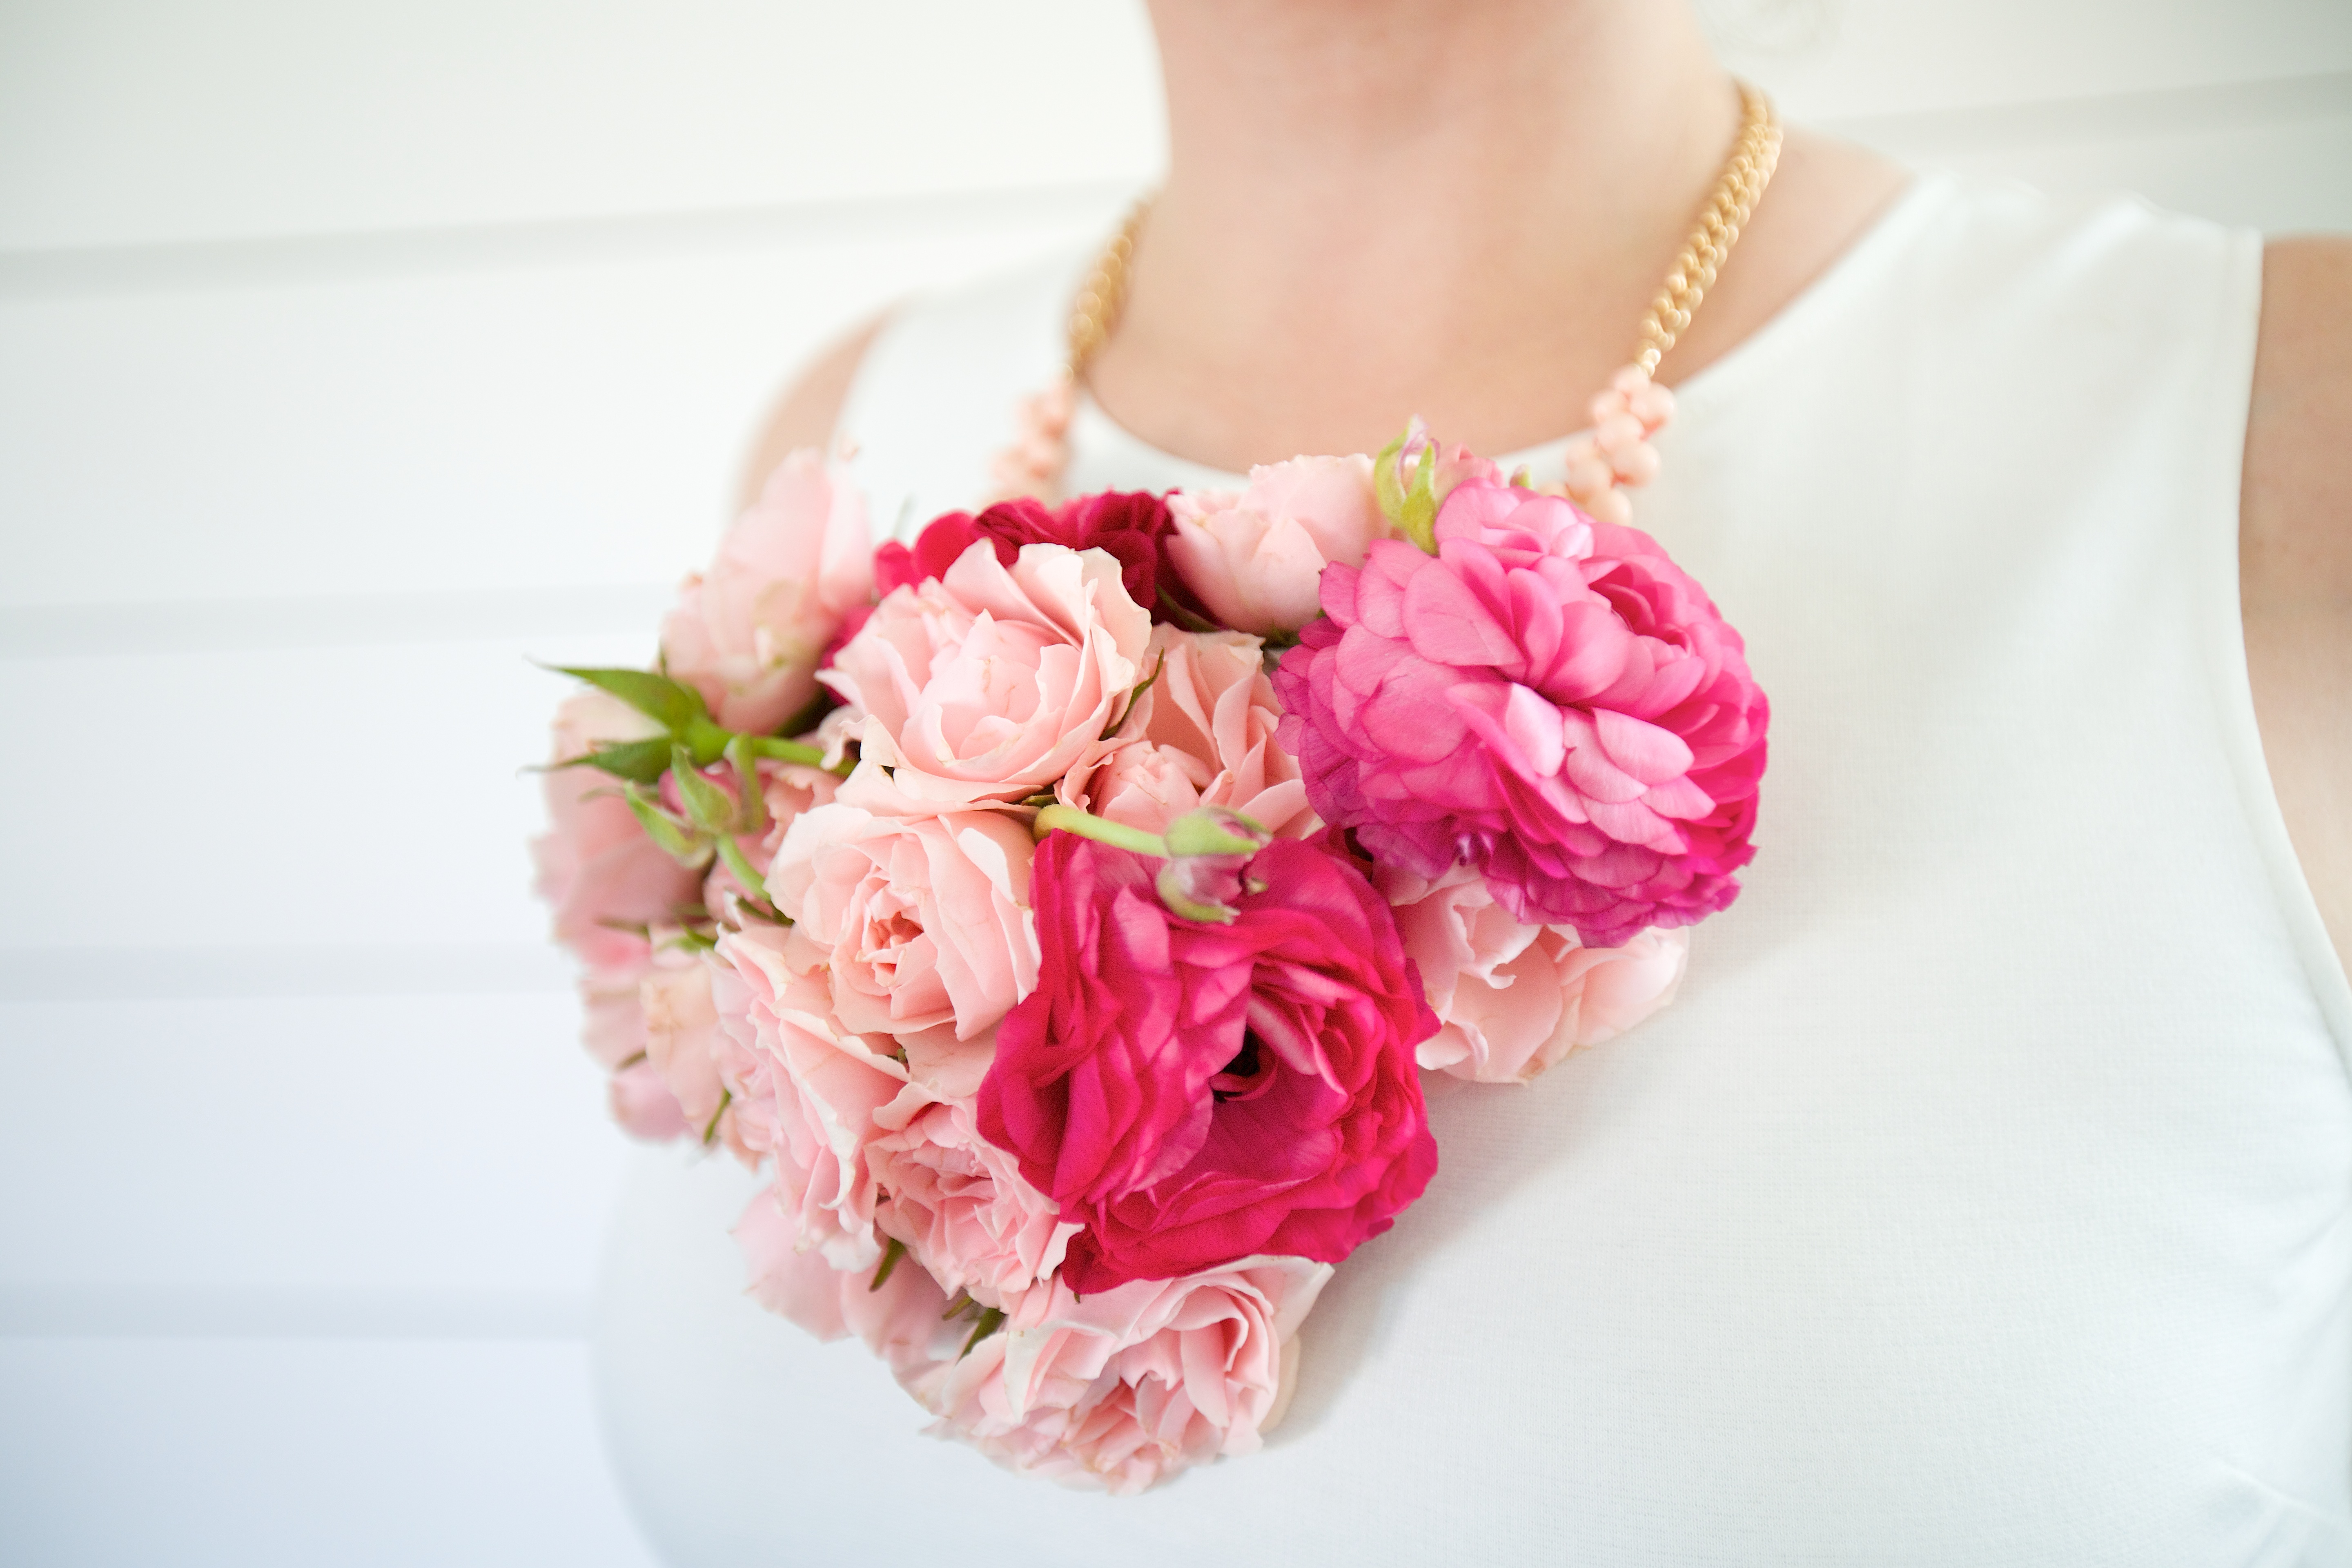
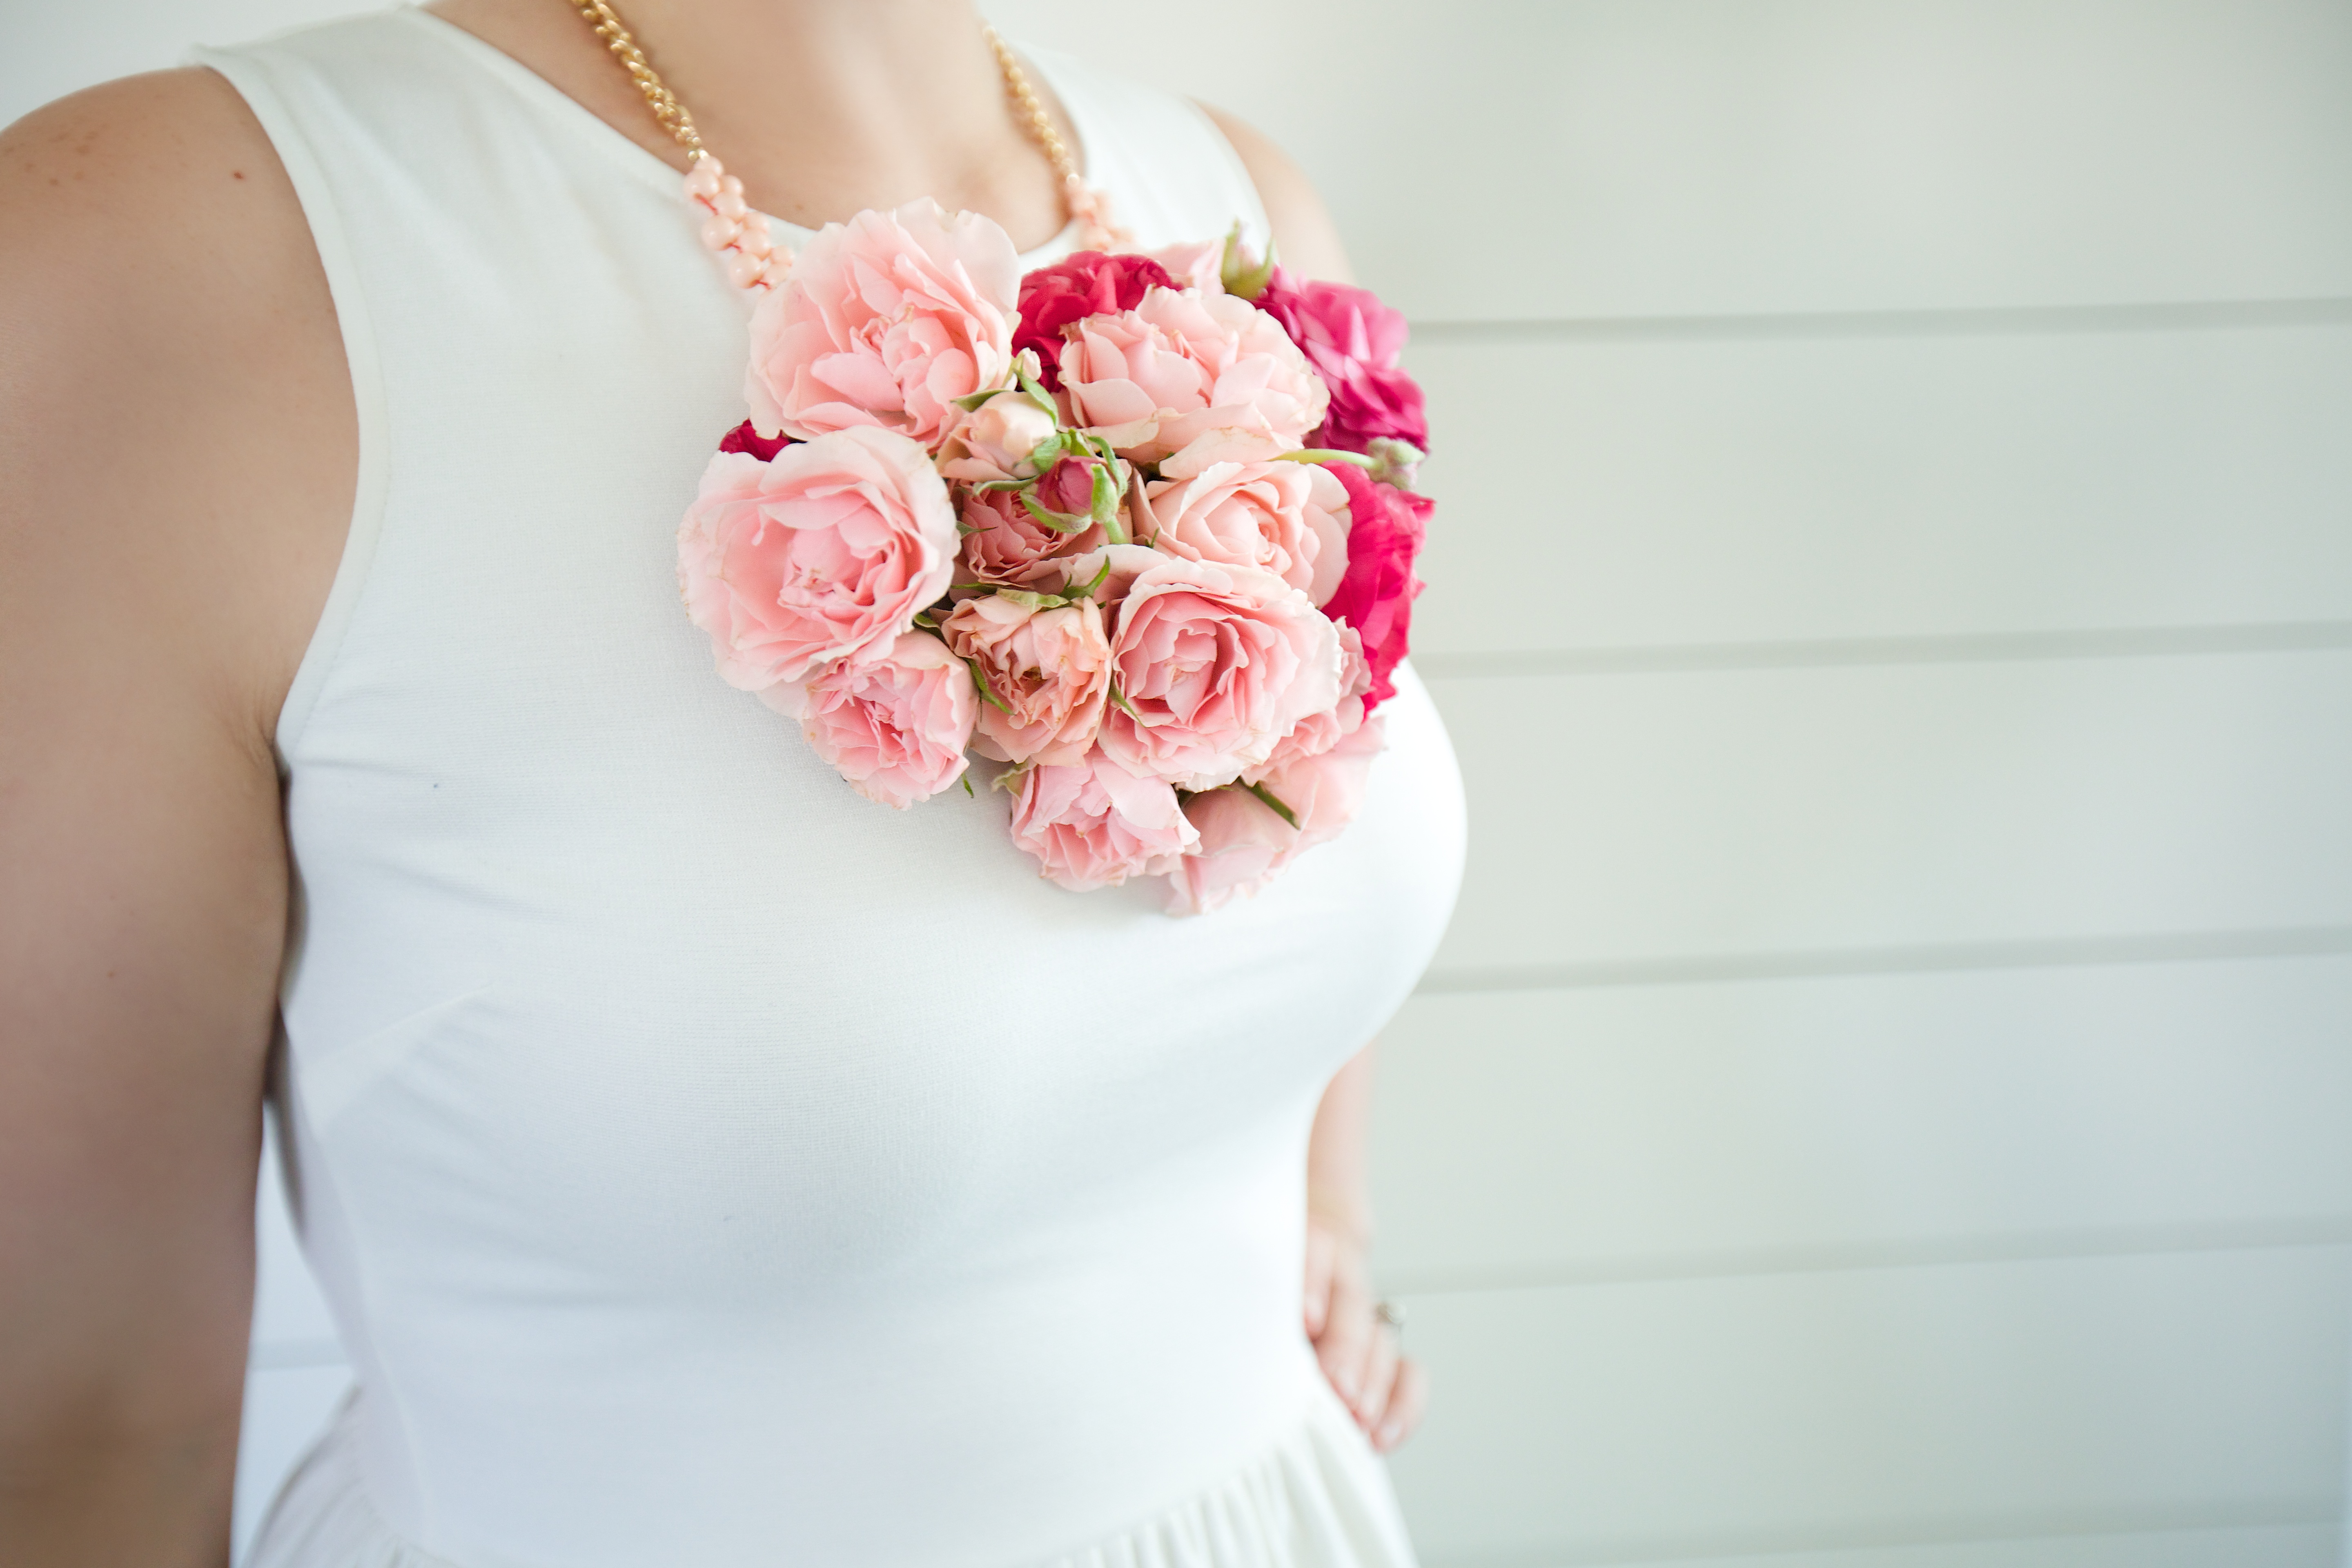
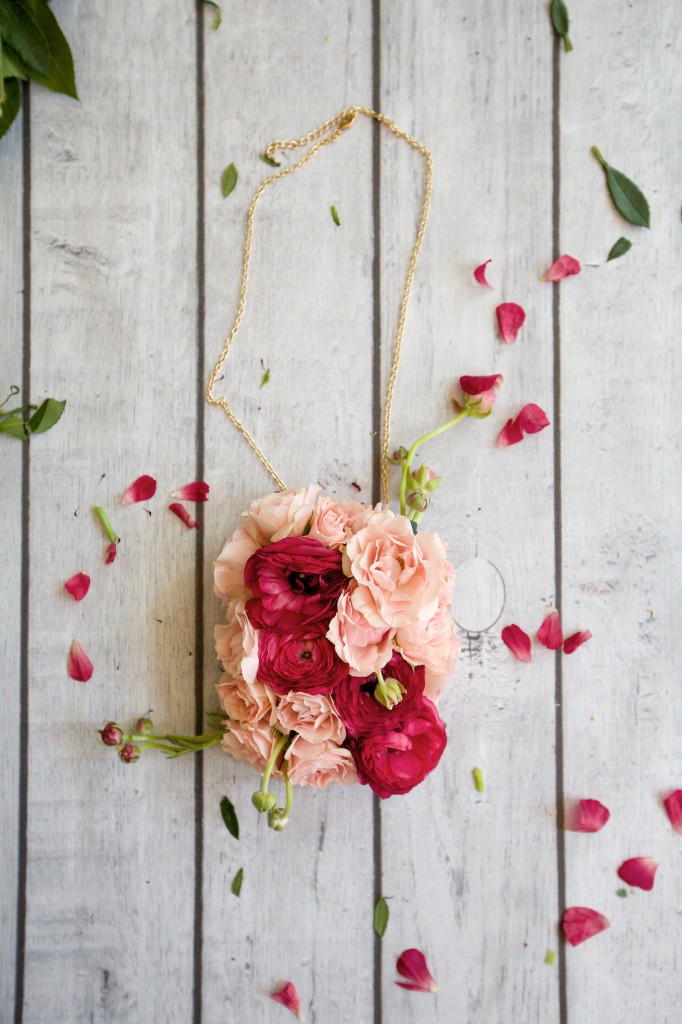
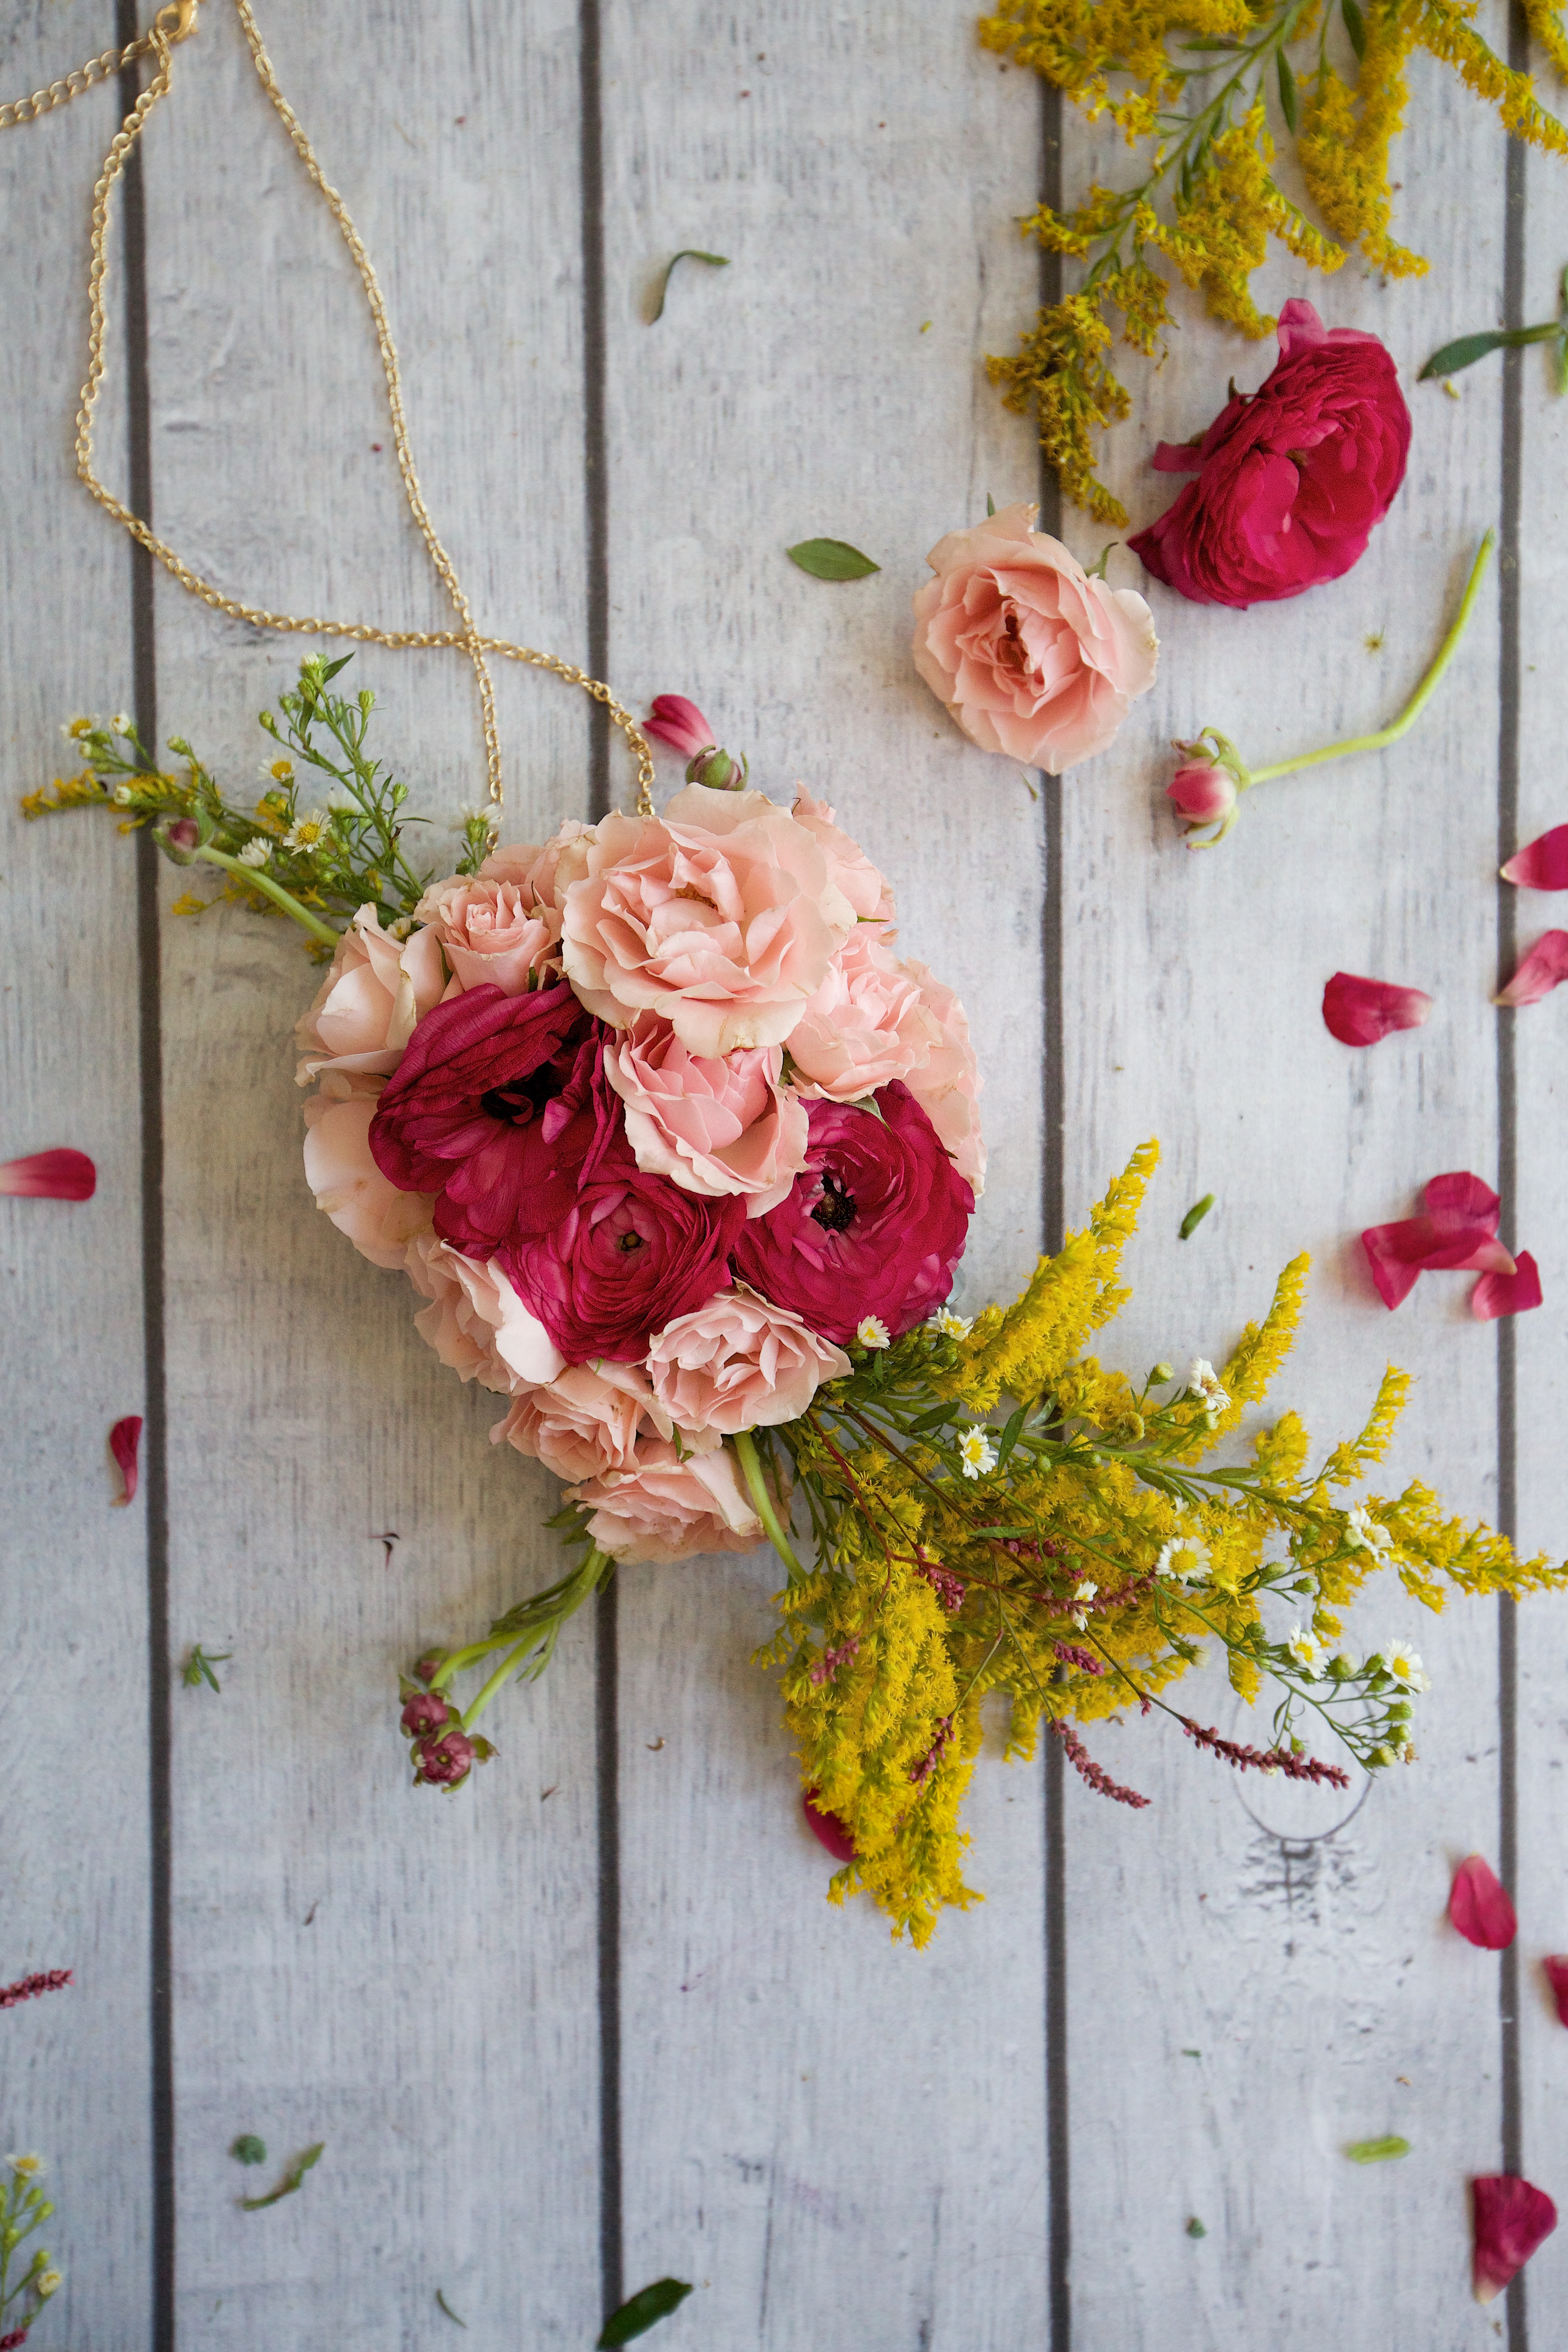
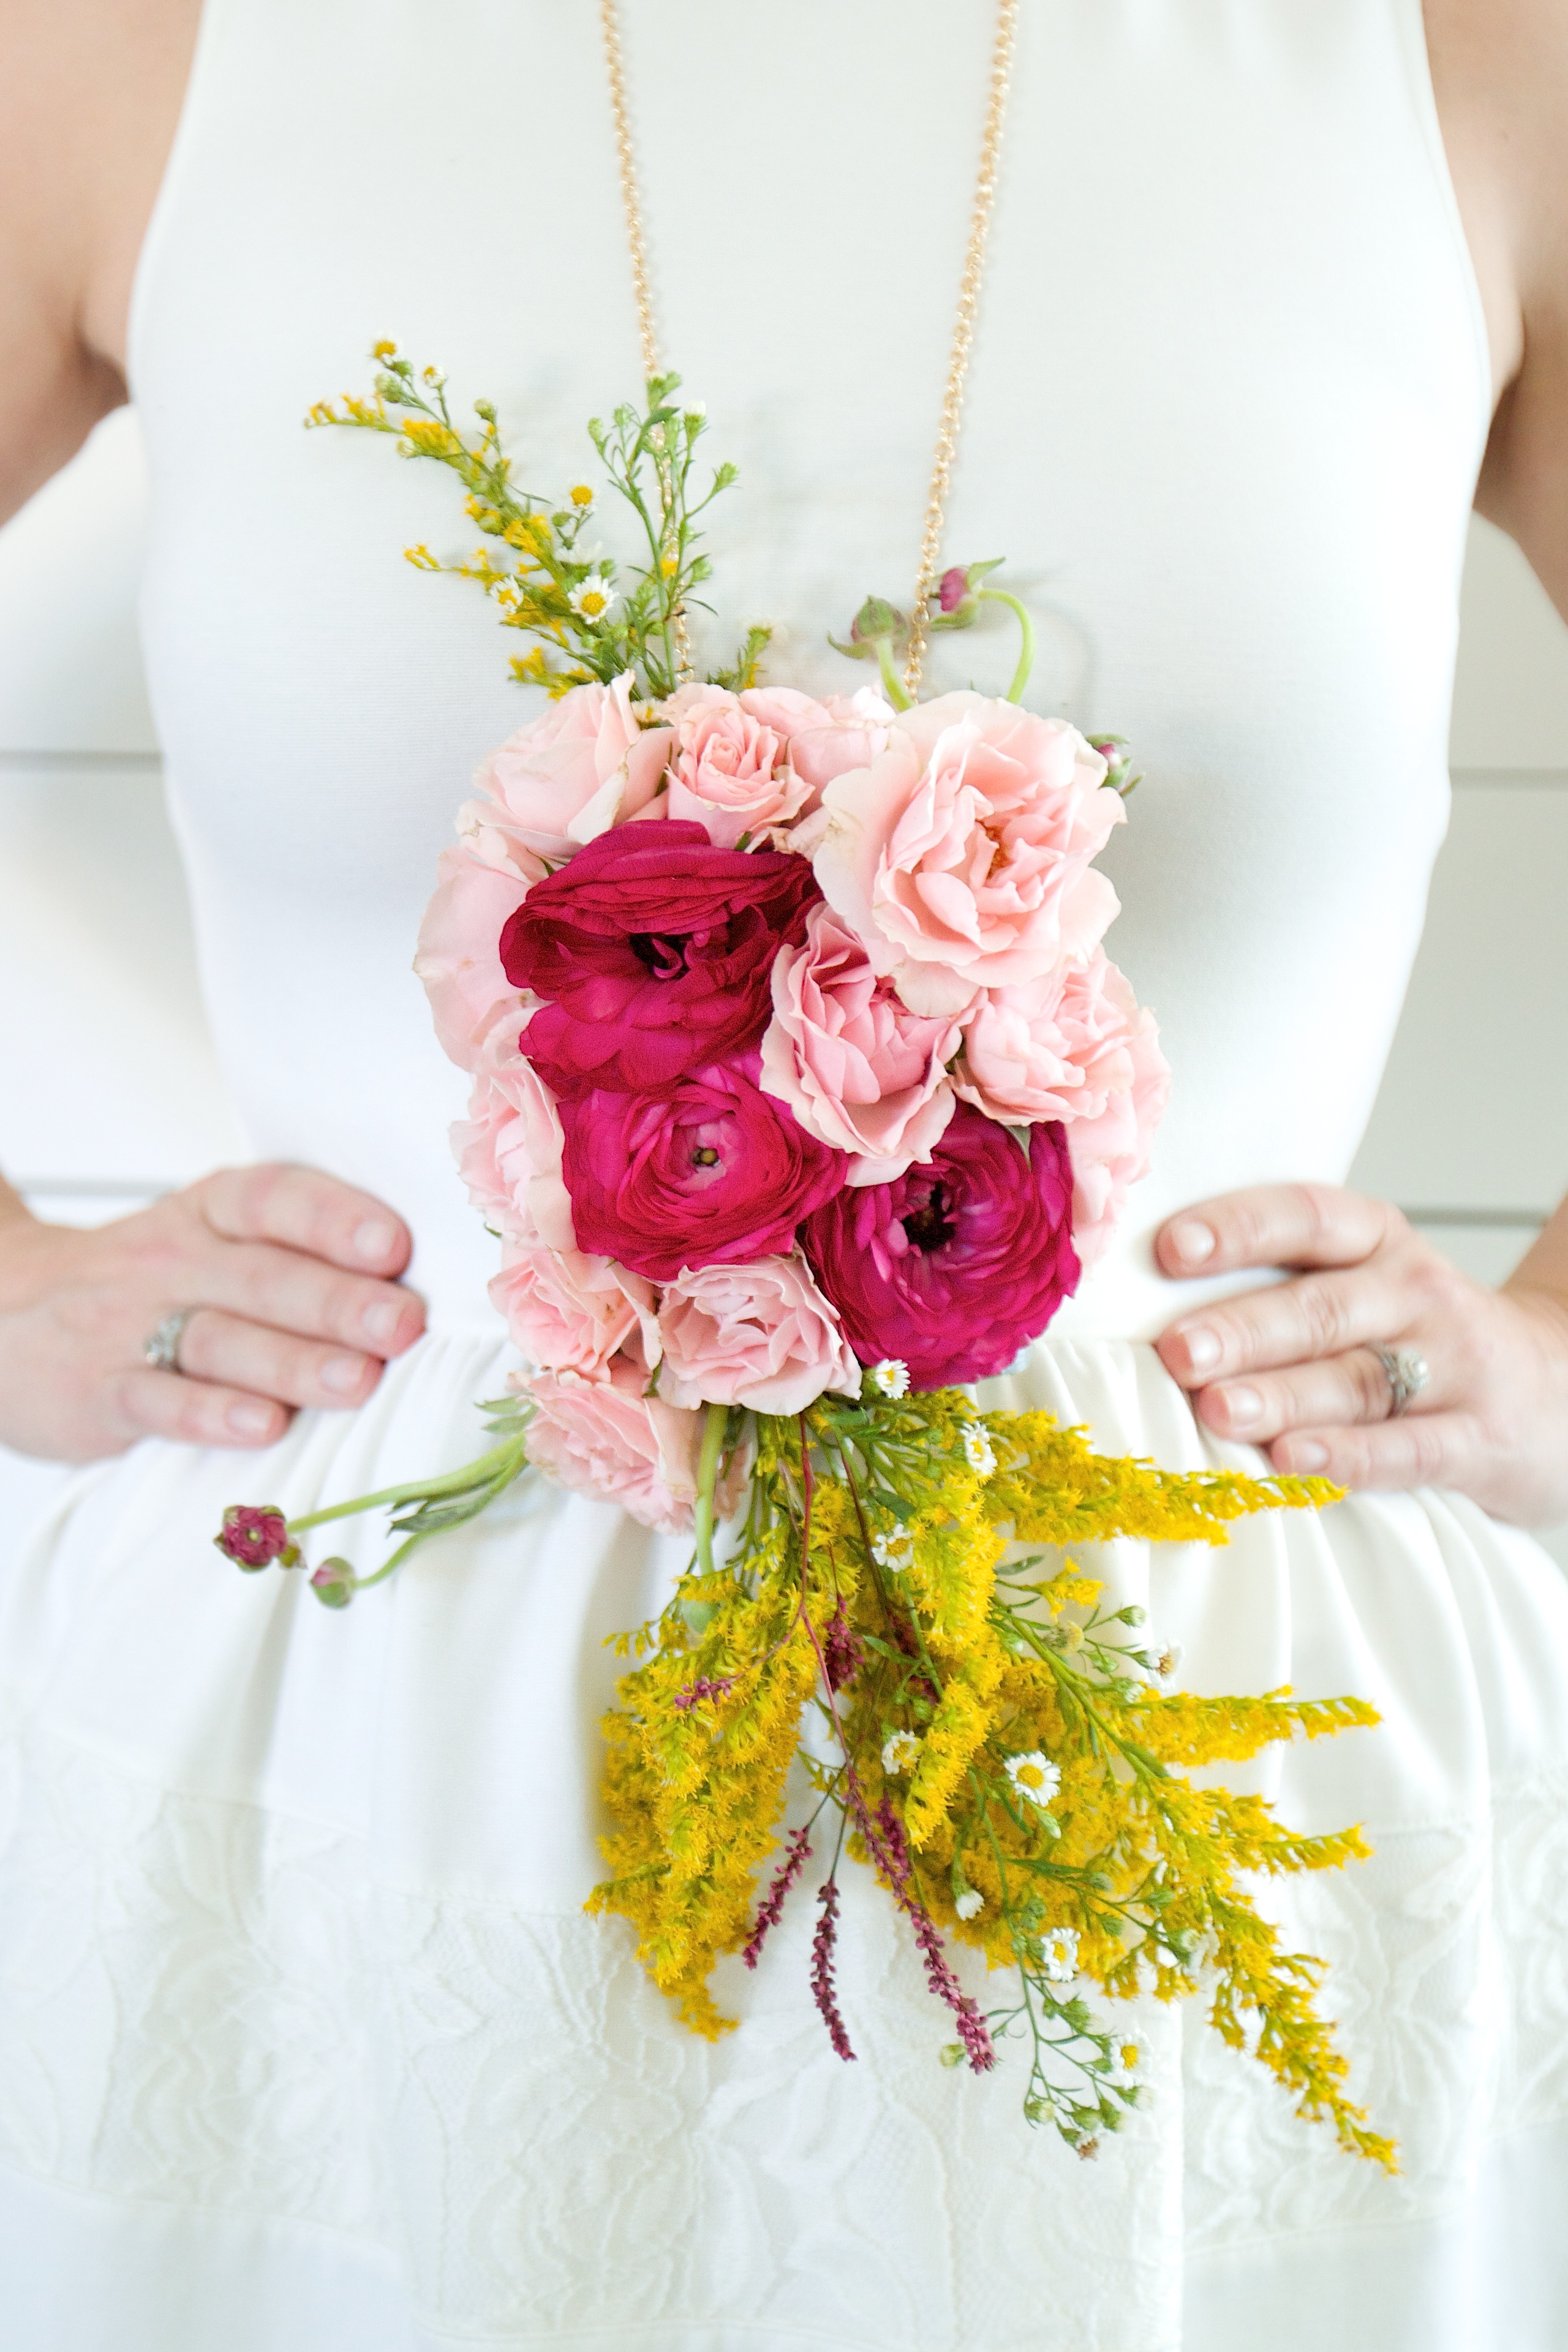
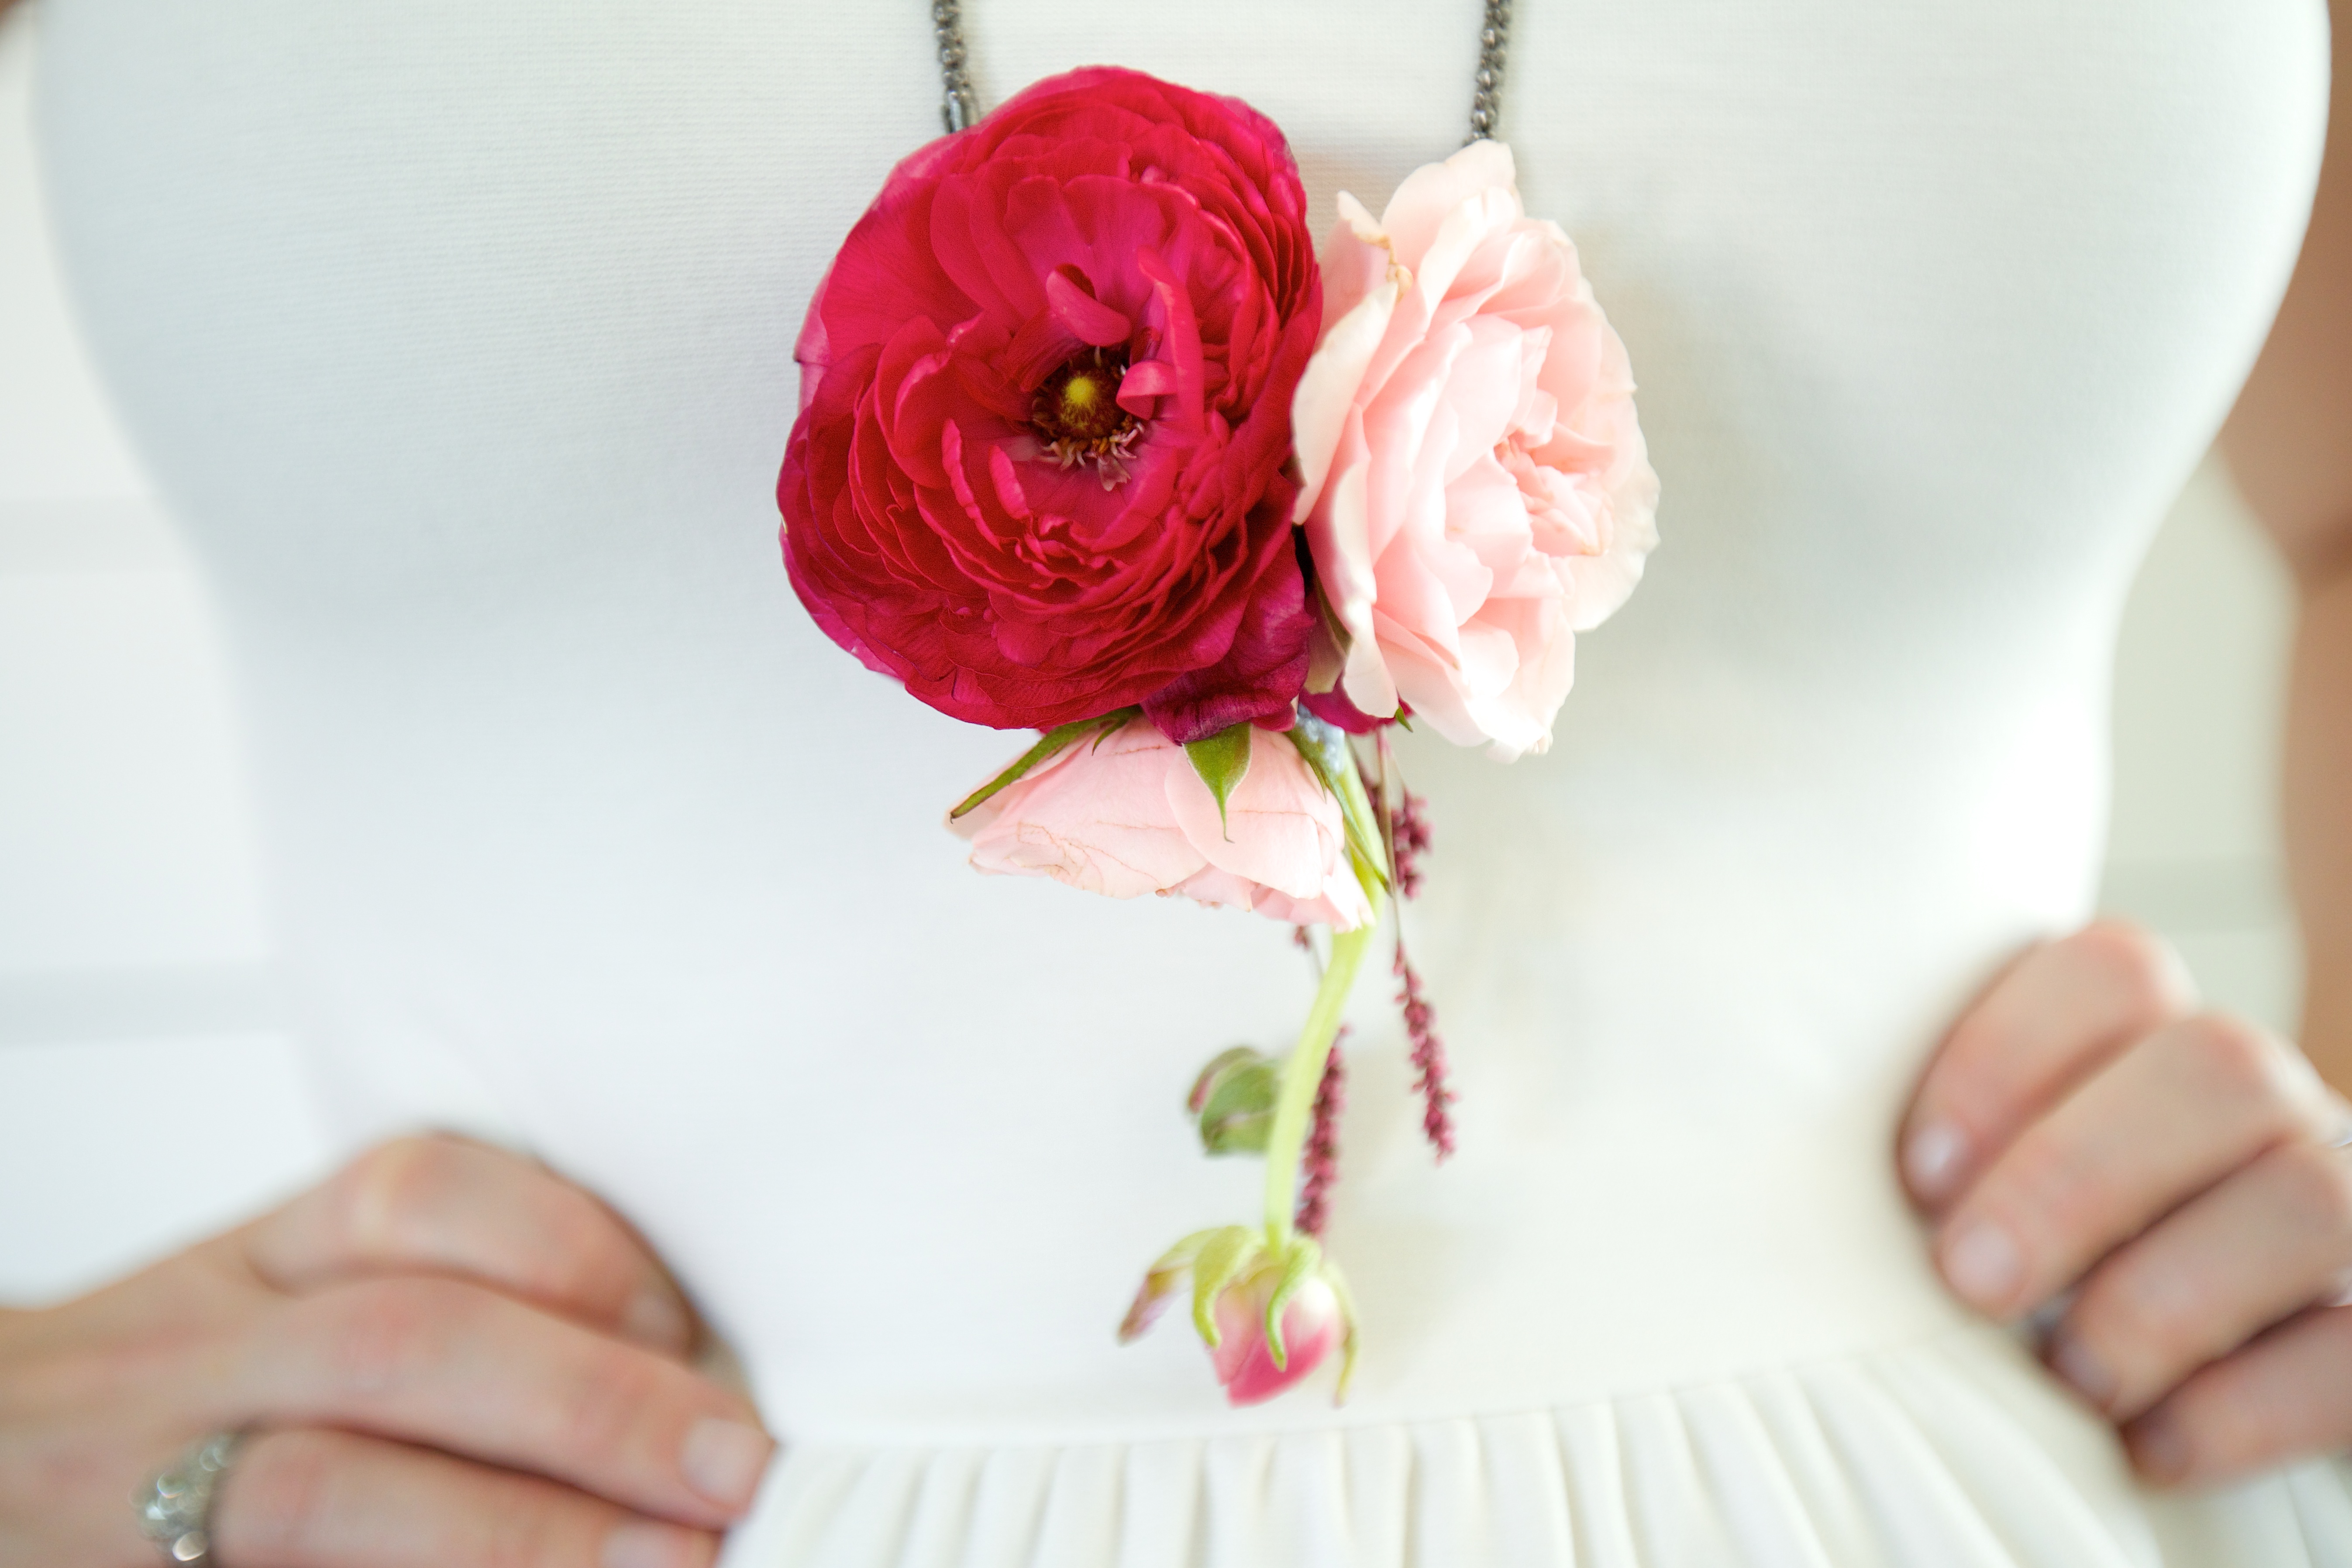
BIB-STYLE
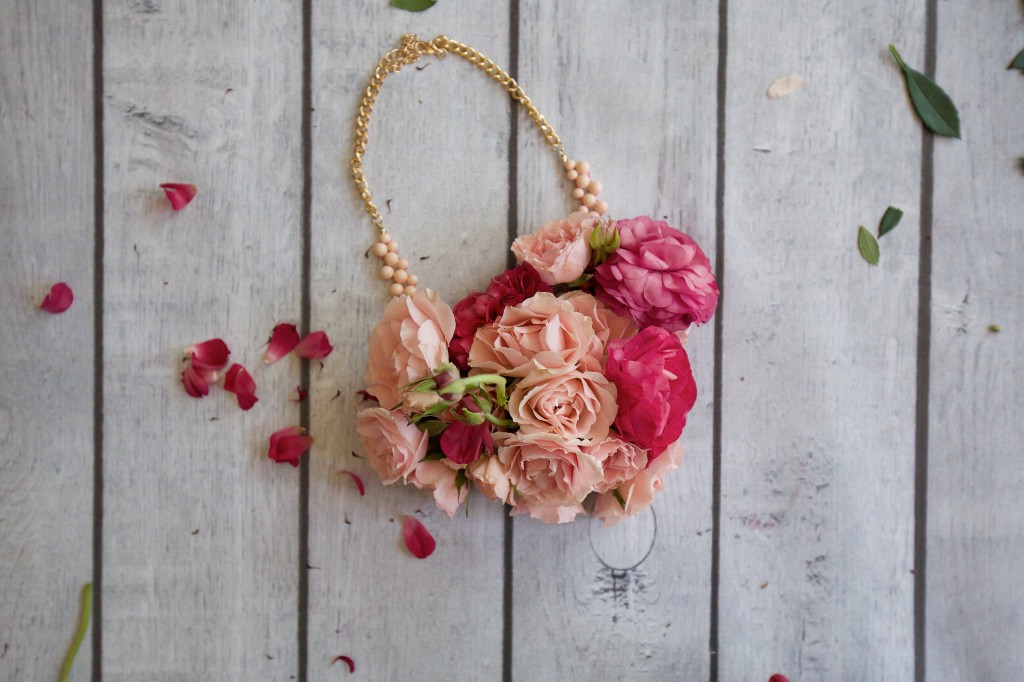
With my first necklace, I was fortunate that I could weave the flowers in between the beads. I left the stems long because I wasn’t sure how the back would turn out, and then later trimmed them. I laid down a base of full flowers to cover the bib (deciding to leave the peachy beading on the sides showing since it complimented my flowers well), then turned the piece over and taped the whole thing down. I then flipped it back over and wove in a few extra little buds. Viola!

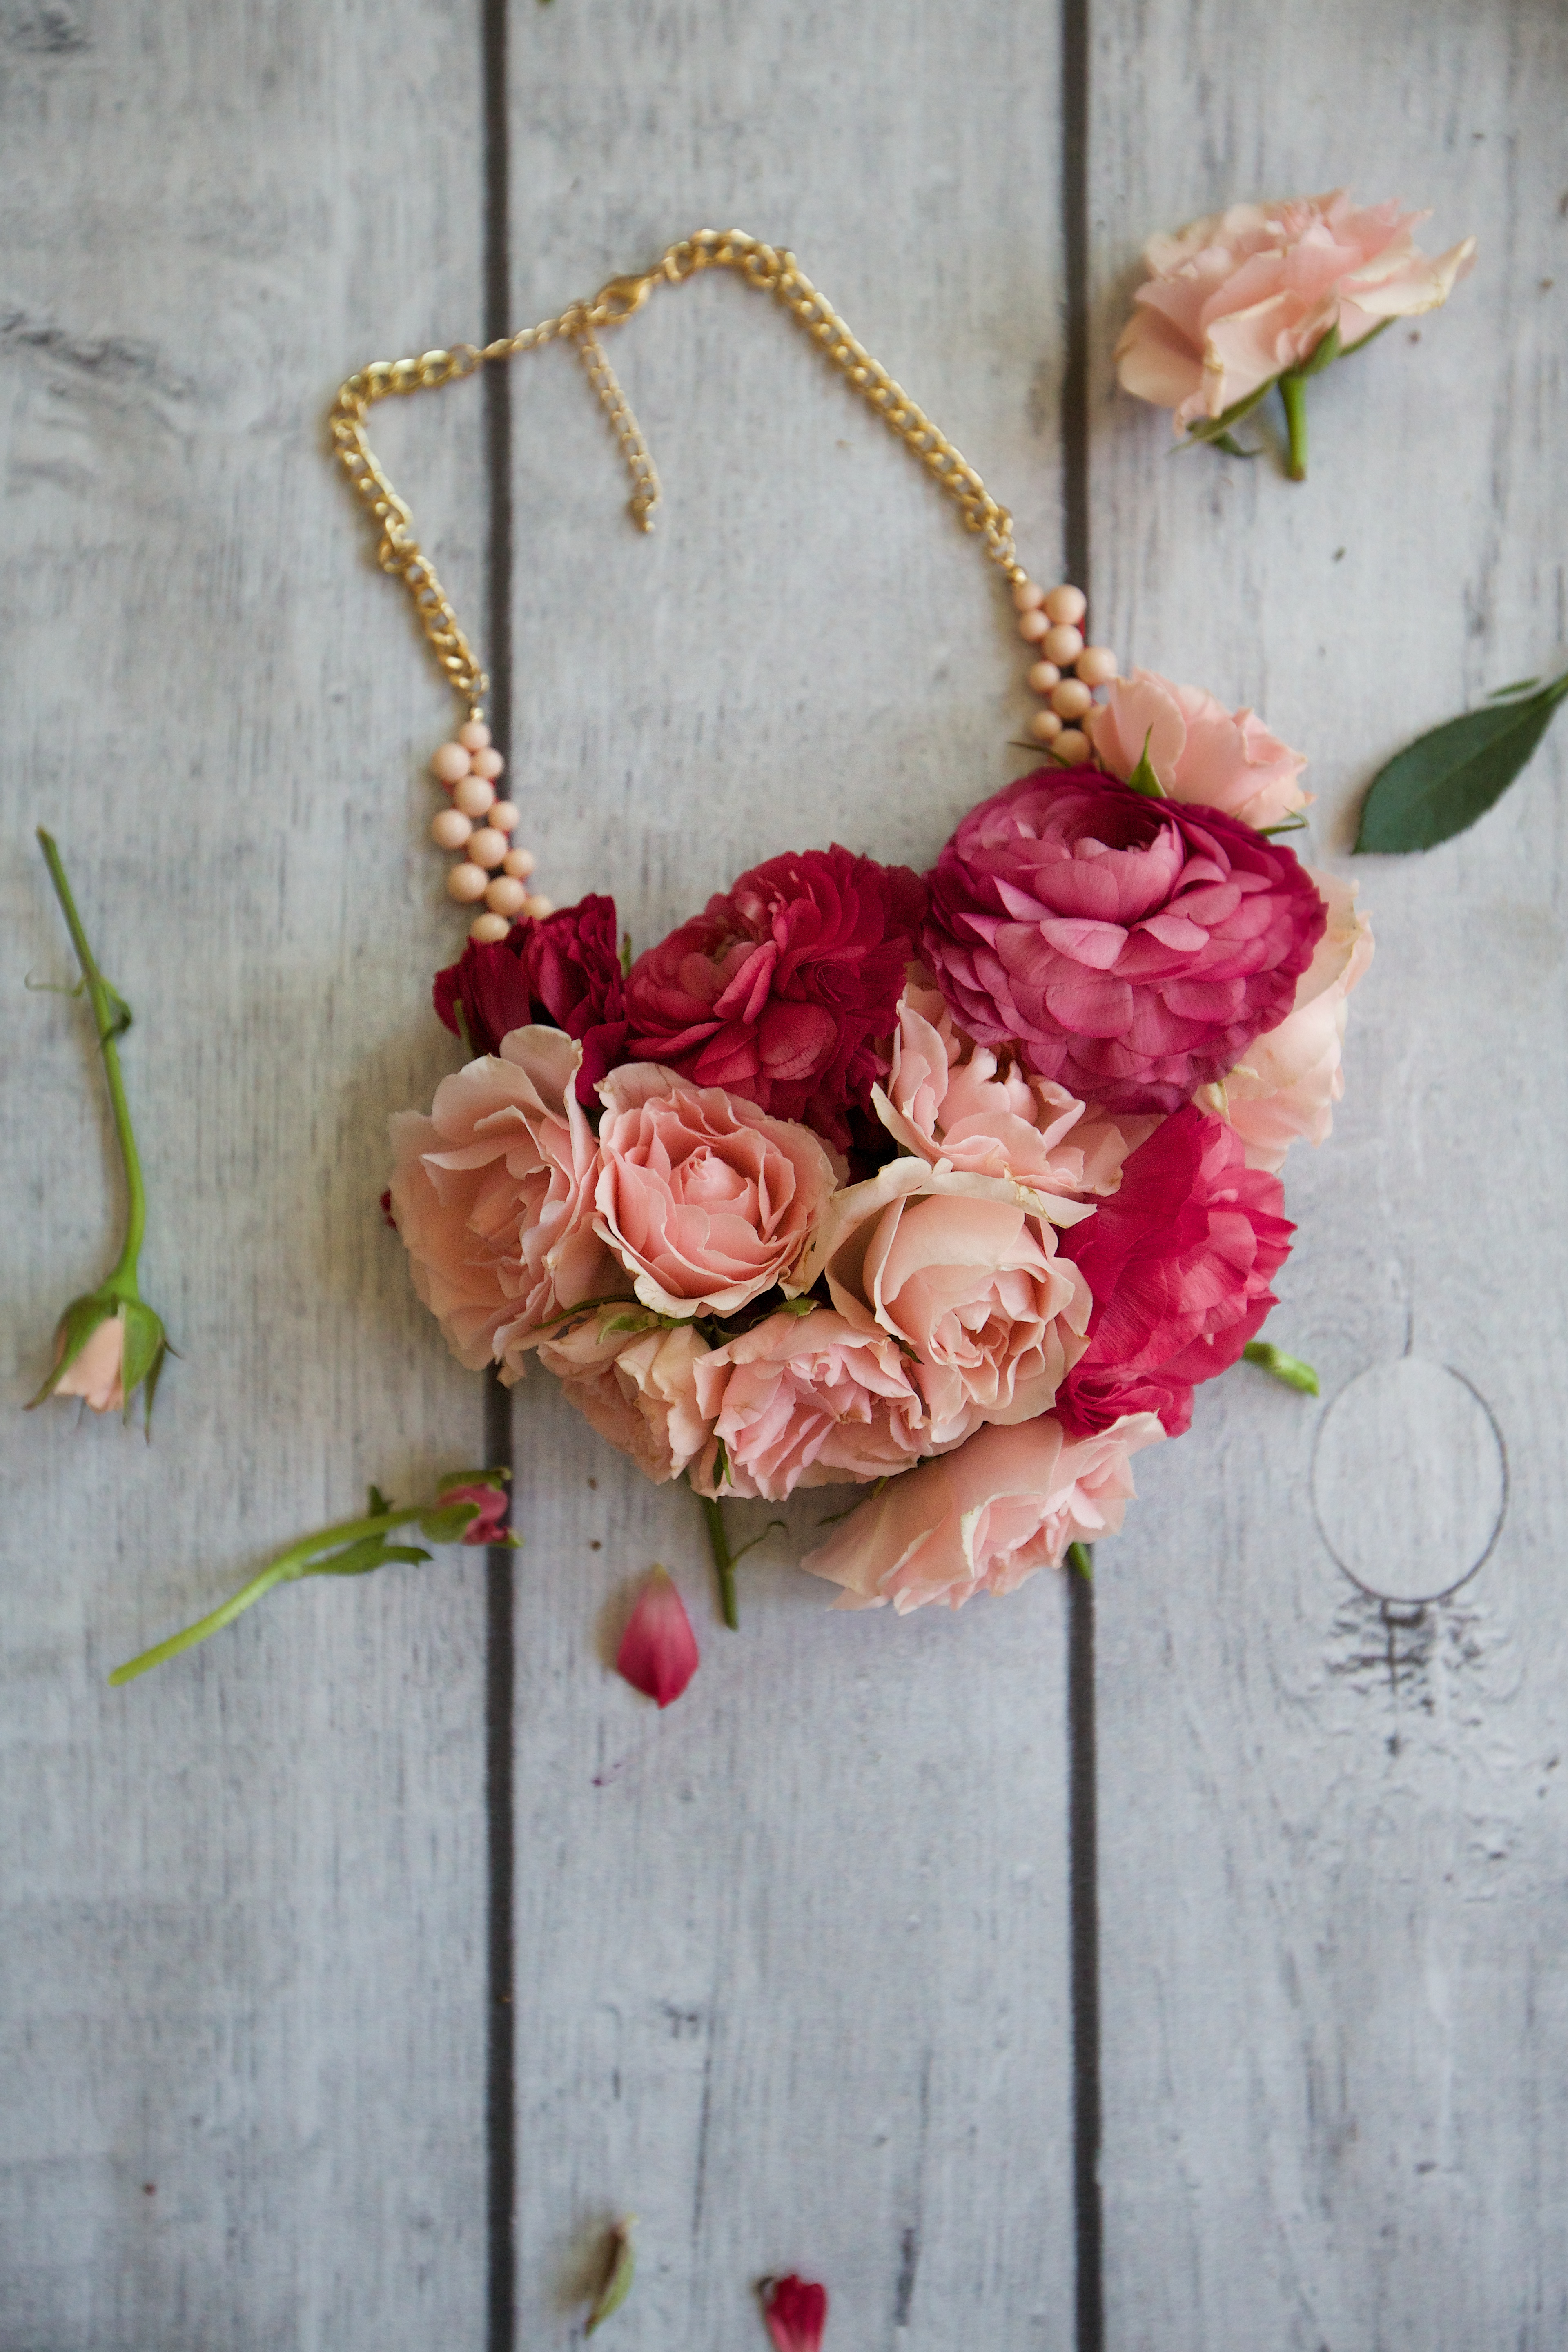


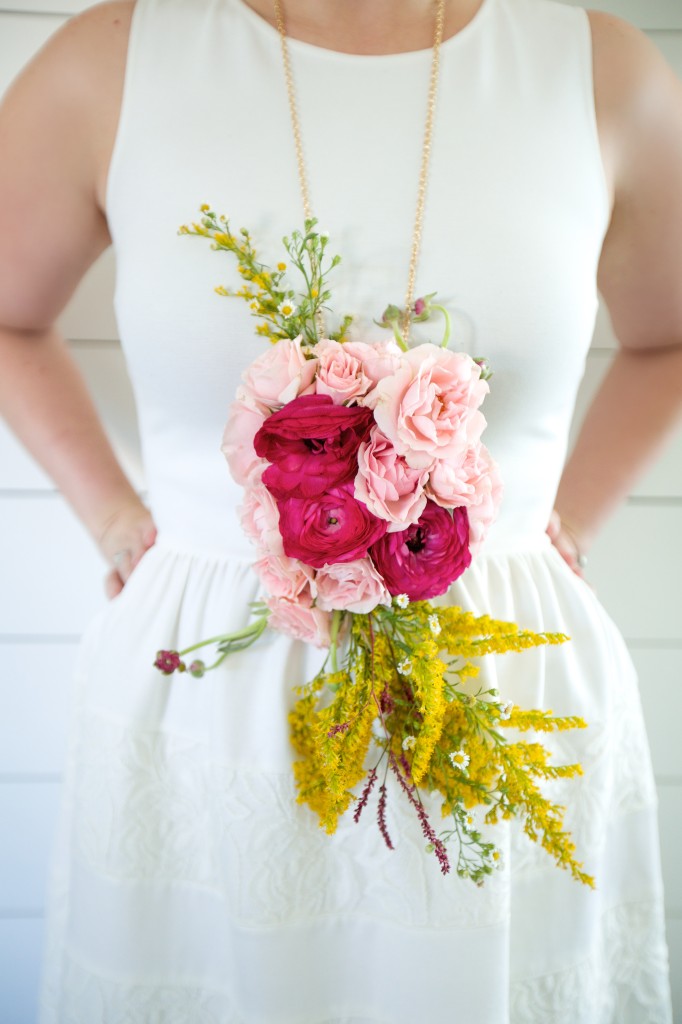
This bib necklace turned out to be bigger and more heart-shaped than I intended, but wouldn’t it be soooo cute for a Valentine’s date night?? I’d totally wear it. Ryan would probably roll his eyes, but I’d do it. Hey, he knew I was harebrained when he married me, so that’s on him! ;)
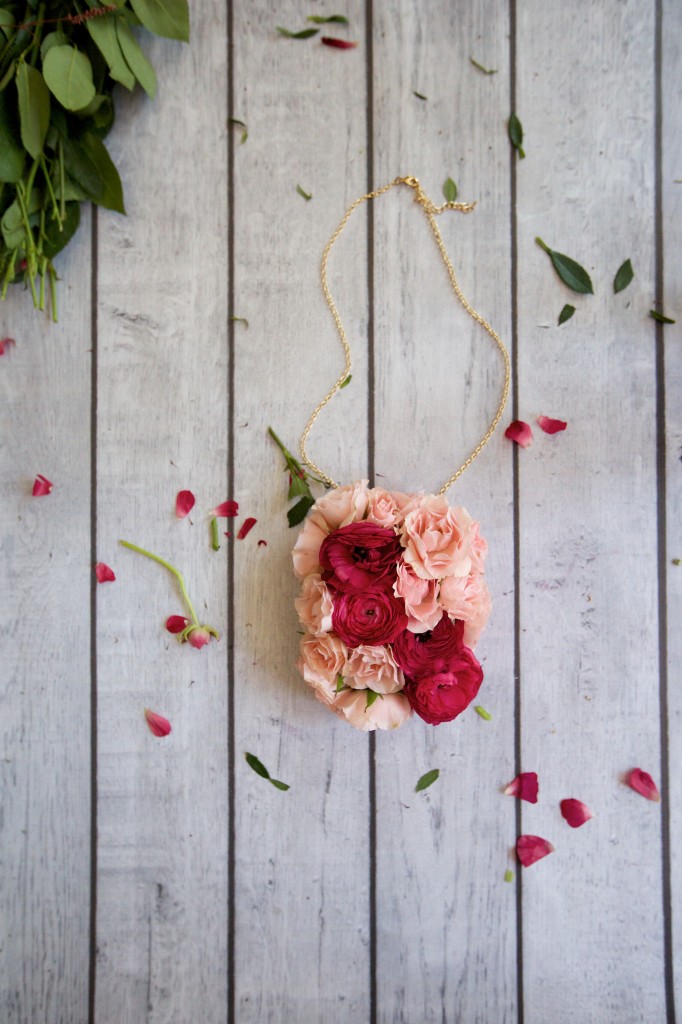
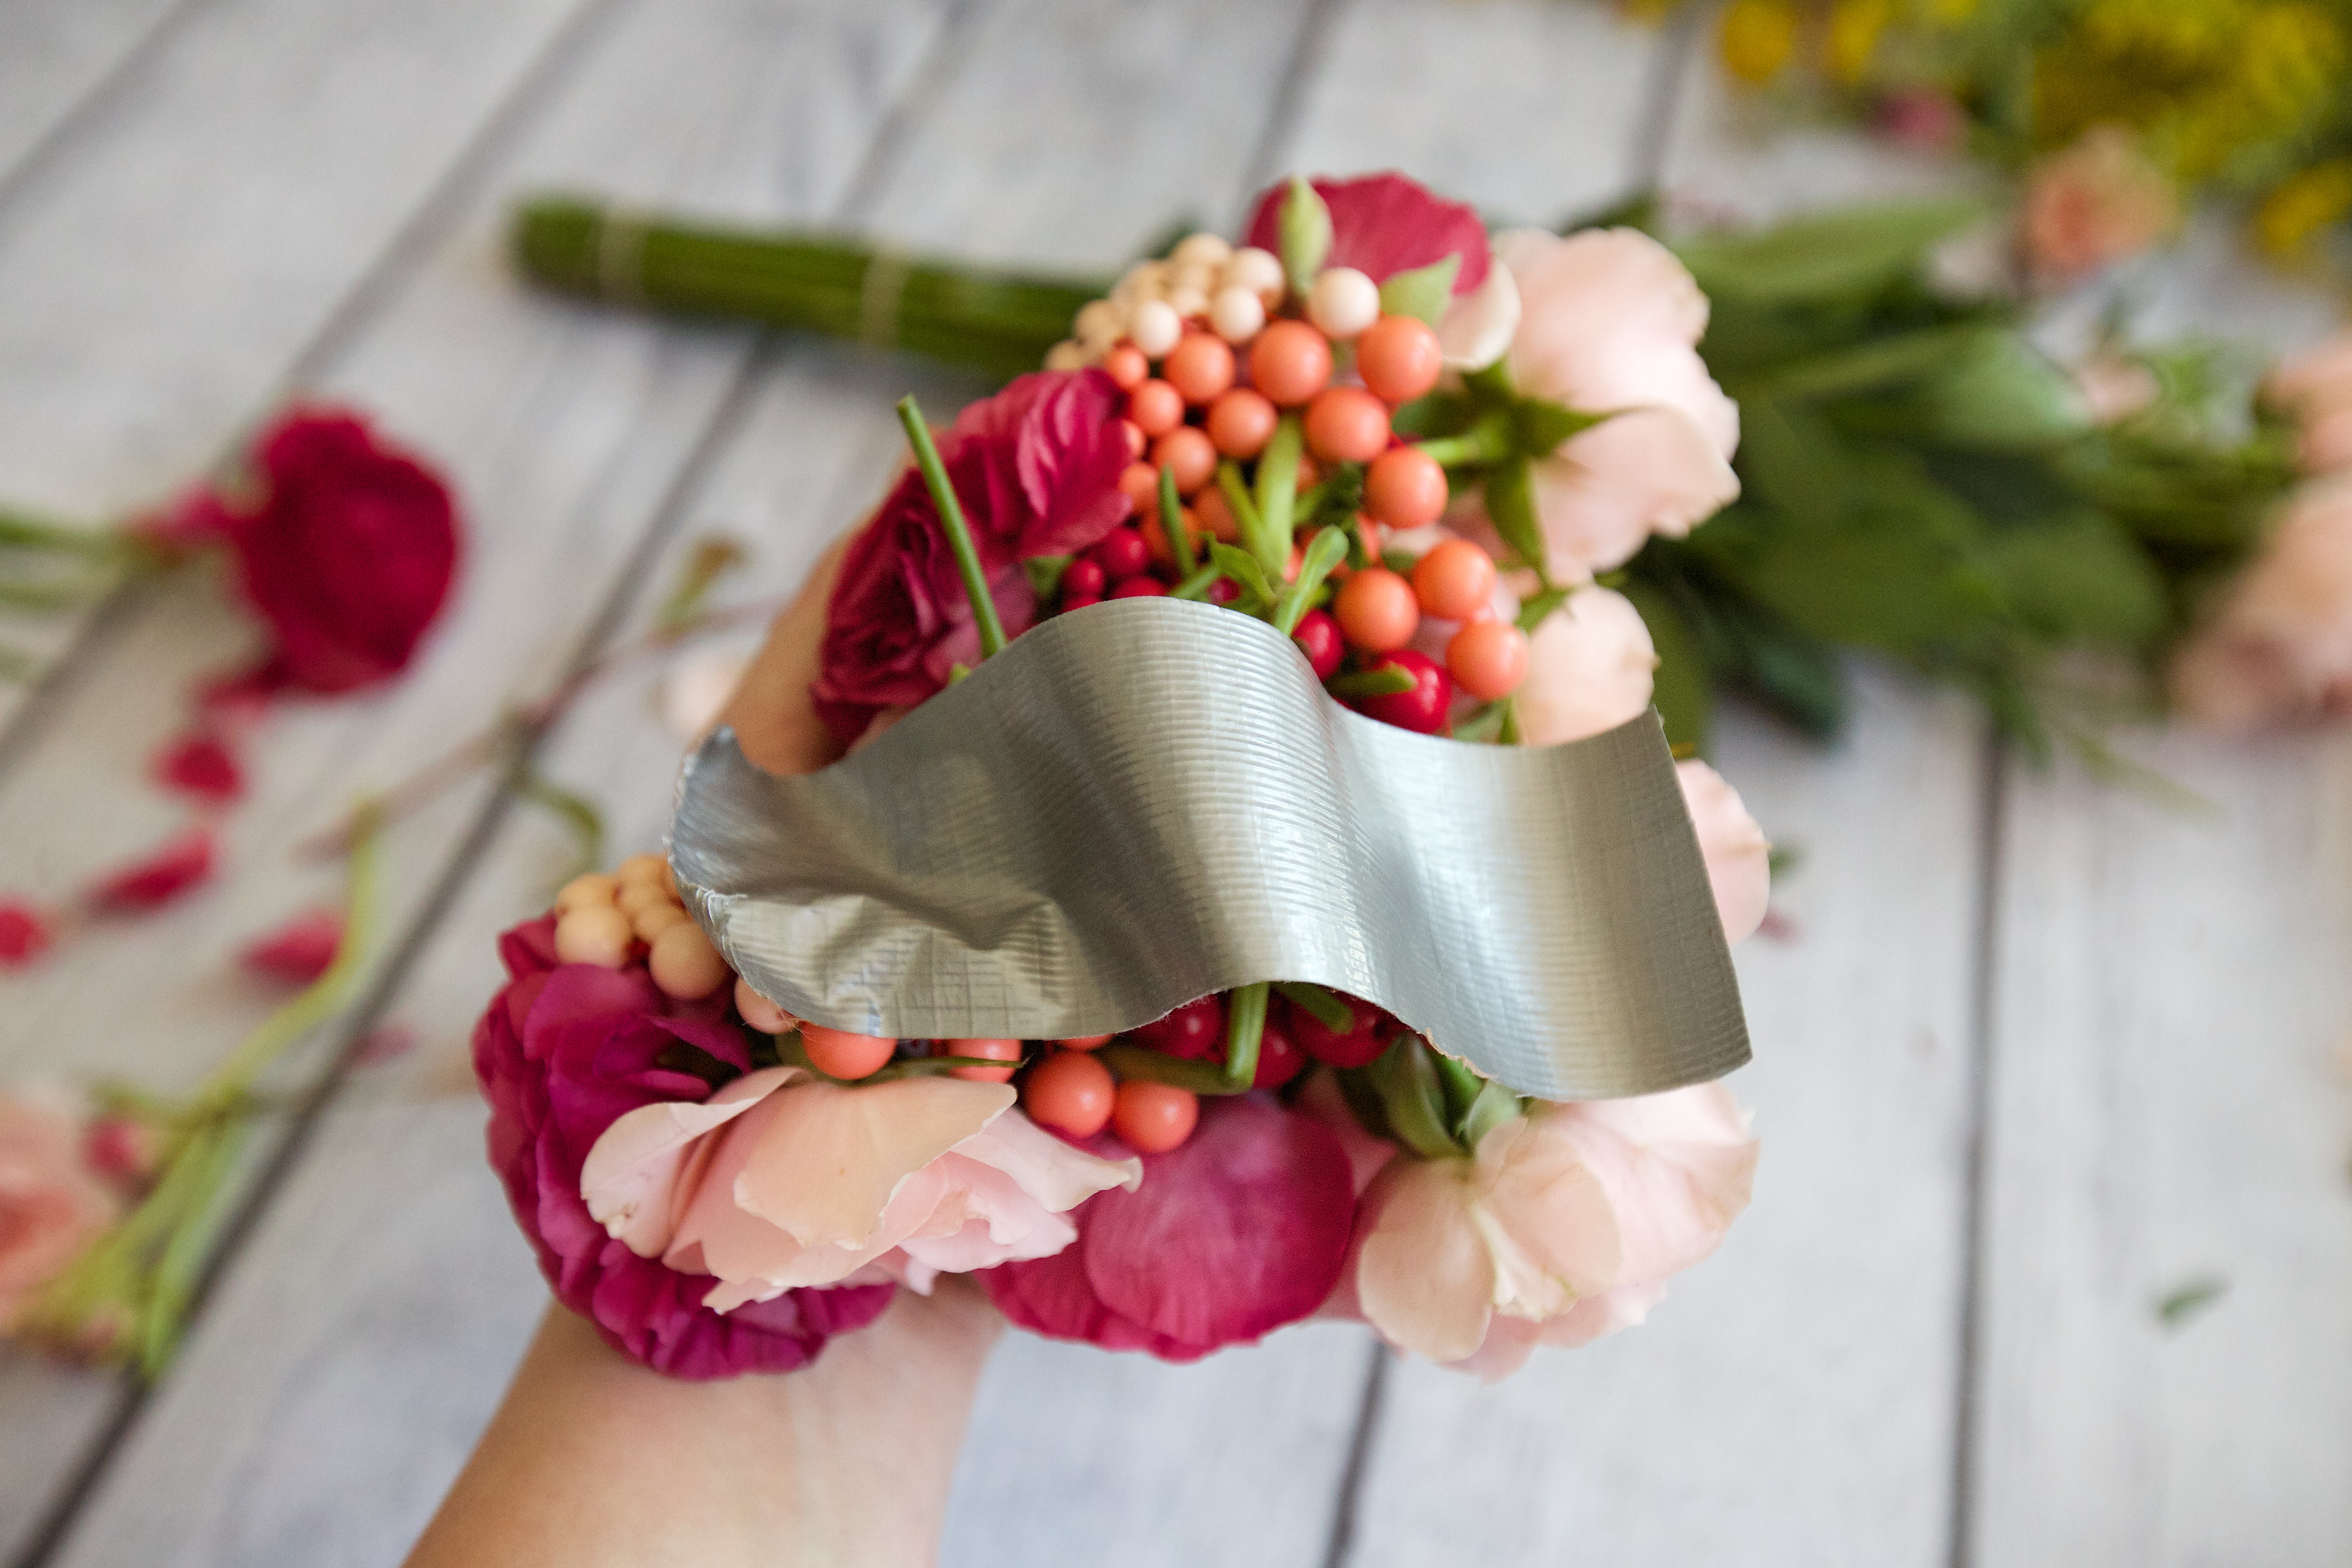
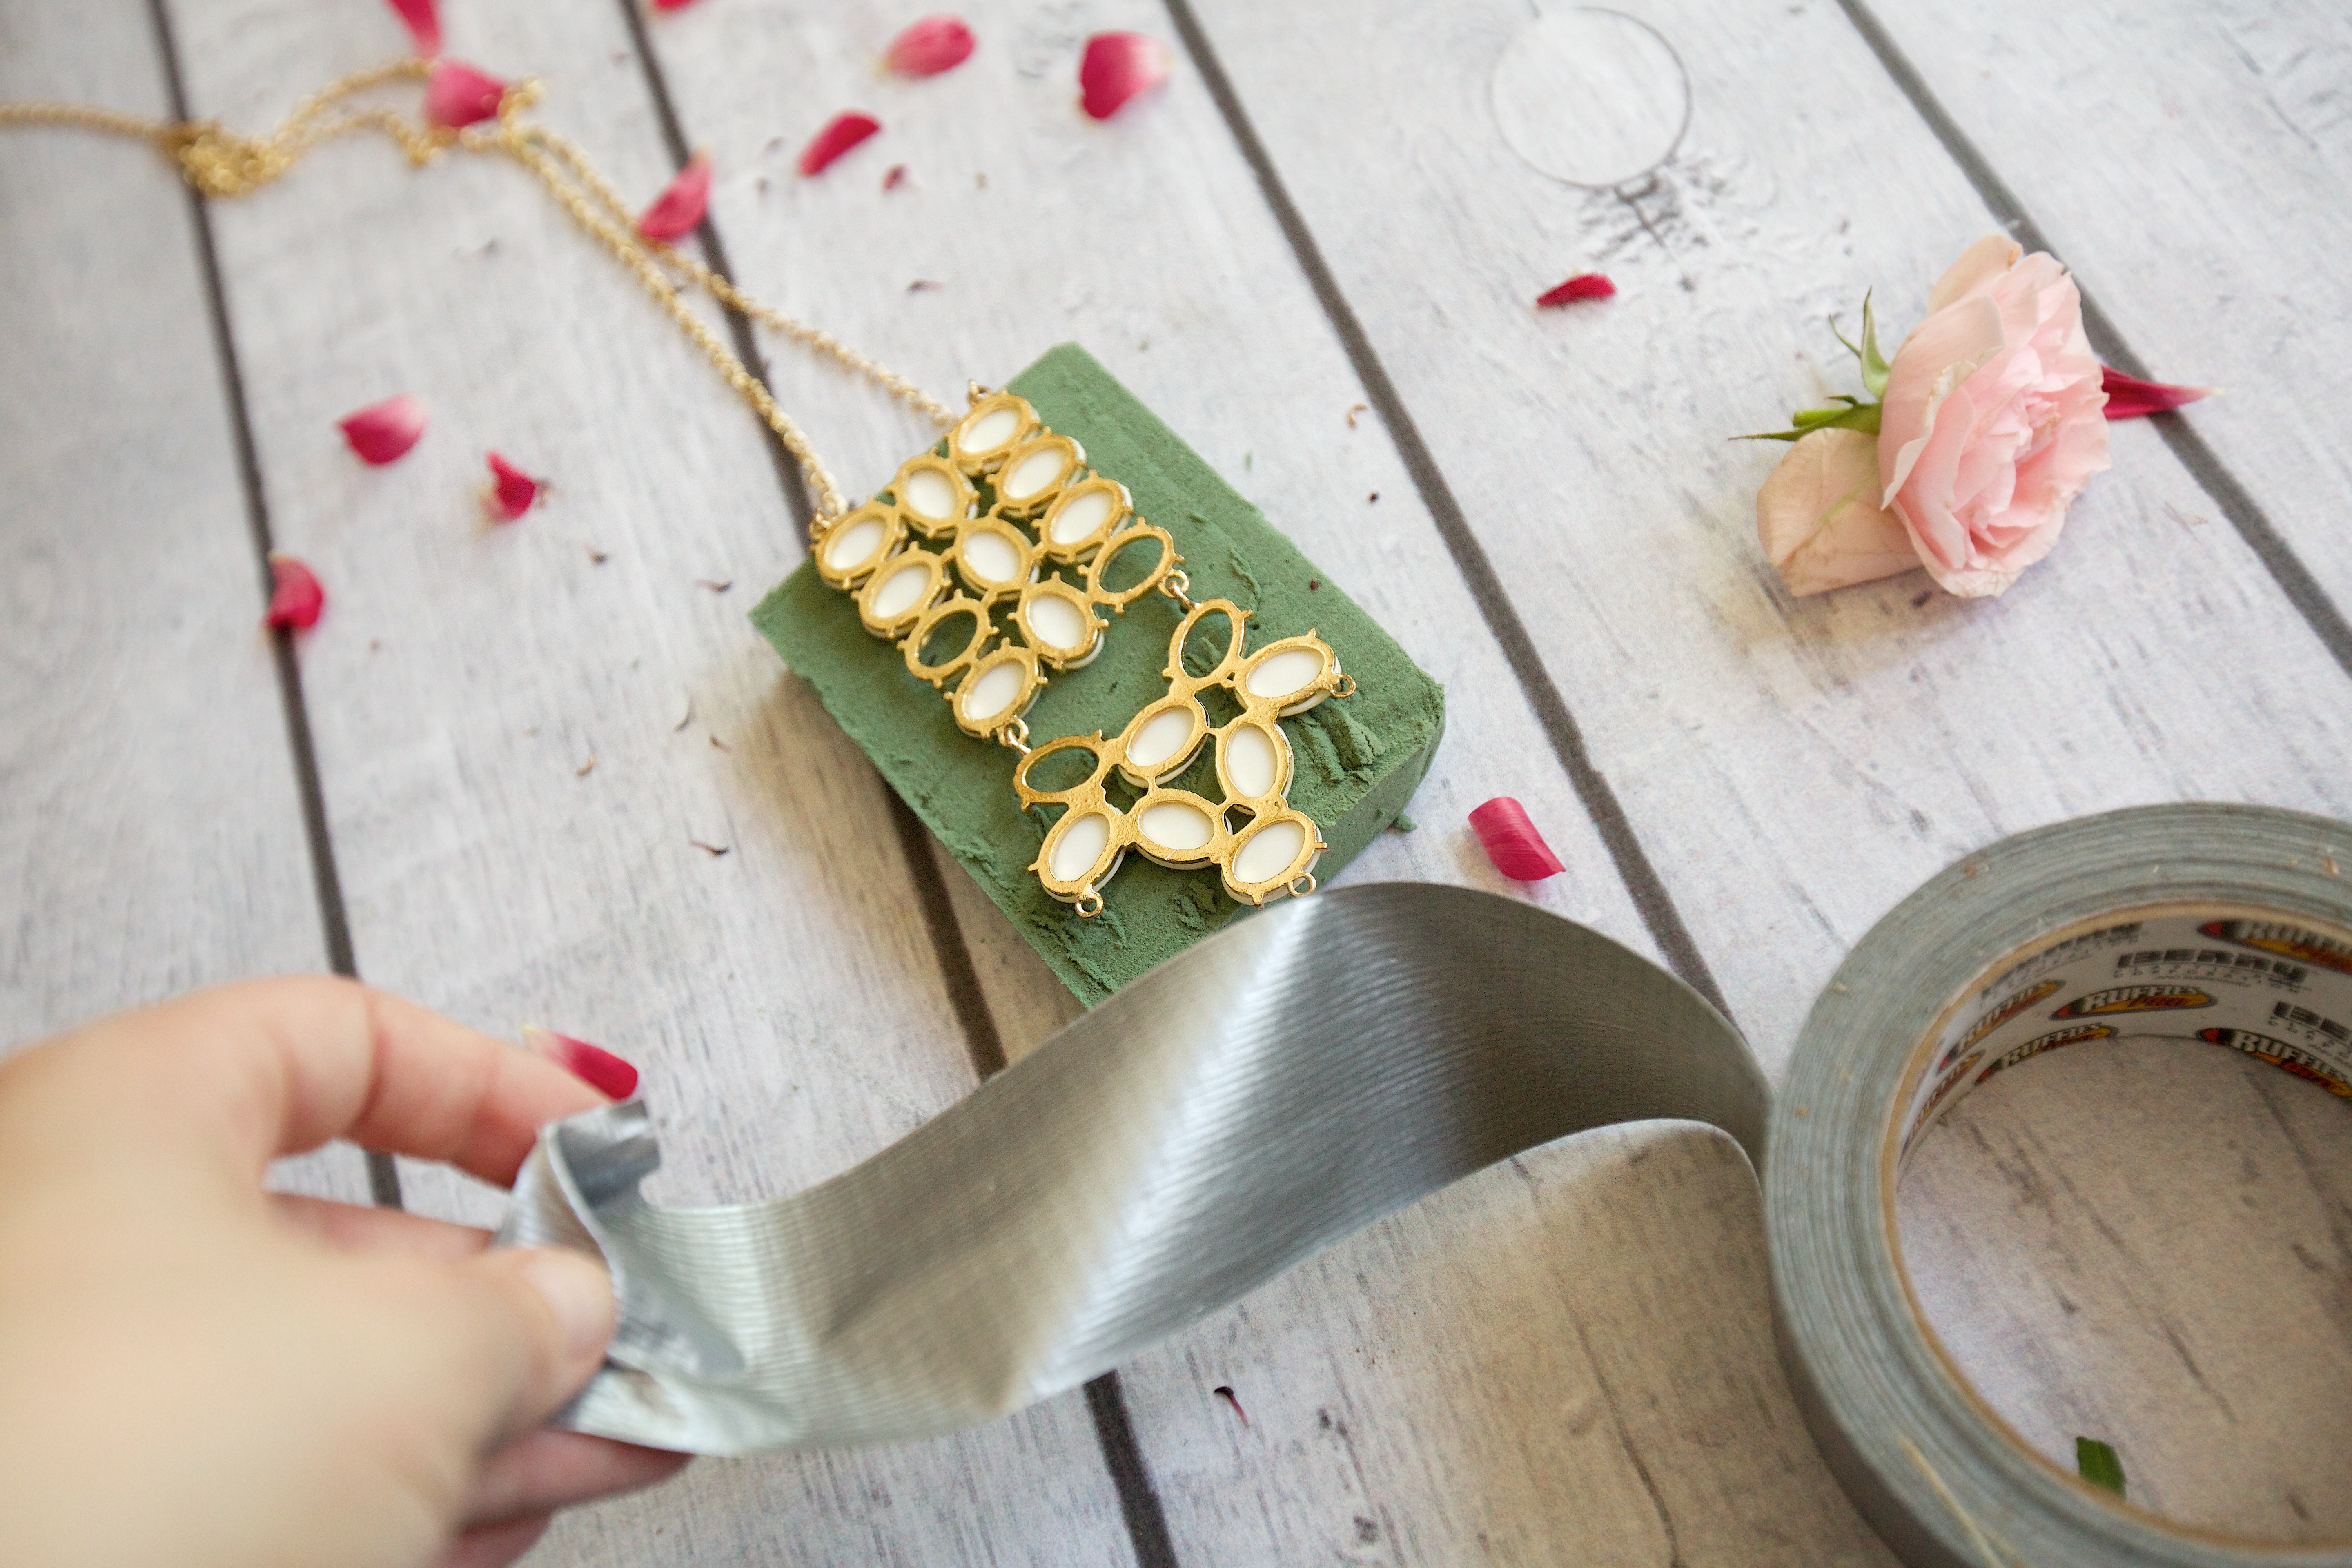
LARGE MEDALLION
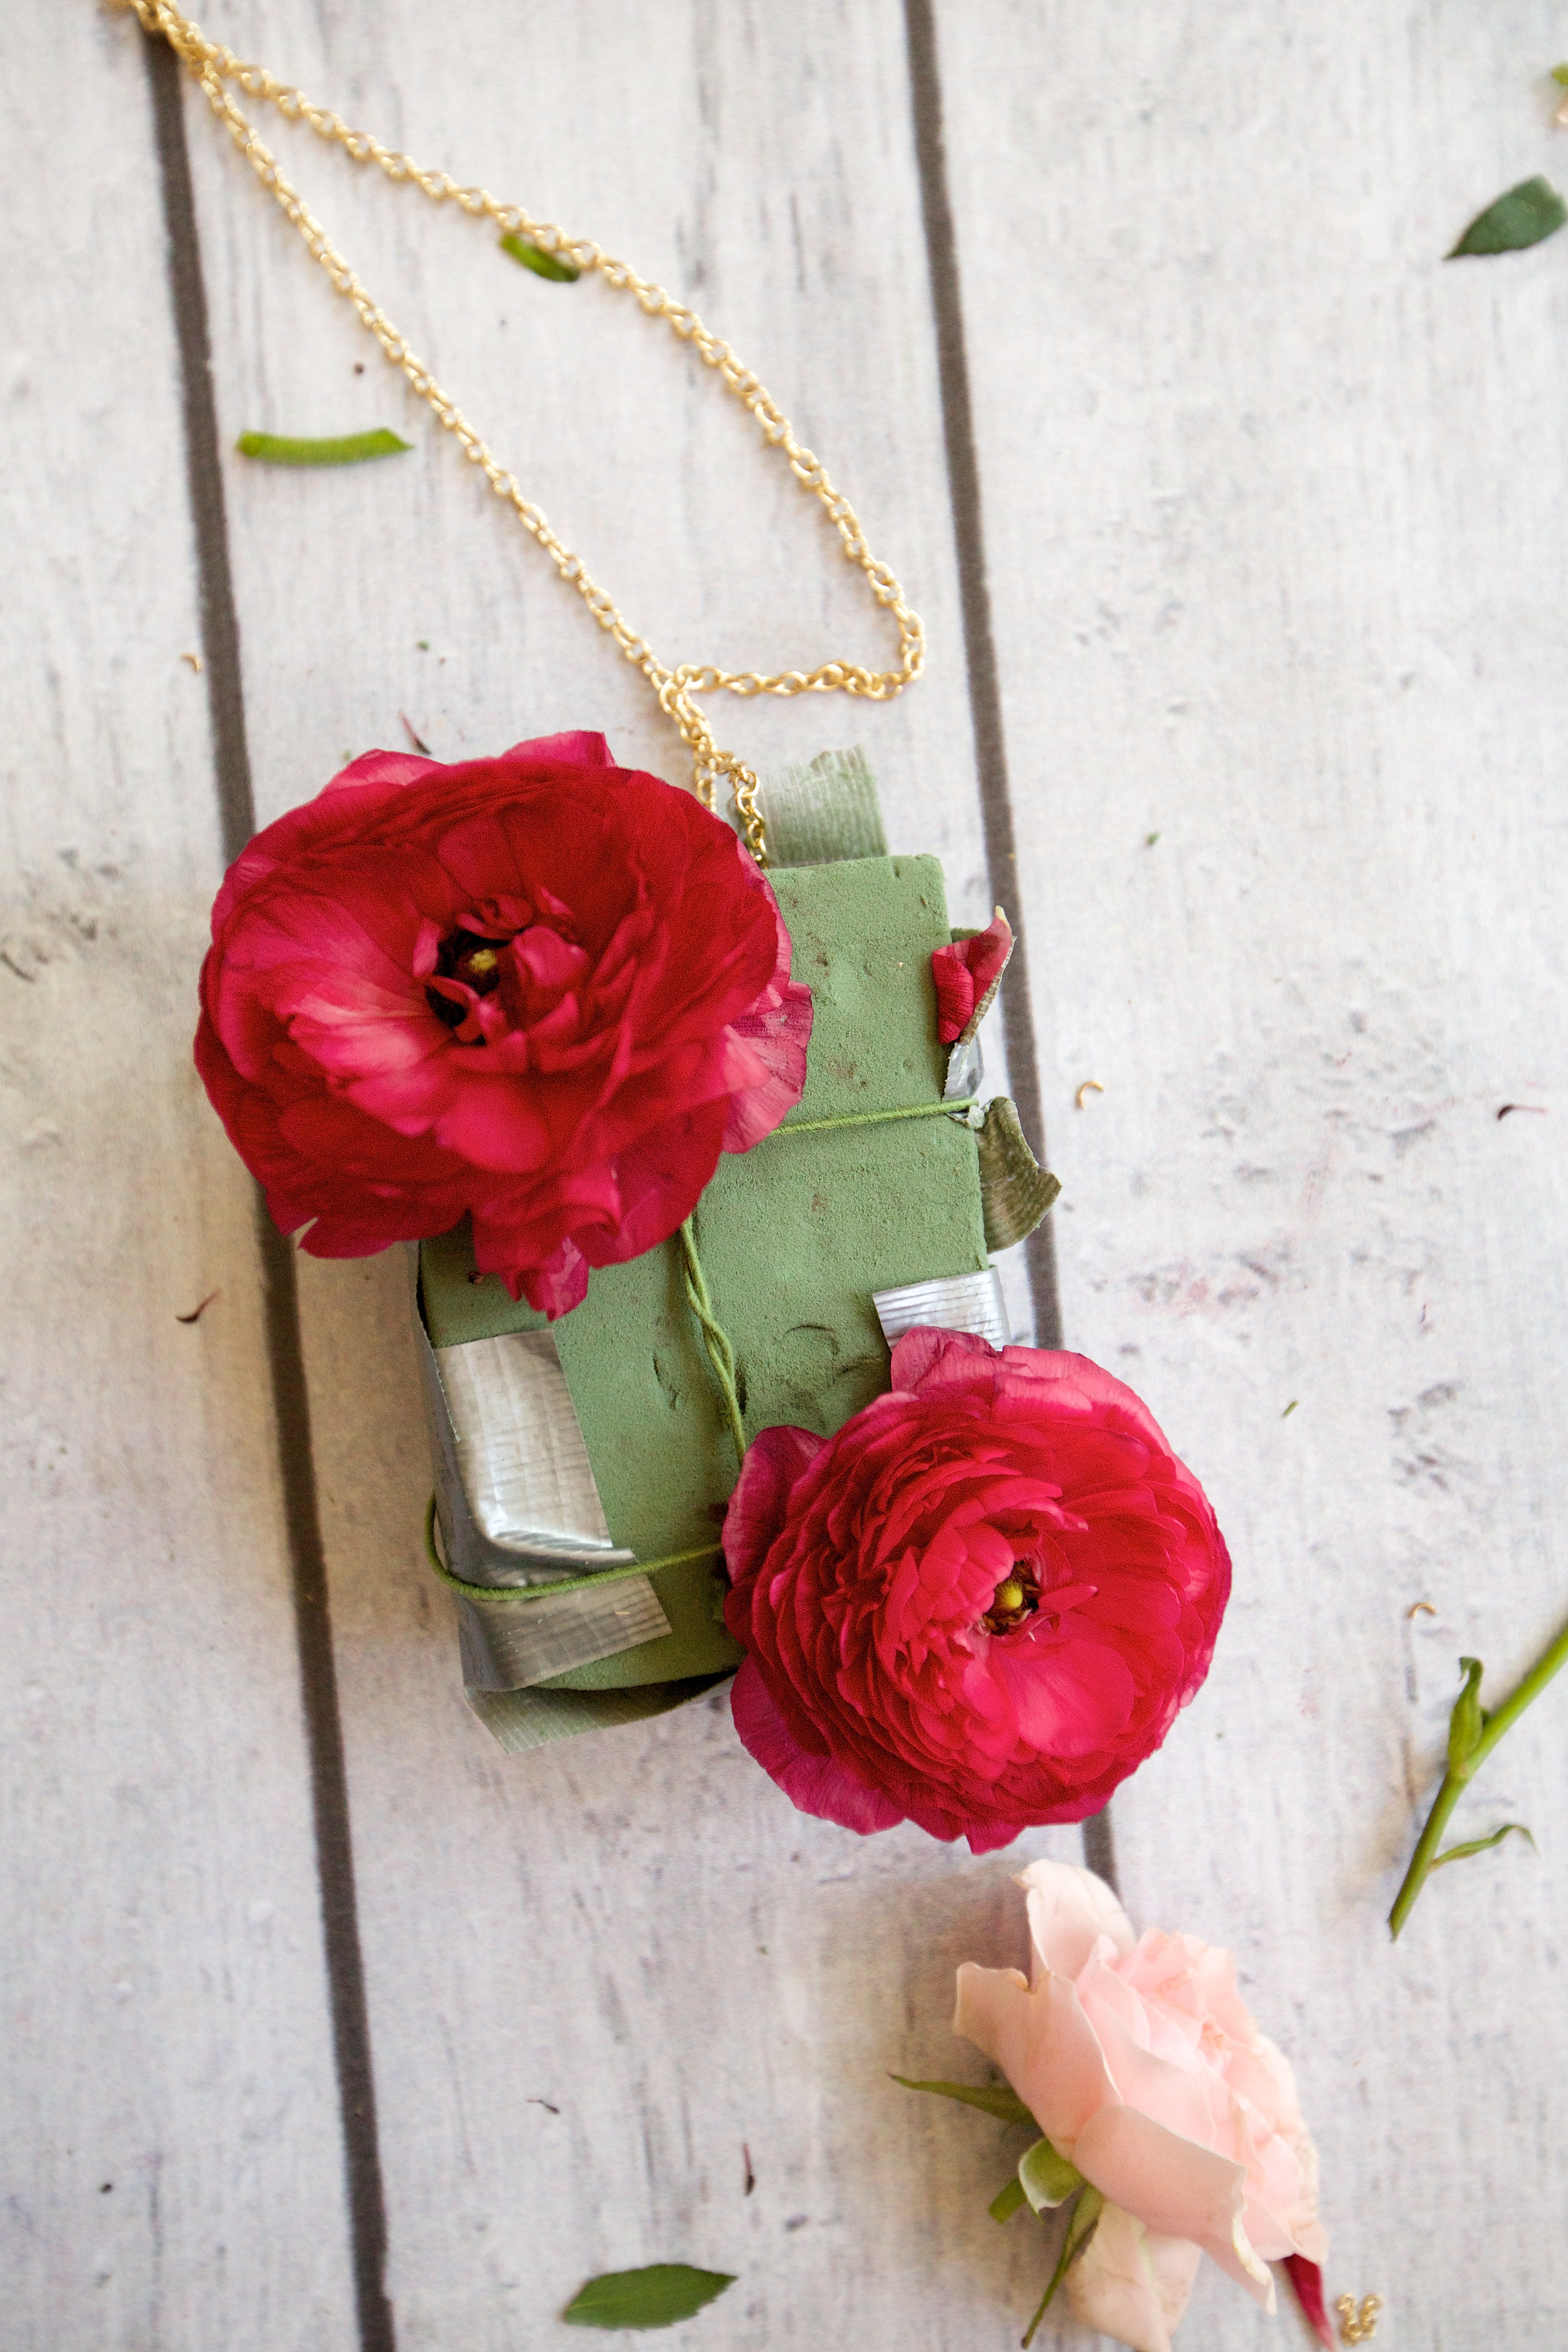
For my next piece, I chose a longer necklace that had a great shape but was missing a few beads (and was thus unwearable). I had to trim the chain mail from the bottom of the medallion, but in hindsight I think I could’ve also come up with something cool where the chain mail was visible and purposeful. (Oh, well! Next time!) I cut a sliver of floral foam, duct taped it to the necklace and then wrapped the whole thing with floral wire to ensure that it would stick (because duct tape doesn’t adhere well to floral foam). If you want your necklace to last, you should soak the floral foam.
Once again I laid down a base of full flowers to cover the foam, and then I grabbed some wild flowers I had foraged on the side of the road to accent it. I have to admit, this one turned out way more Texas-sized than what I had intended, but I’m okay with a little bit of outrageousness in my wardrobe. I mean, if you’re going to wear flowers, then by all means wear flowers, amiright??


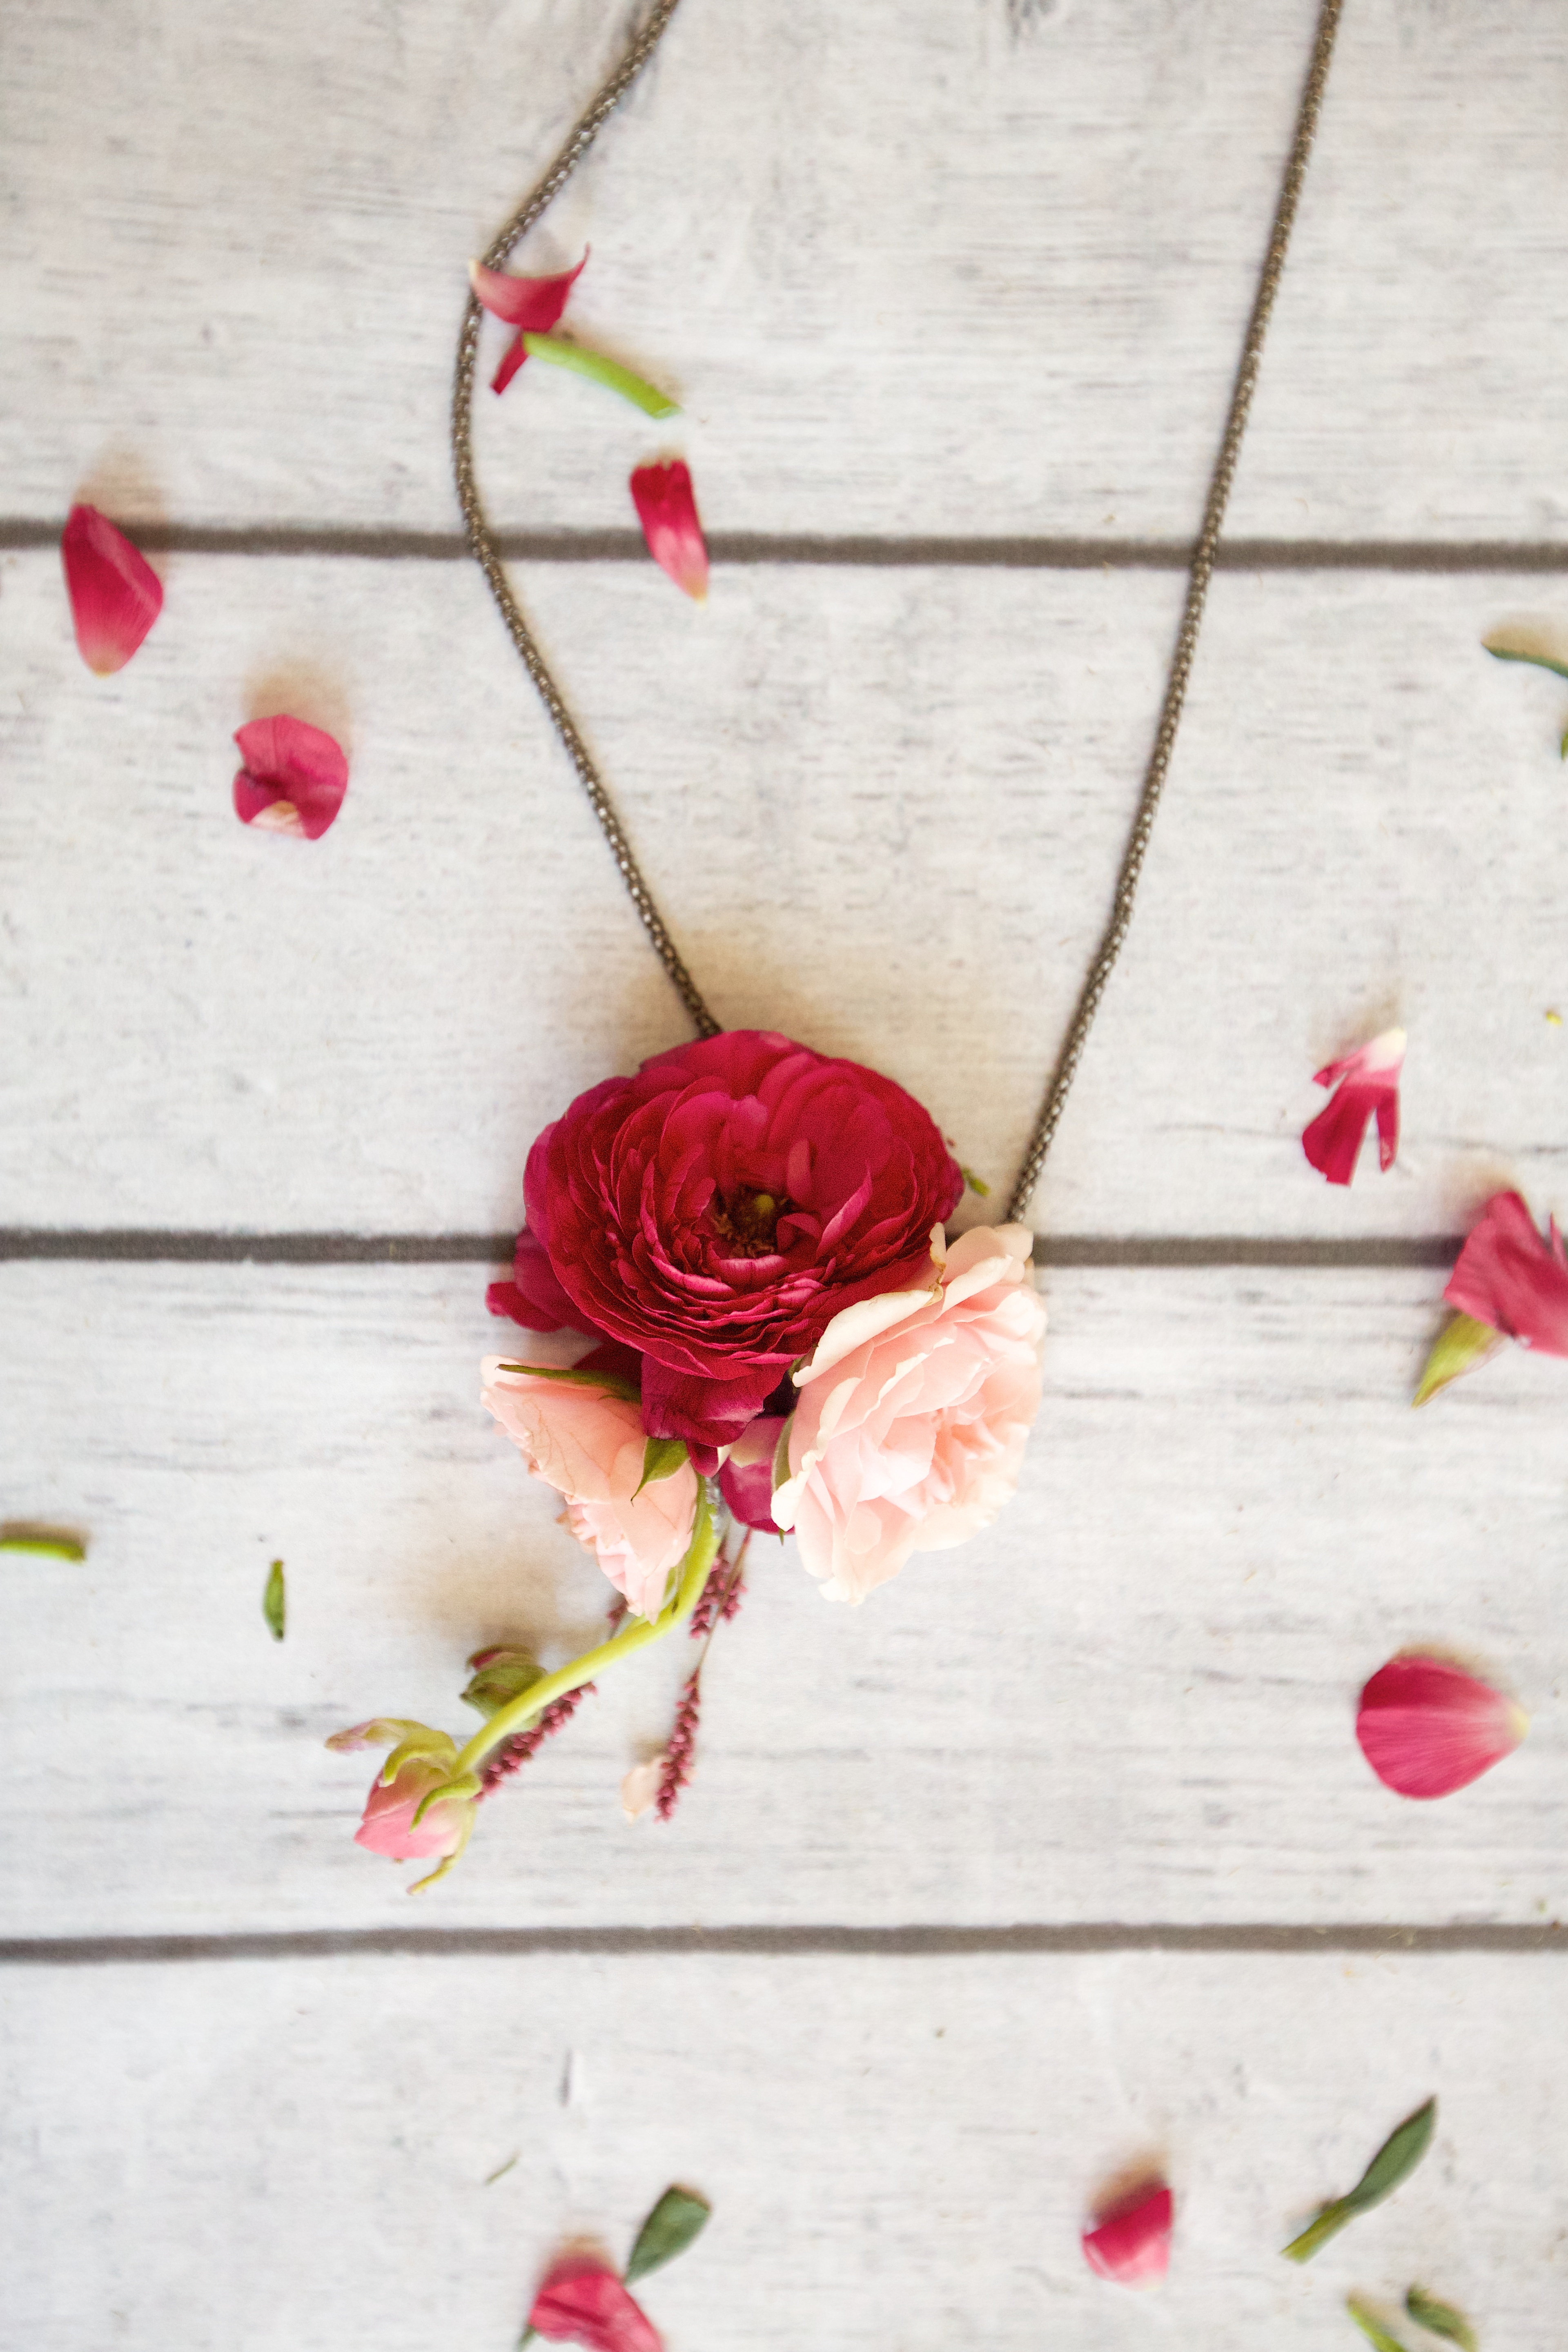
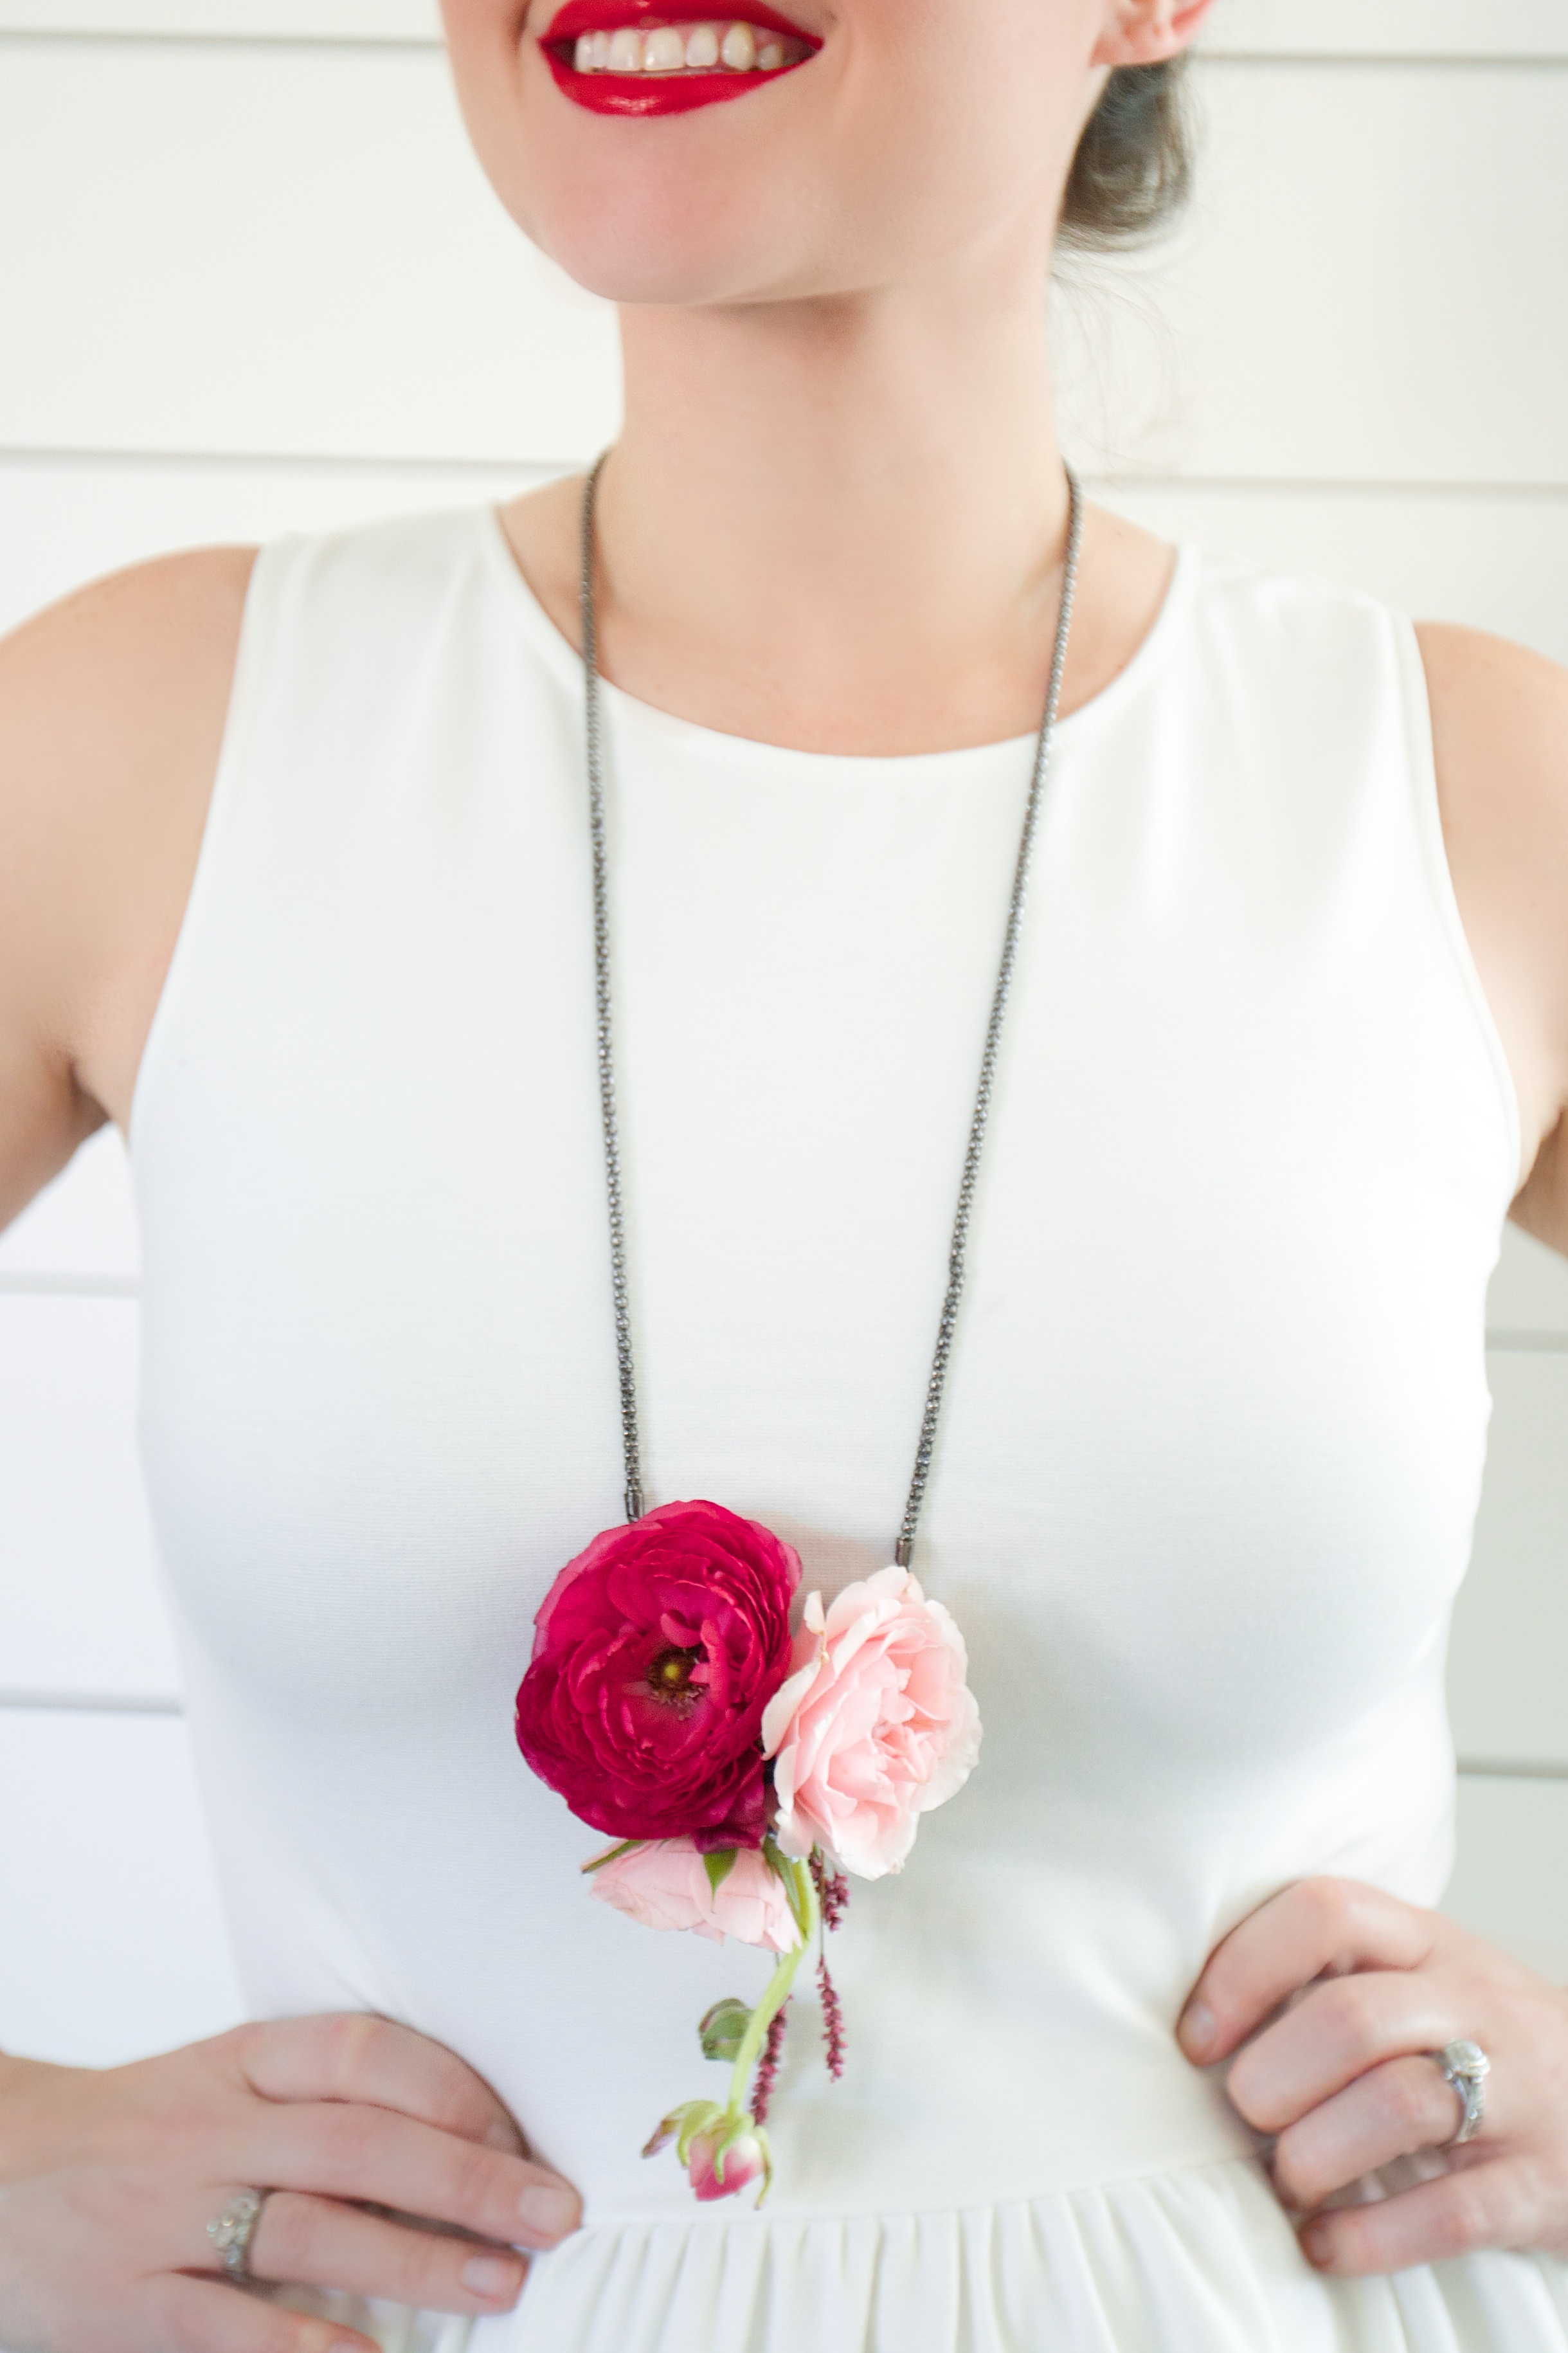
SMALL MEDALLION

For my last necklace, I wanted to kind of go in the opposite direction of the beast of a piece I had just finished. To make this tiny beauty, I literally just snipped and duct taped a couple of flowers to a hideous piece of junk jewelry that I should’ve throw out long ago. I had exactly four minutes to complete this necklace before I had to leave to pick up E.V. at school, and it turned out to be my favorite one! I guess sometimes understated is good, too. ;)
I wish I had a fancy dinner to go to tonight to test-drive one of these bad boys, but alas my Wednesday evenings just aren’t the exciting these days. I am thinking that tomorrow my small medallion is TOTALLY appropriate to wear to drop the girls off at preschool, right?!? I mean, it would be a shame not too, haha! For the two larger, less preschool-appropriate pieces, I ended up repurposing them — which I’ll share about in my next blog post, along with what I did with the rest of the flowers. ;)